
River Crossing/Camp Shoes, Lacing Techniques, Gaiters, Insoles, Socks and Preventing Blisters
So you have your boots, but you’re not quite finished. There are still a few equally essential items to choose, depending on your hike. No matter how good your footwear, you’ll get the best results if you have the most appropriate insoles, socks and gaiters, and the most practical and lightweight footwear for in camp and/or river crossings. Finally, once you understand how all these things affect the creation of blisters, you’ll know how to prevent them!
River Crossing Shoes
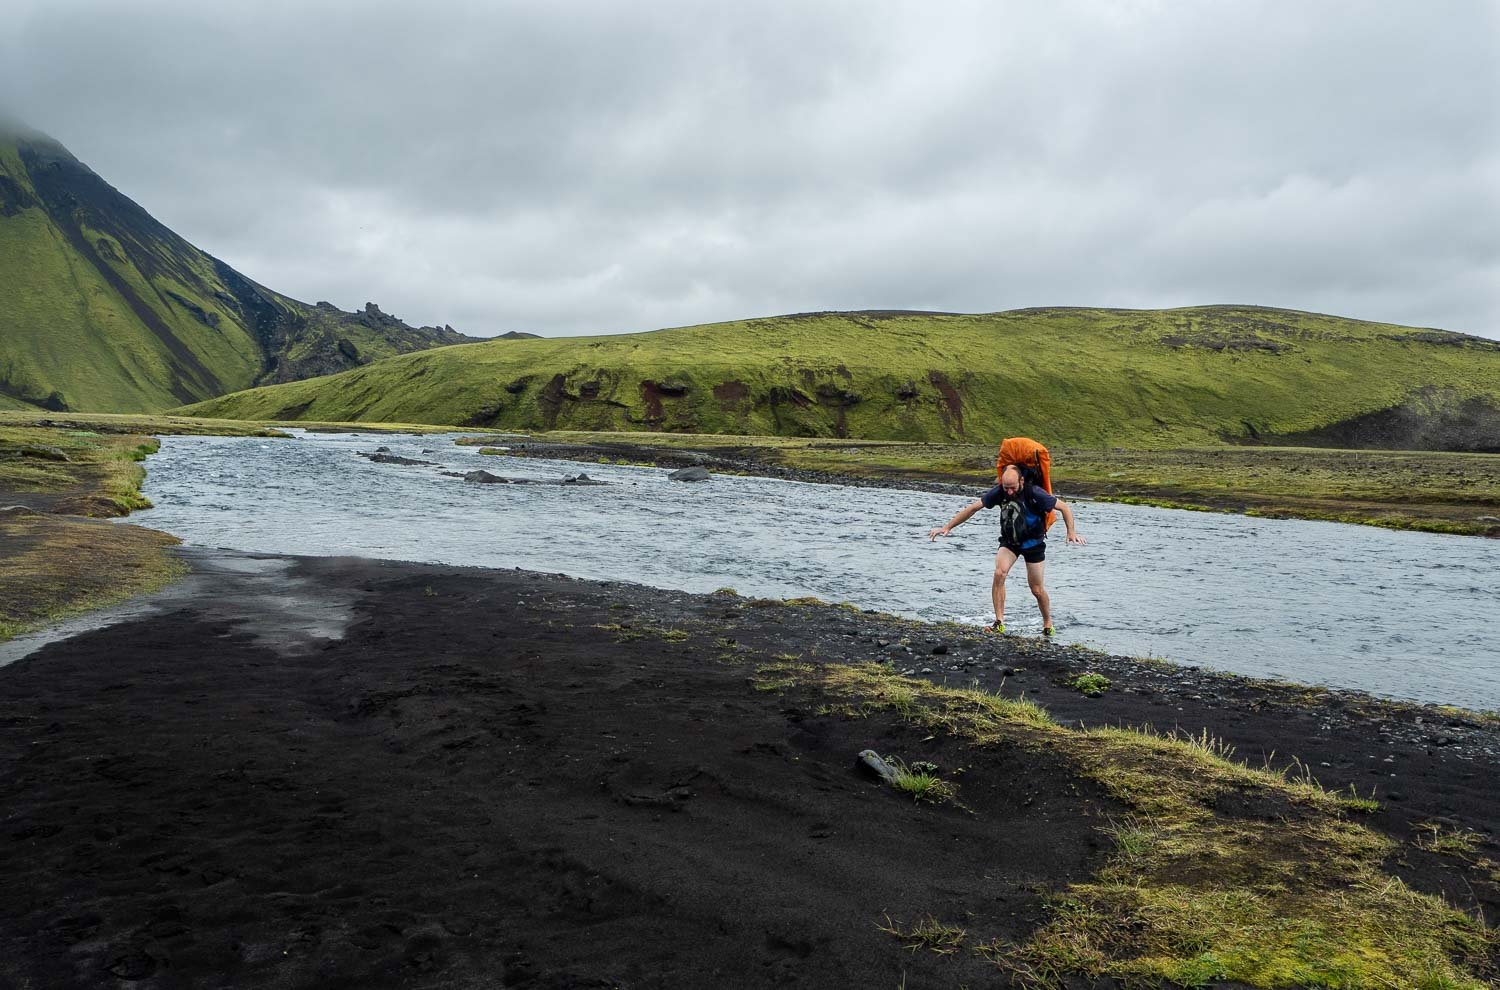
This hiker has swapped his boots for river crossing shoes,
Laugavegur Trail, Iceland
Ideally, river crossing shoes should double as camp shoes. River crossing sandals are commonplace in some countries where there are wide, shallow rivers with pebbly beds. However, if you’re ever in doubt about footing, your lace-up hiking boots or shoes are always the safest option. Many New Zealanders simply wear them through each crossing.
River crossing and camp shoes should be
1. Very light. You’ll be carrying them most of the time. Be very careful when comparing weights because manufacturers randomly quote the weight of one shoe or a pair. With my size 42-43 feet, my camp shoes are always a lot heavier than that quoted for size 39! However, women’s models are often less chunky and therefore lighter than men’s models – Geoff’s 227g Dawgs are the women’s model in black.

Geoff’s camp/river crossing shoes are a women’s model in black. They are lighter than the chunkier men’s model.
Men with wide feet won’t be able to do this, though.
Rubber thongs (flip-flops) are amazingly heavy. Many traditional hiking sandals such as Keens are also relatively heavy:
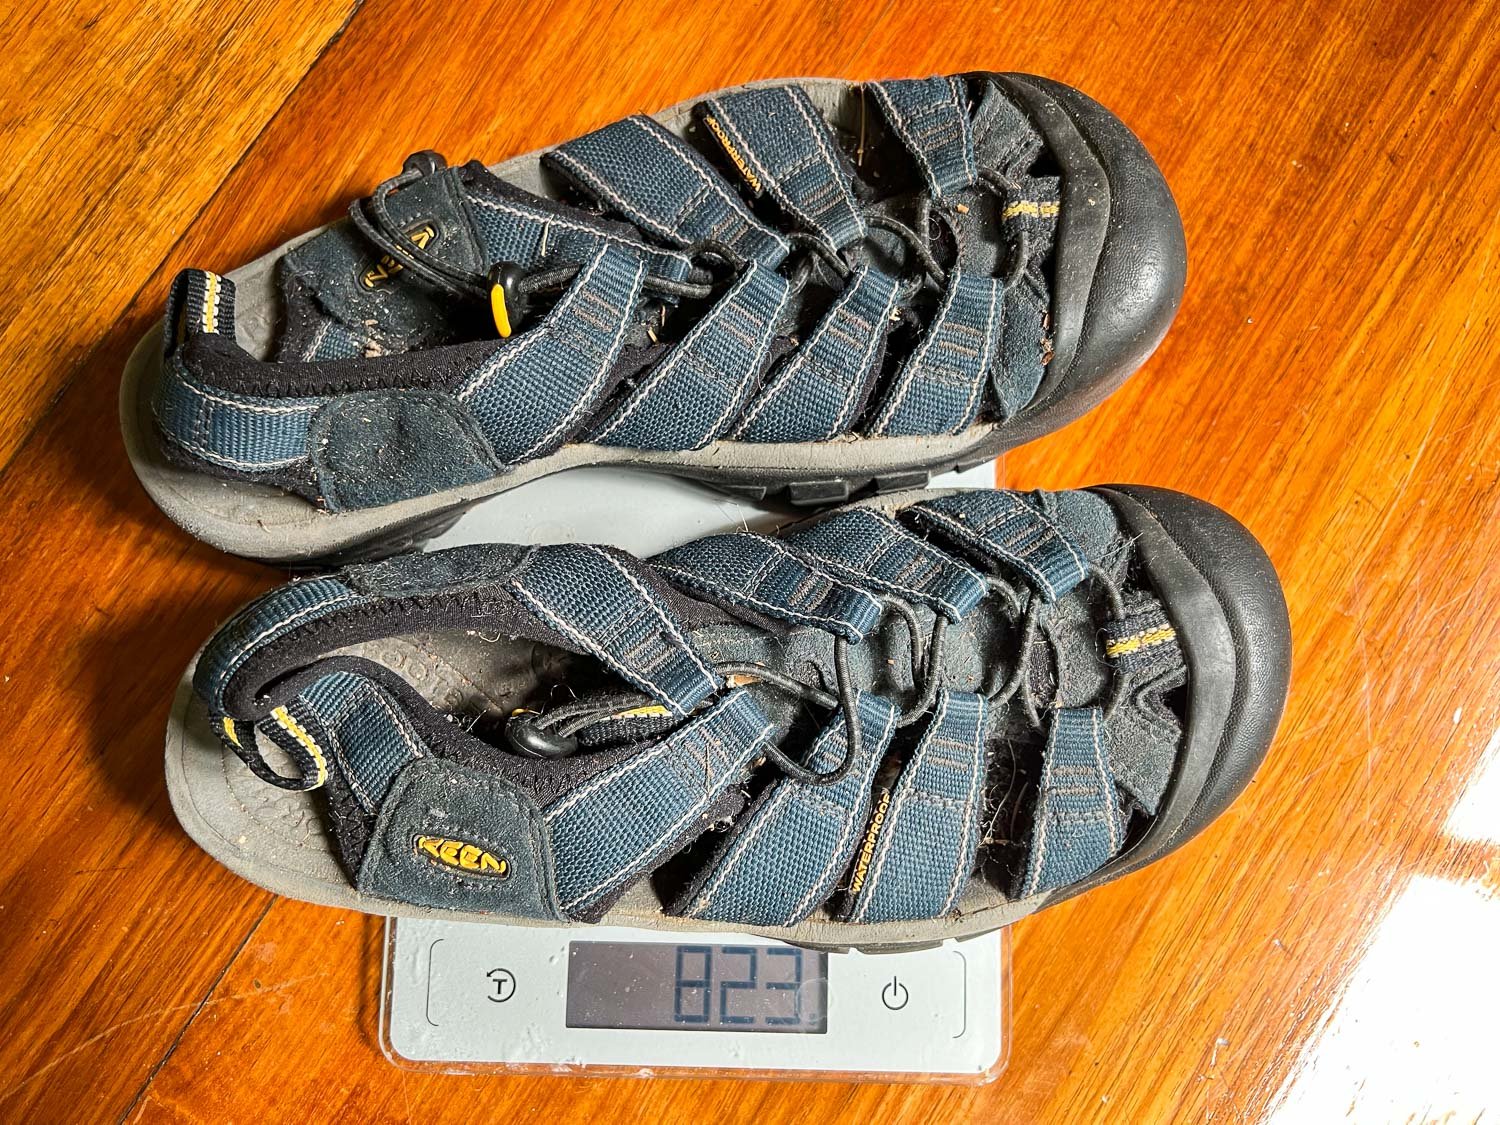
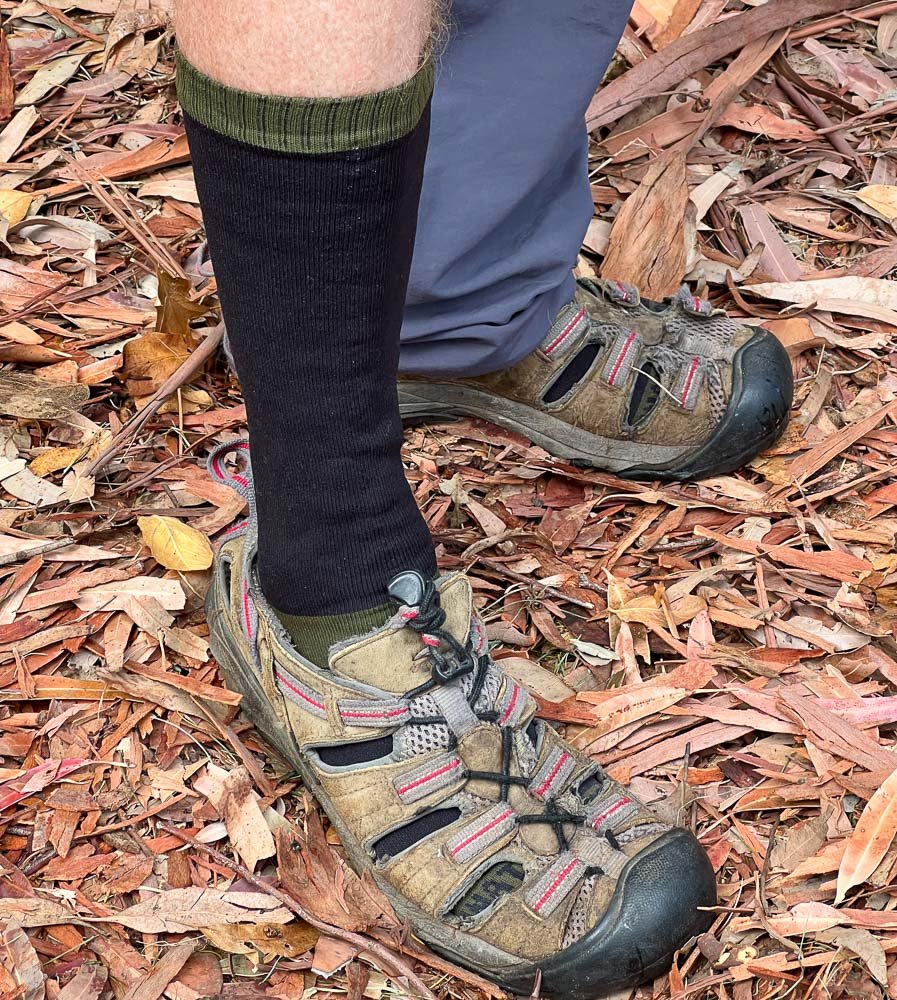
These Keens sandals are okay if you are hiking in them…
but at 823g (29oz) for size 42 they are too heavy to carry just for river crossings.

You might think these delicate-looking rubber haviana thongs would be light,
but they are actually quite heavy at 313g (11oz)/size 42

Whereas these bulky-looking Croc thongs are about two thirds the weight
at just 199g (7oz)/size 42!
Some of the very lightest aquashoes are fine for sandy substrates, but no good for rocky ones. Choose ones with a protective sole; neoprene booties are light but often lack protection.
Often, the cheapest aquashoes are also the lightest, in direct contrast to hiking tents! We considered Xero lightweight hiking sandals but most of them were heavier and more expensive than other options. However, if you are also hiking in them, they may suit.
2. non-absorbent. An early pair of our Croc Swiftwater river crossing sandals were reasonably light, but the fabric upper straps took ages to dry, so we couldn’t wear them with dry socks in camp (unless we wore plastic bags over our socks). Neoprene also takes ages to dry in cold weather.

Crocs Swiftwater sandals (310g/10.9oz size 42):
not the lightest, but it’s possible to hike in them as well
3. Closed toes (optional). Many hikers prefer them for additional protection
4. Well fastened, with a heel strap: You will lose thongs (flip flops) on river crossings if they aren’t fastened to your feet. Slip on aquashoes should also fit well so they’re not sucked off in bogs.
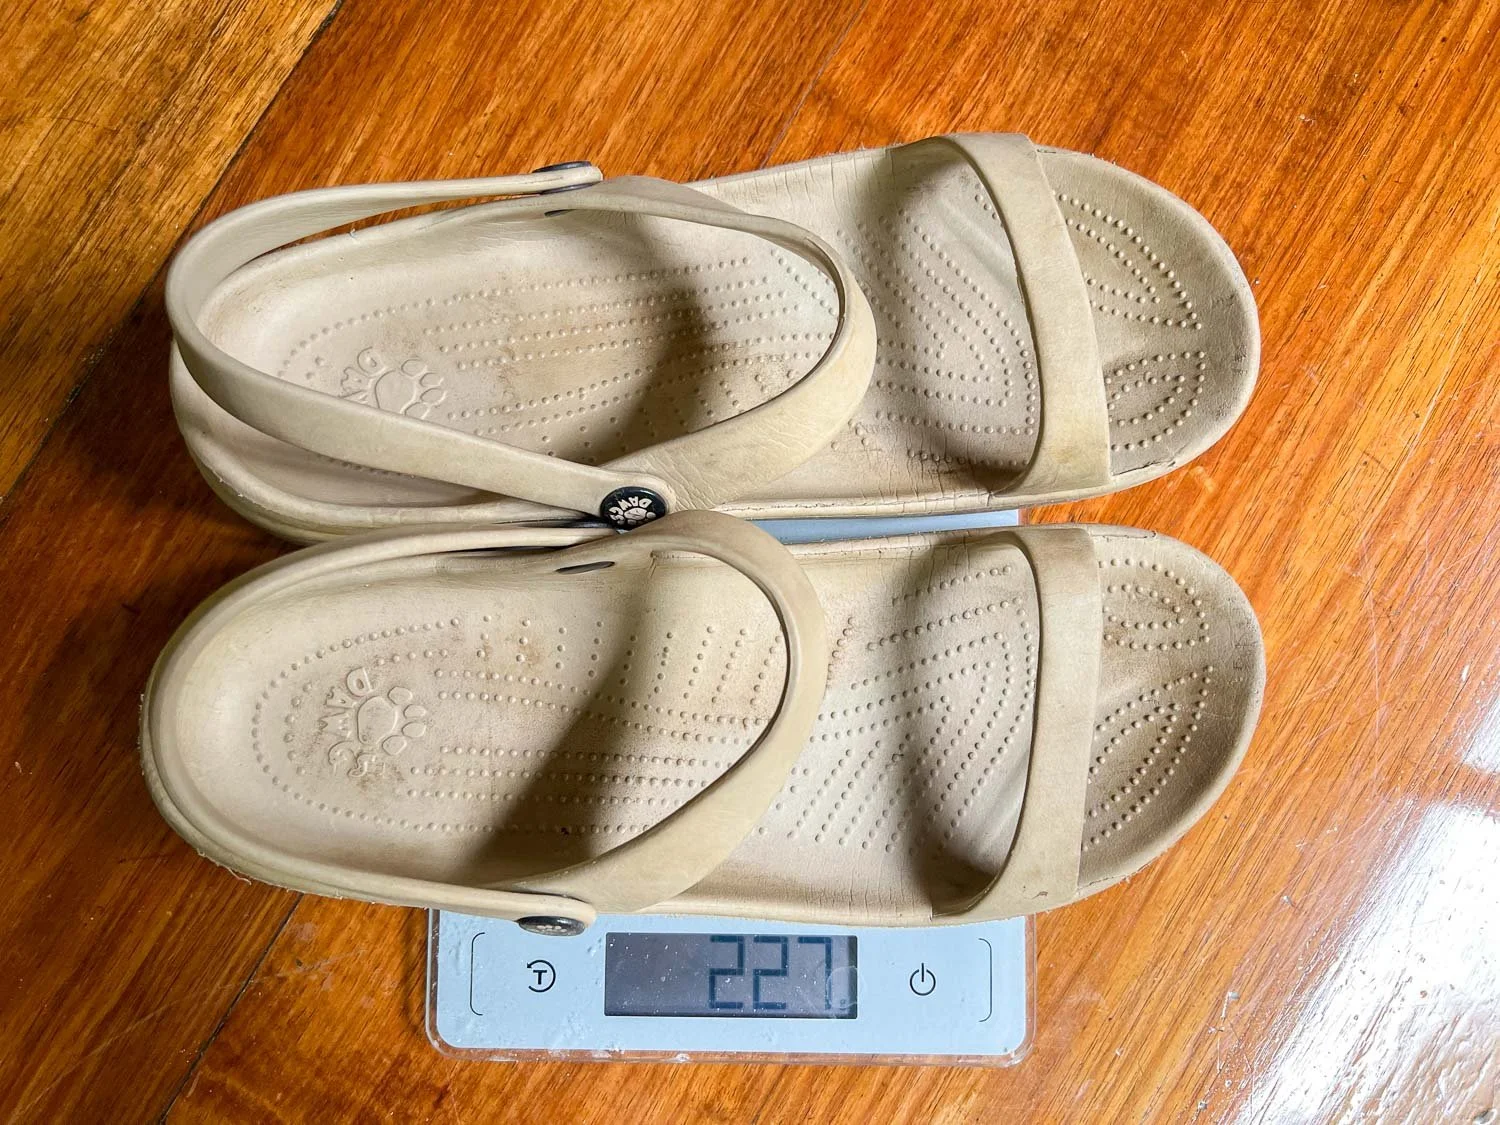
Dawgs – reasonably light (227g/8oz size 42) with a heel strap and firm sole:
not bad for river crossing sandals
Camp Shoes
If your camp shoes won’t be needed to cross rivers, you can go lighter, and choose a thinner, more flexible sole. You can even try DIY ones!
Although rifugias have shelves of guest camp slippers, you’ll probably prefer your own, and certainly your own are always highly recommended if you use showers anywhere, to protect your feet from fungal disease.

Rifugia slippers are there for you to use…
but many of us prefer our own footwear!
Boot Lacing Techniques
If your boots almost fit perfectly, experiment with different lacing techniques. Good hiking footwear specialty and outdoor shops are experienced in this, but this amazing website can teach you everything you need to know. Different lacing techniques can widen the forefoot of the shoe, cinch in the central arch, allow for narrow ankles or high toes and, most commonly, prevent slippage of the heel both forwards and up within the shoe by locking the heel snugly in place.
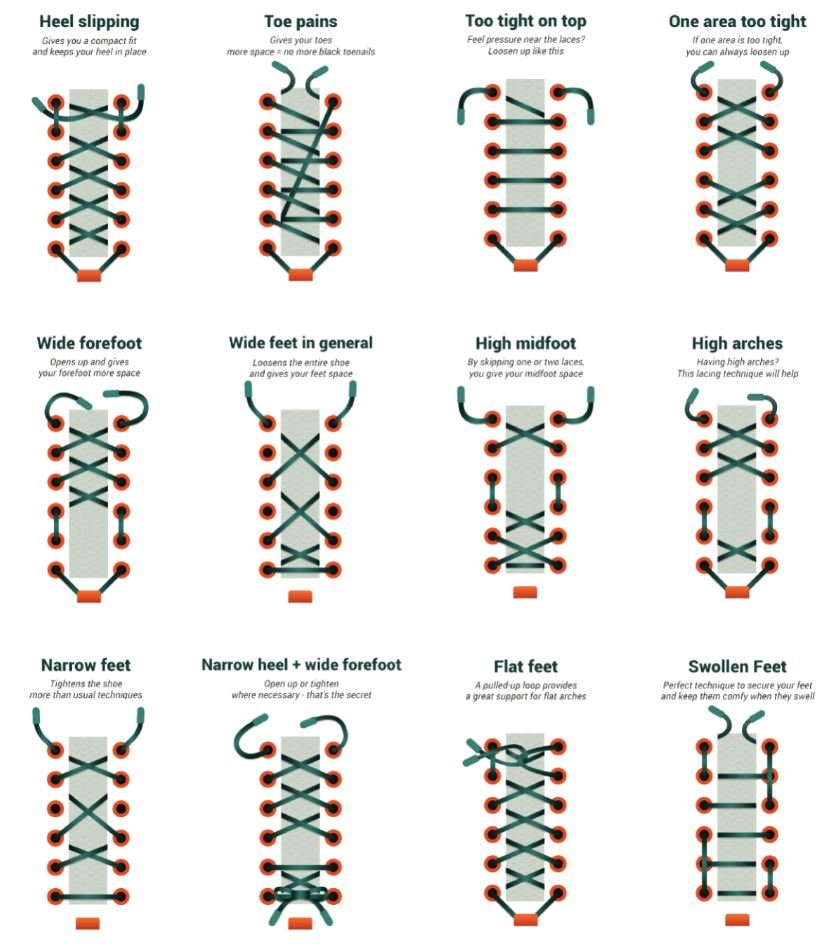
Lacing techniques to address different foot shapes and problems (Image Credit: GearJunkie.com)
Ensure that the new shoe does not need to be cinched so tightly that the eyestays (the U-shaped strip the eyeholes are in) are almost touching: once the shoes stretch with wear, you won’t be able to tighten them further.
Gaiters
Long gaiters are invaluable in many kinds of terrain. They keep your feet drier by preventing rain seeping into the tops of your boots or through the gusset under the laces. They keep your socks and pants clean of mud and grit, and prevent abrasion in dense, prickly vegetation.

In heavy or consistent rain, always wear long gaiters ‘tile-style’ under rainpants to prevent water running down your rainpants, under the gaiters and seeping into your shoes or boots.
We generally wear very lightweight long gaiters paired with long loose pants in Australia (snakes) and with shorts or long pants in Europe and NZ. Unfortunately, although the new zpacks Ultra gaiters are much, much stronger and hard-wearing than their previous Vertice ones, the Ultra is not breathable, so you will sweat, a lot, inside them. We preferred the Vertice ones for that reason.
Light gaiters plus long pants are enough to prevent short-fanged Australian snakes from biting through. By all means wear traditional gaiters if they give you confidence, but know that loose pants plus light gaiters are sufficient here. You’ll need thicker gaiters if wearing shorts or thin, form-fitting leggings or tights, in countries with non-elapid snakes and for bush bashing: our lightweight Vertice ones have quite a lot of tenacious tape on them after scrub bashing in Tasmania!

These ultralightweight gaiters were quite understandably damaged by bush-bashing in Tasmanian scrub but, with ‘a bit’ of extra tenacious tape, held up another 1,000km!
Lightweight Short gaiters are great for keeping sand, grit and gravel out of hiking shoes, mid boots and trail runners:

Short gaiters won’t protect against abrasion, snakes or a lot of mud, but are ideal for keeping gravel, grit and rain out of shoes
Insoles
If your feet are unacceptably sore at the end of a day’s hiking with no obvious cause, and your shoes fit well, cheap insoles purchased from pharmacies or shoe shops are the first thing to try. A little extra cushioning may be all you need. Remove and examine the shoe’s existing insole before buying a replacement so you’re choosing something better. Gel inserts and Superfeet type insoles are very popular and provide modest cushioning and arch support. Other inserts resist pronation, or reduce pain on the ball of the foot (metatarsal dome), or correct for plantar fasciitis (grooves, support), or any number of foot problems.

DIY modification to create a metatarsal dome on the track
If this doesn’t help, you can do as I did, trying progressively more expensive insoles before going to a specialist, who can identify the cause of the pain, and hopefully provide a more targeted solution: it may be the shoes, not your feet!

Different insoles after purchase and the sockliners that come with the shoe. The insert adapted by a podiatrist on the left was one that didn’t work for me. A subsequent one from an orthotist did.
Some manufacturers have better insoles than others.
Podiatrist and hiker Julian Varney kindly provides a professional perspective on insoles. He writes,
“ Most shoe sockliners don't provide meaningful arch support. Shoe manufacturers long ago realised that people favour the feel of something under the medial arch of the foot, so developed shaped sockliners to do just that. Since most of these deform readily under simple hand pressure, the amount of resistance to actual body weight is insignificant. This is another example of comfort rather than support being important.”
If you’re adapting insoles as in the image of the DIY metatarsal dome, Julian recommends you use felt padding on the underside of shoe sockliners, rather than on top. This reduces sticky residue, makes it easier to fix (less tape required), renders it less liable to be moved by feet sliding about (or in and out of the shoe), and also creates a far better bevelled shape for the foot.
Julian explains that there are a wide variety of orthotic materials used for a similarly wide variety of activities, foot problems and personal preferences.
“In general, we can divide orthotics into two types: rigid and soft, plus a spectrum of densities in between. Hard orthotics can be flexible (eg carbon fibre), and usually take up less room in a shoe. The softer orthotics are made of EVA of varying densities, are more bulky, but favour higher repetitive impact activities/sports. Since they can be made out of one block of material, they also stand up better to moisture. Generally I use EVA orthotics for bushwalkers. But that's a generalisation: the device that works for one person may look quite different to someone else's.”
In my case, an orthotist explained that the arch is built to act as a spring and, if it can’t move, the loads are transferred elsewhere, potentially causing new problems. It was only his custom soft inserts, made of three different kinds of EVA, that corrected various quirks and allowed me to hike pain free for the first time in many years; a good podiatrist can do the same. You can take control of your own health and manage flare ups on the trail once you understand them, so it’s worth going to a specialist who can properly explain your specific issues.
Socks

My favourite mid weight Smartwool Womens pHD wool hiking socks
Socks must surely be the most important yet underrated hiking item of all. No matter how excellent your hiking footwear, crappy socks inside them will give you blisters. And the converse can also be true: an excellent pair of socks can prevent blisters in shoes that previously caused them.
Julian Varney:
“Make sure to test shoe & sock combinations in a variety of conditions to find potential hot-spots before a long hike. It might seem a little odd to don your socks and boots and stand in a bucket of water, but testing how it'll feel to walk with wet socks & boots is a useful preventative. Hot and swollen feet operate differently to cold feet too. You need to experiment to find what works for you - the most important thing is always testing boots/socks before undertaking long activities.”
Hiking socks come in a range of materials and blends. The very worst, in Geoff and my experience, is bamboo. They might be great in town, and yes they’re comfortable, but bamboo takes even longer to dry than cotton. Unless you want permanently wet feet on your hike, choose something else.

These Wigwam bamboo hiking socks are very comfortable,
but take too long to dry to be practical in any but very hot climates
Some people are happy in quick-drying synthetic socks but my feet get disgustingly stinky in an astonishingly short time. And both Geoff and I are also more prone to athlete’s foot (tinea) when wearing synthetic socks. However, some people reportedly get fewer blisters in them because they wick moisture more efficiently.
Merino wool socks don’t wick much but are widely considered to be the most comfortable, sometimes in combination with other natural fibres (possum, alpaca, yak), and almost always with a small percentage of synthetic fibre to add durability, wicking and stretch. They don’t get stinky, and retain nearly the same amount of heat when wet as when dry. I asked about the durability of the famously soft and warm merino-possum blend wool in a hiking group, and the unanimous response was that, although they are indeed both soft and warm, their durability is very poor when used in high friction garments such as socks and gloves. Possum blends are best for sleep socks and beanies.
Many people swear by Darn Tough wool hiking socks, which are expensive but which have a lifetime guarantee: simply send them your old pair with a hole worn in them, and they’ll send you a replacement – truly extraordinary customer service.

We’ll need to send these Darn Tough socks off to be replaced!
Smartwool PhD hiking socks are also outstanding, and fit my foot better than DT. Smartwool socks have excellent cushioning in the areas that are prone to blisters: heel, forefoot and toe. I only buy them when they are on sale.

I like the Smartwool socks because they fit very snugly in the arch, and have extra cushioning at the heel and forefoot. This fit holds the sock very firmly in place, without any sliding against my skin.
Waterproof socks are really only useful in certain conditions. They generally comprise a waterproof breathable membrane sandwiched between a soft inner and a more tightly woven outer.

Dexshells have a loop inner knit and a tighter plain knit on the outside.
We have hiked in Dexshell socks (Sealskins are another popular brand) in the Northern Hemisphere and, although they were indeed waterproof, they also retained so much sweat that our feet got wet anyway. Their best uses are in combination with hiking sandals, where their breathability can function at its best, especially in combination with extended shallow wading or river crossings. Some people use them with sandals and a liner sock when hiking in very wet, cold terrain, such as Tasmania. If you plan to use them, be aware that they’re thick and bulky (especially with a liner sock) and may not fit inside your hiking boots.
Dexshells and Geoff’s ancient hiking sandals. No sartorial splendour here, but his feet will be dry!
Instead, a classic hiking hack for waterproofing in cold wet weather is the plastic bag trick: wear two pairs of socks with a breadbag in between. Your inner socks will get damp but your feet will stay much warmer. Or, wear a plastic bag over one pair of socks for short wades.
We keep a pair of dry socks for in camp and/or bed. If it’s wet, you can wear your camp socks inside breadbags inside your camp sandals or hiking boots to keep them dry: your feet won’t sweat enough to dampen them significantly in the short time before bed.
Geoff and I haven’t hiked extensively in extreme cold; extended hiking in snow and below freezing temperatures requires specific tweaks to ensure boots stay dry inside from both sweat and water so they don’t freeze. Research specific winter boots with liners for such hiking.
Blisters
More than any other foot issue, blisters can suck the joy from your hike faster than almost anything. If they get infected, you have real problems. When every step is agonising, it’s very difficult to stay motivated. Leisurely hikers have one advantage in that we are less prone to them than runners and those who do big daily distances, but that doesn’t mean we don’t get them.
Blisters form when there is a shear between the skin surface and the rigid bone structures of the foot. This is caused not so much by surface rubbing or by smooth sliding friction, but when the skin is dragged against an outside surface. The shear, or blister, forms below the surface of the skin – a tear that fills with the characteristic clear fluid. So, to prevent blisters, the surface of the skin should move together with the deeper layers of your foot, rather than snagging or catching on anything. This video illustrates it perfectly.
When your skin is clammy, it’s less likely to slide smoothly. When it’s in a too-tight boot, it’s less likely to slide smoothly. When it’s in a boot that’s too loose, your skin might move smoothly, but it moves too far. Poorly fitting socks also allow the foot to slide around inside them, causing that dragging friction.
Our skin hardens in response to minor pressure and shear forces. This is why ‘wearing in’ boots helps: not only do our boots stretch to the shape of our feet, but the skin under pressure often toughens if given time to do so. And this is also why starting a hike in boots straight out of the box is such a bad idea. You might get lucky… or not!

It’s a great idea to wear boots in before big hikes
It’s essential to prevent blisters before they form. The moment you feel one of those “hotspots” developing, stop walking and address it – don’t wait until lunchtime or that evening, because it will be too late by then.
Every blister prevention aims to keep the surface of the skin in alignment with the layers below it, to stop the dragging and subsequent shearing that causes blisters. Once you understand this, blister prevention becomes much easier.
1. By Reducing Friction:

Boots, socks and insoles drying: you can see my custom ones. I added a bit of DIY height to the heel to maintain the drop as the Hoka boots wore down.
Dry feet and socks are less draggy, which is why some people swear by synthetic socks. Their feet stay drier, so the skin slides smoothly against the inside of the sock. Applying bodyglide can also keep skin sliding smoothly.
Dry feet at every opportunity: take off boots and socks at breaks. Dry skin with a microfibre cloth. Dry shoes as much as possible each night, removing insoles to dry them as well. Hang socks in a breezy spot or near the campfire. As we’ve discussed, non-waterproof shoes dry much faster than waterproof ones.

Firm-fitting merino socks may get damp, but they tend to stick to the skin, whilst sliding against the inside of the shoe. No shear=no blisters, even when the wool is damp and the skin is soft and wrinkly. On the Bibbulmun, we walked for 5 consecutive days in sodden but well-fitting boots plus firm-fitting merino socks without developing a single blister. Poorly fitted shoes would have yielded a very different result. Too much movement, and shear can still happen. Too tight, ditto.
Many people, especially those who get blisters on their toes, swear by a combination of an Injinji liner toe sock, plus an outer sock. Again, the wicking inner slides smoothly against the outer, so that the sweaty toes don’t. There are also two layers between the skin and the inside of the shoe to reduce drag and absorb shear forces. Toe socks are often a perfect solution for hikers who get blisters between their toes.
Armaskin socks work a little differently again. They stick firmly to your skin but are very slippery on the outside. You wear them under any hiking sock.
Blister patches that stick to the inside of your shoe, rather than your skin, make your shoe slippery enough that your socks slide smoothly without dragging. These are particularly useful for blisters in the back of the heel area.
Fixomull tape or moleskin patches on the skin work for many people, possibly by spreading the shear forces over a larger area, but they primarily prevent surface rubbing so are not universally effective: some people develop blisters underneath taping. Compeed are blister specific gel-type patches.
Hikers’ Wool (also known as animal wool) is a traditional blister preventative particularly good between and around the toes. It’s a lanolin-rich fibre that works because it's oily, thereby reducing friction, unlike cotton wool. It also tends to bond with the sock and stay in place; it’s highly praised by people for whom it works.
2. By Reducing Pressure.
For blisters on the sole of the foot, gel and cushioning insoles spread the pressure point over a wider area, thereby reducing its focus and intensity. Unlike ordinary cushioning, gel also moves sideways as well as down, absorbing some of those shear forces. Gel toe caps and sleeves are worth trying too, but you need shoes that are wide enough in the toebox to accommodate them. They have to fit well, or they have a tendency to scrunch.
Calluses develop due to pressure. The hard, thickened callus can in turn cause blisters underneath or beside it. Trimming away the callus and removing the pressure that caused it will prevent the callus and blister from returning. Toe spacers prevent crossing toes, which can promote calluses and blisters. They are particularly useful for the outside biggest and smallest toes, but check with your podiatrist to ensure they fit correctly and are appropriate for your foot.
Donut pads can be placed around a blister or hot spot to divert and spread the pressure. Covering the entire blister with padding may exacerbate the pressure. If you don’t have orthopaedic felt, but you’re carrying thin foam for a sleep mat or sitpad, trim a corner to use as a temporary fix.

Use thin sitpad foam as a short term fix:
cut a donut shape and attach with hypafix.
Custom orthotics spread the load more evenly across the sole of the foot, but this is a biomechanical solution designed by your health professional.
Well-fitting shoes have no inappropriate pressure points that promote blisters. Our previous article describes how to ensure a correct fit for hiking footwear: width, length, arch support and lacing techniques can all contribute.
However, blisters on different parts of the foot may have cryptic causes, particularly when you have chronic conditions such as bunions, crossing toes or other foot quirks. If this is the case, a podiatrist is the best person to help because the cause of the blister may not be what you think it is.
For all the blister facts you can possibly want, this terrific Australian website has reputable and accessible cause and prevention information, as well as products. For hikers who suffer from blisters, we have found no more authoritative, useful and comprehensive site.

1000 km without a single blister!