
Planning and Tips for a Leisurely Bibbulmun Hike
The Bibbulmun Track Foundation has all the resources you need for planning a great trip, and you should use them as your primary source of information. There’s track guide books, maps and relevant publications.
As always, you learn about the hike while hiking, so we’re also sharing what we discovered through the hike that would have made it even easier, as well as answers to questions we were often asked. We aim to complement the Bibbulmun Foundation’s information and your own research.
And plans are just that. Most likely they will need to be changed at some point through the hike. But having done some planning puts you in the best position to be flexible and make adjustments when you need to..

Just one of the beautiful campsites surrounded by wildflowers - this one at Helena
If you haven’t yet, consider reading How to Plan a Slower Hike and Load Sharing for Two for the principles that underlie our hike planning. This post is structured around those principles, where we cover:
Objectives
Access to and from trail heads
Accommodation
Hut etiquette
Campsites, tent pegs, and footprints
Food and water
Leave No Trace (LNT)
Expenses
Bounce boxes
Managing pack weight
Track Conditions
Daily distances and how to tweak them
Rest Days
Navigation; and of course
Snakes, ticks and other wildlife.
Our Hike Objectives
After enjoyable hikes of ten or more days both in Oz and in Europe, we were both keen to experience “thru-hiking”: living on the trail for weeks or months. We considered the Australian Alps Walking Trail but much had been recently burnt, and we’d done most of our local Heysen Trail in sections, so the Bibbulmun was perfect for a first thru-hike (see Why Hike the Bibbulmun Track).

Pink or yellow - what colour would dominate this day?
Getting there and back
If you walk north to south (ie southbound, or SOBO) you simply need to get to Perth and then catch a suburban bus or taxi to the trail head at Kalamunda.
In our case, we drove from South Australia to Perth but went via Denmark and other track towns to drop our resupply boxes at Visitor Centres or with a track angel. We could have posted our resupply boxes, but that precluded including fuel – and our resupply boxes were larger than most! Our boxes were big because the supplies were for two, and we’d included everything we needed for each section. That simplified town days as we needn’t buy extra things, like fuel or cracker biscuits. Dropping off boxes also let us become familiar with a new area.

Kalamunda Trail Head. Excited and ready to start our trek.
After you finish the hike in Albany, you can bus or fly back to Perth. Depending on season, cheap flights may be available if you book about 36 hours ahead. If you park at the airport, write down the Bay Number (oops!).
The regional bus service is excellent and goes through all the main towns so, if you have to bail at any point, returning to Perth or Albany is straightforward. Hikers doing sectional hikes (ie one section of the track at a time) often use regional buses to get to and from the start and end of the section.
If you’re hiking northbound (NOBO), storing a car is easier in Perth than in Albany, where options are limited and expensive. We suggest you either fly or bus from Perth to Albany, and then walk back to Perth. You could also hire a car in Perth and drive to Albany (but many car hire firms don’t offer the choice of leaving the car in a different town).
Accommodation
Accommodation is cruisy. Between track towns there is a hut at the end of each day with the option of sleeping in your tent as well: luxury!

The shelters are practical and cosy, with a campfire possible in the northern part of the hike late autumn-spring.
In towns you’ll find accommodation to suit every budget, from free or cheap backpackers to cheap Tourist Parks, to motels and upmarket B&Bs. We had no trouble booking one or two towns ahead except during school holidays, or when local events such as cycling or marathons were happening. We were still able to get accommodation, it was just more expensive. You can book further ahead if you are on a tight budget, but that does reduce your flexibility on the track.

Basic but free shelters at Donnelly Village; behind them are rustic cabins with warm fires!
It’s also worth noting that many accommodation options further out of towns will collect you and drop you back at the track… but make no assumptions! If staying further out, you’ll also need to consider laundry facilities and food, although most remote places will help with that as well. Again, confirm these basics when booking, whether you’re in town or further out.

Upmarket accommodation in Balingup because there was not much else available – what a shame!
Hut Etiquette
All the commonsense rules apply – no boots on sleeping platforms, clean up when you leave, leave quietly if you are heading off early. Just be a decent human being.
After our experiences sleeping in European rifugias where the norms of communal sleeping are widely understood, we were surprised that some Bibbulmun hikers complained about them.

Sleeping people snore, fart and are restless. They may have mattresses that are noisier than your own. Disturbed by a snoring hiker? Don’t shout at them in the middle of the night, as one poor chap experienced.
You can of course try ear plugs, but if you really don’t like the things that are part and parcel of communal sleeping facilities, then don’t sleep in them. For light sleepers, the wonderful thing about the Bibbulmun is that there is an alternative at every single hut: a campsite! No need to endure those human foibles if they bother you: just pitch your tent some distance away for a quieter night.

The Bibbulmun hut platforms allow freestanding tents or inners to be used, and some people do this for mosquitoes and for privacy. Because the track was quiet when we hiked (Covid), there was usually plenty of room but, when huts are crowded, courtesy dictates you set up your tent on a campsite, or sleep in the hut without it
This is one of the more modern ones, reconstructed after it was burnt down in a wildfire.

A great compromise is a net!
Rusty happens to be using a two-person net on this night with few people in the hut, but a single net takes up no more space than your sleeping mat.
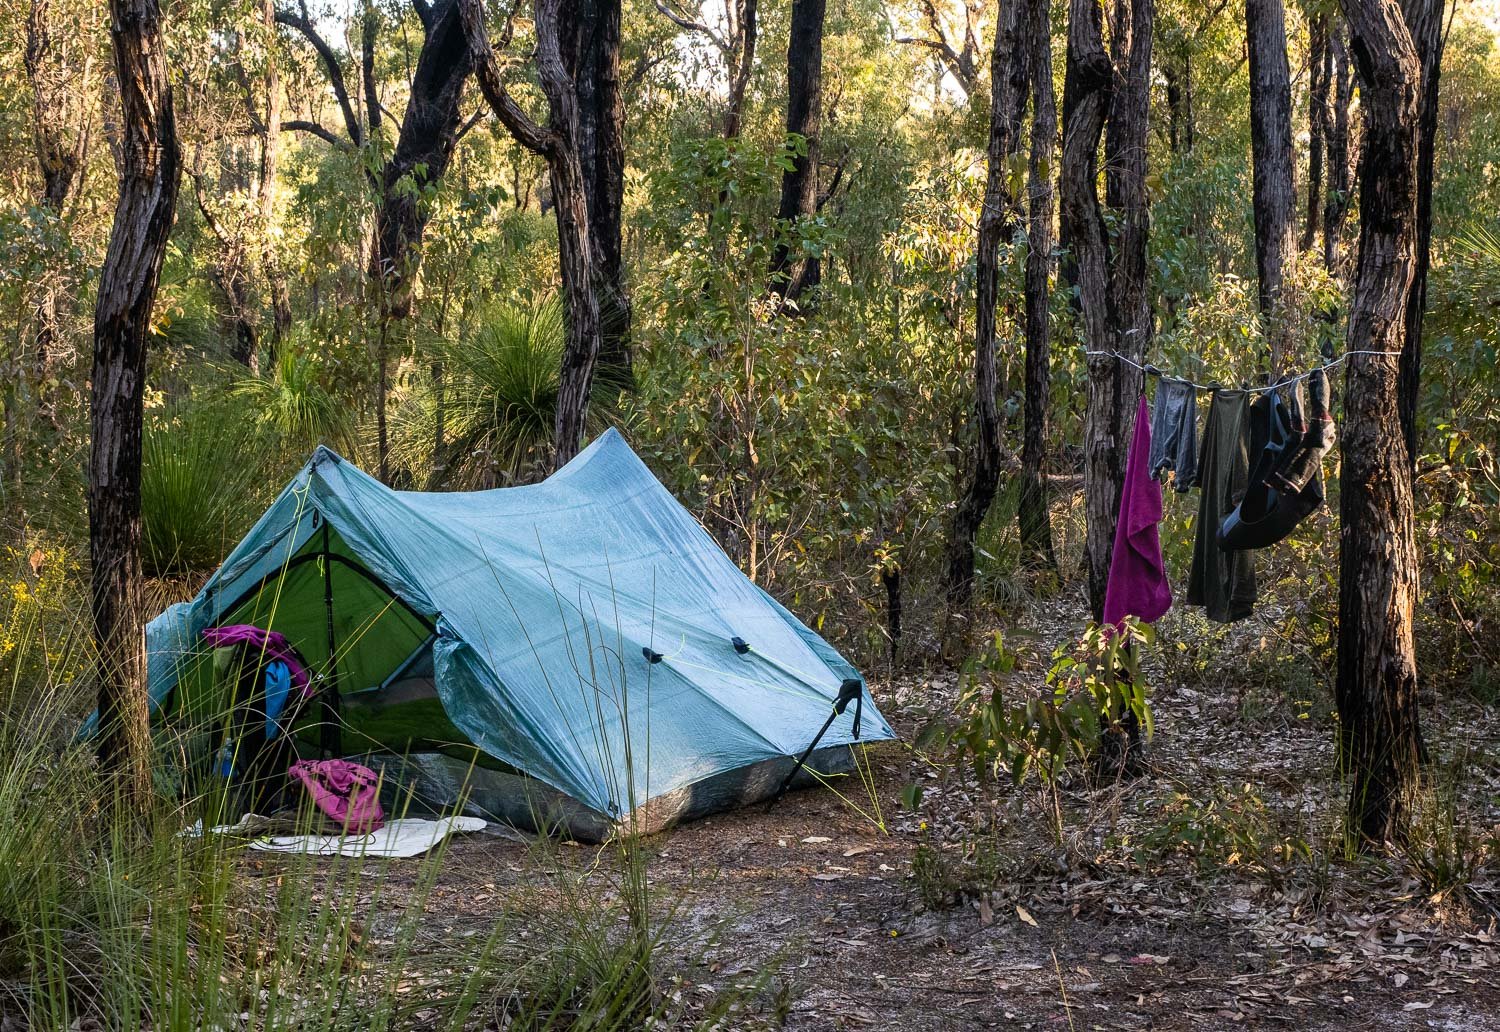
Campsites, Tent Pegs and Footprints
There’s plenty of information about Bibbulmun huts, but little about campsites. See detailed daily reports in the Sectional Blogs (to come), with photographs of the campsites near every hut, as well as interim options.
We recommend that you take a light Tyvek footprint for your tent, particularly in the northern half of the hike. The rough ironstone gravel of the Darling Range is highly abrasive and a footprint will protect your tent floor. A clean tent floor also increases your tent’s life: repeatedly rolling or stuffing a dirty tent abrades the fabric.
Inexperienced hikers have carefully denuded many tent sites not only of stones but also of leaves and mulch. You can expect a lot of splashback in rain on hard, bare ground in the northern sections.

There are numerous lovely tent pitches - one reason why we camped about 70% of the time.
Most of the tent sites are well-sized, but our Stratospire Li and especially our XMid would have been too big for several of them. However, there is almost always a flat spot near the hut or on an access track to use instead.
If you have a choice between a non-freestanding tent and a freestanding one, the latter are more versatile on the Bibbulmun as you can pitch the inner inside the hut when it’s not crowded – great for mosquitoes!
Tent Pegs: With non-freestanding tents, good pegging is essential. We used MSR groundhogs, plus four spike/nail pegs. These were sufficient for nearly all sites except for Mt Wells, where even titanium nails wouldn’t penetrate (we used rocks), and Boat Harbour. This very windy and exposed pitch on sand would have benefited from sand pegs, but we double-pegged the windward side using a combination of spikes and groundhogs, and the tent stayed put. Wash tent pegs every time you break down your tent to prevent the spread of dieback disease.
Leave No Trace
No one likes to see other people’s rubbish on the track, and we were thrilled that most people cherish the Bibbulmun as if it was in their own back yard. Carry out all your rubbish, dig 15cm deep cat holes at least 100m away from watercourses and the track itself; a metal sand peg is useful for this. And ladies - unfortunately, yes, it is us ladies - please carry a ziploc bag for your used pee paper in the same spot you keep your loo paper and hand sanitiser. Pee is sterile and it is both simple and hygienic to pop paper straight into a sealed ziploc after use.
Other basic LNT principles include preparing ahead (so you don’t bring unnecessary packaging), using campfires appropriately, sticking to the middle of tracks (even if they’re flooded), avoiding making new short cuts, and using boot cleaning stations for hiking pole tips and boots to minimise the spread of dieback disease (this is covered in more detail in our upcoming Vegetation, Orchids and Other Wildflowers article).
Leave things as you find them - don’t pick flowers, use existing firepits, and don’t build or add to rock cairns. Keep pristine watercourses pristine: soaps, dish detergent and even sunscreen or insect repellent can affect aquatic fauna and flora.

This water may be coloured by tannins but is clear and pristine. Cooling sweaty feet or bodies is perfectly okay, but don’t slather on sunscreen or insect repellent just before jumping in!
Wild camping is illegal on most of the Bibbulmun. Because it is such a heavily used track, the impacts would be significant if everyone chose to wild camp, because we are all likely to choose the same pretty, or flat, spots! If all of us aim instead for minimal impact by using LNT principles, hiker numbers will remain uncapped, unlike so many other popular tracks both here and overseas.
The Bibbulmun is popular. Everyone doing the right thing makes a huge difference to its long term viability, so that we don’t love the track to death. Sometimes wrappers fall out of people’s pockets - why not pick them up when you see them? Please watch this video before starting, so you and those who come after you will have an equally beautiful environment to enjoy.
Food and Water
Water is easy with rainwater tanks at each hut, and also at intermediate spots we stopped (which we checked/confirmed with hikers who had recently passed through). The official word is rainwater needs to be sterilised, but we didn’t as the season was so wet. We’d choose differently in autumn after a dry summer.
Hiking food is available at all towns, either from the local Visitor Centre or supermarket. But we dehydrated all our own meals ahead of time, packaged all breakfasts, most lunches and all dinners and put them into our food resupply boxes. The resupply boxes we left at Visitor Centres, but track angels helped with resupplies at Brookton Highway and also at Denmark. Put a bottle of wine or nice chocolates in your box to give them when you pick it up!

I didn’t know blocks came this big…
an extra resupply in town, this time for us!
We also snagged a pub lunch mid hike at Mundaring Weir Hotel – very special, and also lunch at Donnelly River Village - yum! Check the maps and opening hours to avoid missing these and other opportunities along the track, such as Mumballup Pub (closed for us unfortunately). Peaceful Bay does great fish and chips.
You might like to also check back for Food Preparation and Logistics for a Through Hike when it becomes available. Or subscribe and we’ll send you the link when it’s up.
Expenses
Accommodation Expenses
The Bibbulmun Track can be as expensive or cheap as you choose to make it. Accommodation for 49 nights in huts is either free or about $1/night each if you join the Foundation: there is no cheaper holiday.
In towns, backpacker or Tourist Park accommodation is also very cheap, especially if you use your tent in the latter. Staying 3 nights in each town increases expenses, not just for accommodation but also because you’ll likely buy meals.
Ensuring your motel room has a microwave and toaster means you can cook your own meals. Our very fancy accommodation in Balingup seemed ridiculously expensive at first glance but, with a kitchen and breakfast makings supplied (eggs, bacon, bread etc), and by cooking our own lunches and dinners with fresh supermarket purchases, this accommodation ended up similar to cheaper motel accommodation when we bought two or three meals a day from cafes.

Our accommodation in Balingup was expensive but they gave us a ride into town for supplies.
We made the perfect rest day hiking dinners and breakfasts!
Food Expenses
The biggest saving you can make is dehydrating and preparing all your own food at home. See Food Preparation and Logistics for a Through Hike (coming soon) for more details on managing food costs.
Other Expenses
You’ll need to factor in track transfers if you’re getting food drop offs or being taken off the track. Food drops, whether you drive them yourself or post them, also add up. Laundromats, many of which use credit cards, are in most towns; Walpole’s was closed when we passed through. Tourist Parks and many motels also have laundry facilities, but it pays to check when booking.
Be Realistic
The towns you visit are mostly small ones, and rely heavily on tourism. Some only receive supplies once a week and these can be unreliable, particularly during a pandemic. They do indeed have additional costs to cover. So whilst they are well set up and eager to support hikers, sometimes things you’d like won’t be available, or might be more than you’d prefer to pay. Don’t stress or let it ruin your day, just smile and enjoy your hike instead!
Bounce Boxes
A Bounce Box (in our case, a prepaid extra-large post bag) containing a change of clothes is traditionally inside your first resupply box, but this was at Brookton Highway, so our primary Bounce Box was waiting for us in our second resupply box in Dwellingup, the first town. You change into clean(er!) clothes upon arrival in town, then, when you leave, post the clothes to the next town. A post bag rather than box is handy because you can squeeze it into the post office mailbox if you leave early in the morning, rather than waiting for the post office to open.
Because some towns are relatively close together, TWO bounce bags ensures they’ll arrive before you. We put the second bag in the third resupply box at Collie, and then leapfrogged the two bags. We had often booked accommodation by then – we booked accommodation one or two towns ahead – and most places were happy to hold onto our bounce boxes for us if we posted them direct (otherwise, post to the visitor centre). We’d put an empty prepaid post bag in all our resupply boxes after Collie. The last posting destination for each Bounce Box is Albany, that way two full bags will be waiting for you in Albany.
Washing clothes along the track uses precious water when there isn’t a nearby natural source, so it’s best to stick to essentials.
A set of clean clothes and other luxuries make collecting your bounce box a particularly joyful experience!
Bounce Box and Resupply Box Logistics

The table summarises our bounce box and resupply strategy
Managing Pack Weight
Read Load Sharing for Two to understand our approach to managing pack weights and why we do it that way.
Our base weights, including Helen’s 1.8 kg worth of camera, lenses and batteries were 8.5 kg for Helen and 8.2 kg for me. I carried most of the food. Our food averaged to about 800 grams per day. On 10 day sections we needed to carry 26.5 kg total weight between us. For those sections I would have a pack weight on the first day of 16 kg and Helen 10.5 kg.
We started each day with 3 litres of water between us; you may need more. We ensured we were well hydrated before we left camp, and never ran out of water or got dehydrated during the day. We shuffled pack contents between us during the section so that we were both shedding pack weight each day and sometimes also during the day.
See Five Steps to a Lighter Pack as well as the excellent pack weight calculator at lighterpack.com.
The majority of the Bibbulmun is through forests and native scrub but there are occasional parts where you pop out of the forest into picturesque farmland.
After trimming non-consumables, the simplest way to reduce combined pack weight is to increase the number of resupply locations. A significant reduction in combined weight for longer stretches can be achieved by reducing time between resupplies to 6 days (assuming that you’re carrying a spare day of food). Some options to achieve this include:
For the long stretch between Kalamunda and Dwellingup, we had arranged for only one resupply at Brookton Highway. That was simple to organise thanks to a kind track angel. We could have instead arranged for resupplies at Dale Road access point (just before Dale Campsite) and again at the service station at North Bannister (worth a visit for a pie and an ice cream) which is conveniently on the main Albany Highway, and close to Gringer Creek campsite. The extra resupply point would have meant only 6 days of food was needed at the start of each resupply point, keeping our starting combined pack weight to about 24 kg.
An additional resupply point between Dwellingup and Collie at Harvey-Quindanning Road access point splits this section in half and reduces 7 days of food down to two lots of 4 (keeping a spare for both new sections), so weight savings for us would have been 2.4 kg. Arranging a track transfer is a little more complicated; the transfer operator out of Dwellingup is your first option.
The General Store at Donnelly Village is the logical choice for adding an extra resupply point after Balingup, especially if you’re staying at the Village for a rest day (highly recommended!).

We had a rest day at Donnelly River Village. This is the usual scene in front of the General Store: what a lovely family friendly spot to stay!
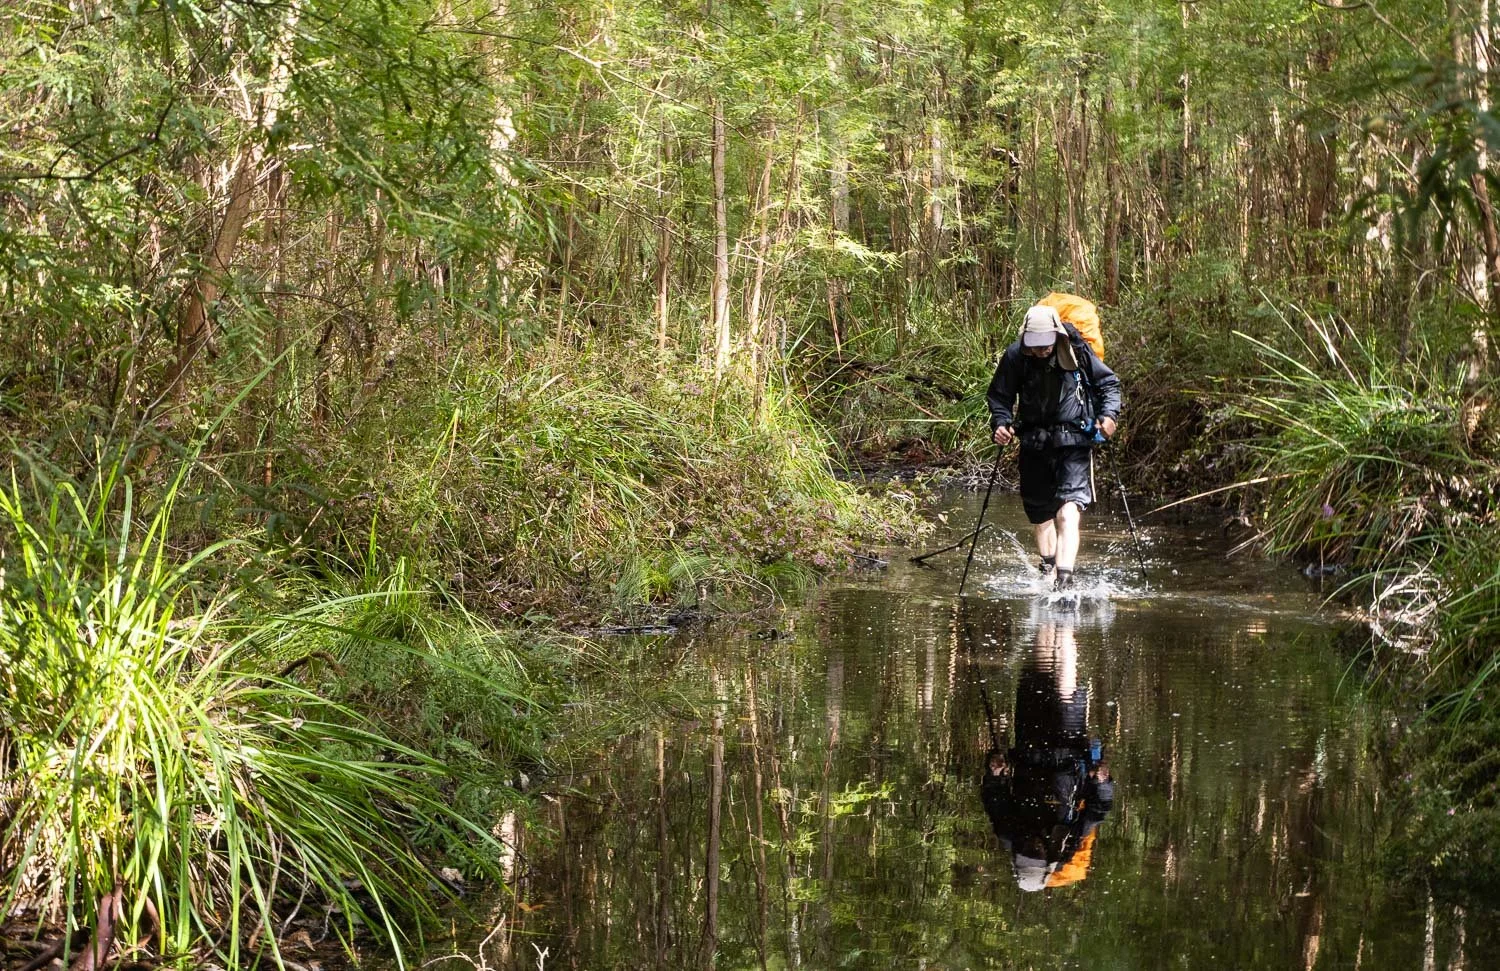
The 10 days of food I carried from Pemberton could be reduced to two with a resupply of 8 days food at Northcliffe Visitor Centre. There were two hard days so we recommend you do this. Thereafter, from Northcliffe to Walpole, days are statistically easier, but we waded many pools and clambered over or under much deadfall, so the days were long. A logical further resupply point is at Mt Chance Spur Road off the Southwestern Highway. However, this may be an expensive option because the area is relatively remote from Walpole where the nearest transfer operator is based.
The most logical resupply between Walpole and Demark is at Peaceful Bay. If you stay at the Caravan Park you can send a resupply box there. That effectively means you’re carrying no more that 4 days of food (including a spare) throughout this demanding section.
Track Conditions
…. Are excellent - (see Why Hike the Bibbulmun).

Some of the Bibbulmun involves pleasant walking along quiet forest tracks
We checked blogs to get a feel for terrain and track conditions, as well as chatting with the vollies at the Bibbulmun Track Foundation. The track is well formed and maintained – no major bush bashing as in the Walls of Jerusalem, and with modest elevation gains (the biggest day is a touch over 700 m).
Route and Points of Interest
The Bibbulmun Track is a dedicated 1000 km trail between Perth and Albany, so route selection is straightforward. There’s a variety of landscapes, with plenty to see along the main track and also in the small towns along the way.
The terrain was highly varied, with new scenery every day or few days

A pretty bridge on the final leg into Balingup
We used the Bibbulmun Track Foundation website to get a first appreciation of the route and distances. Some online tracks from hiking websites are unreliable, so I processed elevation gain information using QGIS and national elevation data. I also used FarOut to revise elevation gain estimates after downloading (purchasing) the maps for the app.
The eight sectional paper maps are excellent. Diversions are often in place so check the Bibbulmun Foundation website, at Visitor Centres, Parks, the comments books in huts and with hikers coming the opposite way.
How Far Each Day?
The distances between huts vary significantly, typically between 12 to 20 km. A handful of huts have less than 10 km between them, but around one third of the huts are over 20 km apart.
Here’s a graph of the distances we walked each day and the elevation gains – as recorded by my Garmin fenix 6s.

You can see that elevation gains early in the walk (SOBO) are still significant even though days are shorter (and therefore individual climbs tend to be steeper). We didn’t “double hut” these short days early in the hike, but took our time and enjoyed each day instead.
Our preference is distances around 16 km when done over many consecutive days. Most of the hike was fine, but some parts were significantly more than that on a repeated basis.

Here’s a graph of daily distances and the number of days for each daily distance.
Total distance is not the only story of course: elevation gain is at least as important, and of course temperature. Like many older folk, neither of us, but particularly Helen, do well in warm weather – in fact anything past 25 Celsius (75 F) can become unpleasant.
The advice from the Foundation is useful and accurate. Locals on the track who had done all or parts of the trek several times were also a great source. Often the most difficult thing to know is what question to ask! Anyway, whilst we could have split up more days than we did, we made it and we’re both still smiling!

The adjacent table identifies my hindsight view of days on the track I consider to be the most obvious and beneficial to consider breaking up. See our upcoming “How to Make the Longer Days Easier” for more detail, or subscribe to receive the link.
I estimated the difficulty of each day (based on distance and elevation gain) and then ranked the days to focus on the top 10 days and options for splitting them. Hindsight is a wonderful thing and there’s nothing like having walked the track to discover options. That in itself is a great reason to join the Bibbulmun Track Foundation: you’ll get local knowledge from others who have walked the track, often multiple times.
As I’ve suggested, you probably won’t want to split them all, but it’s worth being aware of them to adapt your hike should you need to (eg. to manage Helen’s fickle Achilles tendon). And sometimes just knowing there’s a bailout option if you need it makes the day easier and less stressful!
Remember that factors such as weather play a big part, and what is a hard section one day may be easier on another if it is not as wet or hot.
Climate and track conditions on any day will determine the day’s challenges, but the scenery always remains beautiful.
The track transfer companies are very reliable and services good. There are excellent track transfer options that we can verify at:
Dwellingup
Collie
Pemberton
Walpole
Services are also available in Denmark but we didn’t use them, as it was convenient for our friendly track angel to help us out.
In addition to some intermediate camping areas, several roads provide access points to the track. These crossings are well documented on the Bibbulmun Foundation’s web site and are marked on the hard copy maps (another good reason to buy them). So you can split the remaining longer days in many ways, be that an intermediate campsite or accommodation, or to arrange a pick up from a transfer company, stay in a town and then get dropped back the next day to recommence you hike.
However, each extra “non-standard day” does create extra logistical complexity and cost, so it’s a balancing act.
Whilst we still had many 20 km days, most of them were very manageable. We never pulled up short, albeit a bit tired (type 2 fun days!) a few times.

A rustic old hut just before Boarding House Campsite where you can stop early to shorten the day.
We also managed one extra-long day by double hutting, so the track is definitely doable at a leisurely pace!
Once you have an idea of your schedule, arrange a planning meeting with one of the Bibbulmun Track Foundation advisers to fine tune your leisurely hike.
Rest Days and Contingency Allowances
We originally had allowed for one rest day in each town, ie two nights in each town. But one “rest day” is used up by collecting food drops, washing clothes, organising accommodation in the next town and ringing friends and family. We therefore changed this midway to two days in each town, ie three nights. We found that was much more restful so, if you have the time, consider this approach, especially in larger towns.
We also had longer days than originally planned a couple of times on the day before a town, once by double-hutting due to atrocious weather (we walked straight past the hut because a hot meal and shower in town were two irresistible carrots), and another when we decided not to split a day. We therefore effectively gained a day (at Pemberton and at Walpole), but then spent the extra (third) day in each of those two towns. In both cases we spent part of the extra day in town for a half day walk with daypacks to shorten the first day out of town to the next hut. That worked really well.
Navigation
During the hike we relied mostly on hard copy maps from the Bibbulmun Track Foundation. They were clear and reliable.

Checking the map at one of our 10-15 minute longer “snack” rest breaks – we try and have these every two hours.

The track markers (wauguls) are easily spotted and closely spaced. Look behind you to check both sides of trees for wauguls if you’re starting to wonder if you’ve made a wrong turn.
Also check both sides of trees at confusing intersections. Because maps and waymarking are so good, we used the FarOut mapping app only occasionally to confirm our location.
Whilst we used FarOut, it often had out of date or an incorrect track alignment, and the base map information was limited (eg road names) so it was really only helpful for confirming location. Paper maps provided a much richer picture with topography, vegetation, powerlines, plus creek and road crossings.

Keep your eyes peeled for navigation hints that volunteers and other hikers have left for you.
This turn-off has a yellow waugul, but you can see that many people have marched straight past it. If you’re not sure which of two routes is the right one, a branch laid across the wrong track is a universal hiking sign not to go that way. Strips of bunting left from long-finished events to indicate turn-offs are, somewhat annoyingly, often still up too.
I sent home our old GPS 72Map but kept our Inreach Mini. So navigation was pretty straight forward in comparison to some of our other hikes.
It also pays to keep abreast of track diversions, and the signs associated with them.
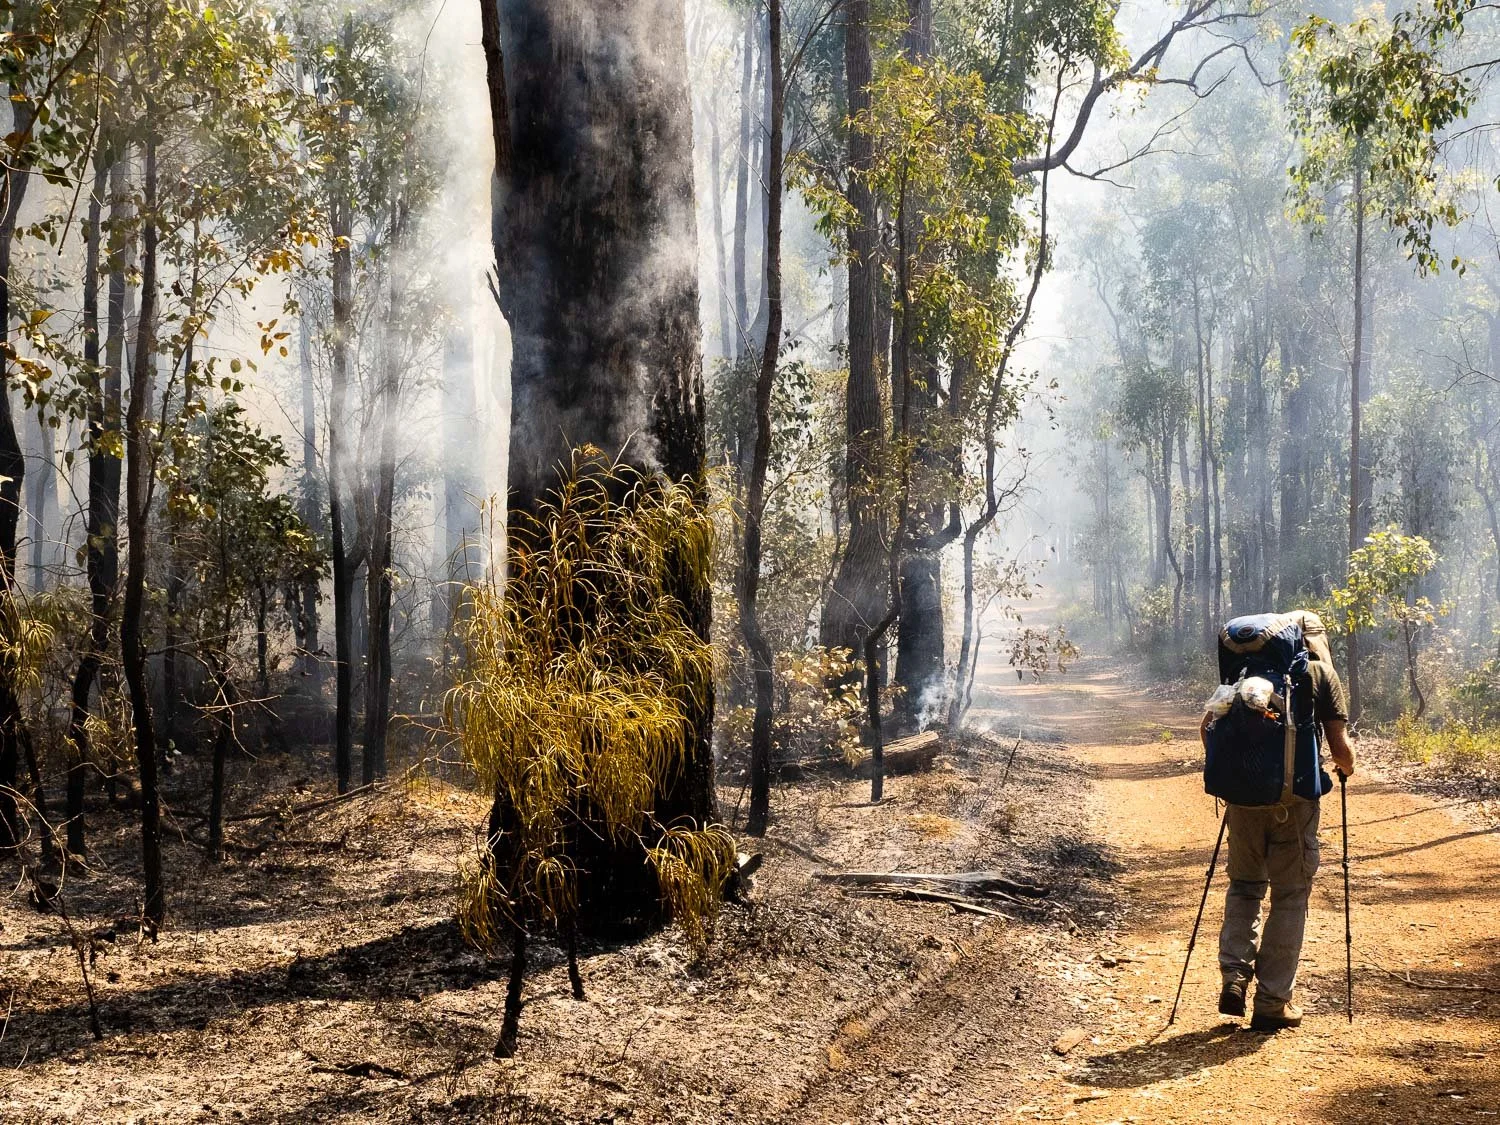
These are mostly in place for weeks or months to address sections of track that may be under water, or are hazardous due to erosion or structural issues, but there are also short term diversions for control burns !
Snakes, Ticks and Friendlier Wildlife
Dugites and tiger snakes, the ones you are most likely to see, are highly venomous, but you can completely prevent bites while walking by wearing shoes, long loose pants and/or gaiters, even lightweight gaiters.

Australian snakes are elapids with short, backwards-facing fangs, so they rarely penetrate thick loose pants, let alone gaiters. They don’t have super long, penetrating fangs such as are seen in other parts of the world. Also, unlike snakes overseas, Australian snakes’ venom travels through our lymphatic system for some considerable time before entering the bloodstream. The lymphatic system moves around the body with physical movement, which is why immobilisation and pressure work so well.
No one who receives correct first aid and subsequent care has died from a snakebite in Australia: it’s when people panic and rush about, or when bandages are removed too soon, that people succumb.
Staying alert and wearing sensible clothing and gaiters through snaky sections is all you need to do! We wore gaiters most, but not all of the time, depending on terrain and weather
Although any stretch bandage can be used, snake bite bandages with little rectangles printed on them are readily available from Australian pharmacies. When you apply and stretch the bandage at the correct pressure, the little rectangles change shape into squares. If yours date back to before mid 2021, buy two new ones as the original rectangles weren’t calibrated as well.
It's normal to be startled when you see a snake but, if you’re wearing correct clothing, your chances of being harmed are minuscule.
Kangaroo Ticks
Are prevalent in warmer weather primarily north of Collie, and bite us as well as kangaroos. In many ways, they are more challenging than snakes because it’s more difficult to protect yourself from them. Be careful when squatting: find a clear area so your bare butt isn’t touching a single sprig of grass. And I’m amazed Helen didn’t collect more ticks whilst photographing orchids.

Crouching amongst drenched vegetation in bucketing rain - luckily not tick weather!
We checked ourselves each night – and each other’s hard to spot places! – and saw only a single one on the mesh of our tent. Other hikers saw more on the track, so perhaps we just didn’t notice them! Nuke grade insect repellent, tick tweezers and a tick dry ice spray are worth carrying. They are apparently less prevalent after Dwellingup, so you could post the spray home when you reach Collie, but we chose to carry it the full distance as there were also stories of ticks being seen near Walpole!

Still smiling!
So… whilst we had some long days and steep climbs, we met many great people, saw beautiful wildlife, had a wonderful time, and we made it!
Sound doable? See our upcoming Bibbulmun posts on making some of the longer days easier, food prep, and wildflowers.
Subscribe - it's easy and free – and we’ll notify you when these become available.