
How to Plan a Slower Hike
When you are a slow hiker, a 40km/25mile multiday trek may seem daunting, let alone 120km/75miles or 1000km/620miles. You may feel even more daunted when you see fit strong hikers do that 40km/25mile distance – easily! – in a single day. You see their post on social media or in a hiking group with the “one day” mentioned prominently, because those hikers get their enjoyment from challenge, speed and conquering a goal. And that’s perfectly okay. But if someone hikes that distance in a day, you think, it will take us two, three, four or even five days to so! That walk can’t be for slow hikers like us, you think. We could never do that hike. But you would think wrong, because almost any hike can be adapted to those who hike at a slower pace.
Just sitting - taking time to immerse in the landscape.
It’s essential to have the confidence to hike your own hike! You don’t need to emulate fit athletes to do the same hike. You can instead take more time and cover less distance each day, but have just as much or possibly more fun!
And the planning is not hard. There are three main overlapping phases, with earlier details associated with each phase being reviewed as more information becomes available. Key phases are:
Deciding where to go: Clarifying hike objectives, track and climate considerations, hike area selection, and accommodation.
Planning what to do on the hike: Identifying points of interest, understanding the big picture, deciding hike distance and duration, and mapping alternative routes.
Planning how to do it: Managing food and water, final route selection, daily distances, rest days, and fine-tuning.
I’ll explain what we do so you too can tailor a hike to your own slower needs, remembering it’s what we do: it may not suit you exactly, but we will give you confidence and tools to plan your own multiday hikes and experience the fabulous rewards of being self-sufficient and taking time to enjoy the journey.
Hike Objectives
This sounds basic, but knowing what you really want to achieve from a hike is essential. Is it scenery, culture, personal challenge, or to see how far and fast you can hike – all good reasons, but clarity about your primary aim best guides your planning. It helps if you are both on the same page!
You might find it odd that neither Helen nor I love walking per se, but we love experiencing wilderness and journeying through different country, rather than destinations or box ticking. For us, the journey is only fully experienced by taking time to appreciate our surrounds, from tiny orchids to vast vistas. So we choose hikes that maximise landscape and/or cultural experiences. That’s not to say we aren’t prepared to do long days or big elevation gains in a day – we will – but they are not our primary reason for the hike but instead a means to a goal, such as amazing views or special campsites.
Your priorities might be different.
Taking time to enjoy the view!
Track and Location
The next planning stage assesses track and general walking conditions, which in turn influences daily distances. Consider your own preferences as you read the list below, and add extras if you think of them. Considerations include:
Well-marked tracks – these are easy navigating and often well-trodden, and easier underfoot.
Unmarked or poorly marked routes - are our navigation skills sufficient? How much extra time to route-find?
Rocky or uneven ground – how demanding on feet, ankles and knees?
Vegetated – are you pushing through heavy scrub a lot of the time?
Snow – for us a little is fun, but we have no deep snow experience or snowshoes so too much gets stressful.
Soft sandy beaches – our bodies aren’t fond of hikes that are primarily beach walking without breaks, but other people love them.
Extremely steep climbs or descents and those that require a lot of scrambling – for us ok now and then but day in day out is demanding!
Climbs that require technical skills – beyond us.
Remoteness – we love remote areas, but they come with additional risks not everyone likes.
Climatic conditions – temperature, wind, rain, snow. Heat is a showstopper for us – we’d much rather walk in rain! Climate heavily influences the season we hike in different places.
Exposed areas – Helen is not keen on highly exposed tracks although a little is okay.
Looks can be deceiving - the views are stunning but fortunately this track is not as exposed as it might appear.
This information then filters out certain hikes. For example – we love Tasmania and although a particular Western Arthurs hike looked amazing, the exposure and scrambling/climbing are possibly too demanding for us. Fortunately, there are so many other options that we can’t possibly do them all!
Also, in many cases, parts of a longer hike can be done as a series of day walks or several shorter multiday walks. You can often skip or reroute around overly demanding or uninteresting sections: you don’t have to strike the whole hike from your wish list. Our local Investigator Trail hike is a simple example where we cherry-picked the best bits. And similarly, The Heysen Trail is the iconic 1300km/ 800mi thru hike in South Australia that we’re often asked about. But no, we have only done the most interesting parts (for us) through native vegetation, so although it’s a great hike ,it’s not one for us.
Hike Selection and Route
Don’t be put off by impressive but somewhat daunting feats of others. Take advantage of and be guided by other people’s experiences – but make your own decisions!
Peruse hiking websites, vlogs and blogs to get a sense of terrain and options. Our early research into the Walls of Jerusalem suggested that most people do a three-day out-and-return, or a three-day circuit. Some do the lot in two or even one day. It seemed rushed for us slower hikers: we’d be pushing the entire way. So we developed a much longer but expanded circuit in the area. We were initially a little embarrassed to share our details – so many days for such a short distance! – but, to our amazement, everyone we met – even young, fit, 6km/h (3.75mph) hikers - drooled at our itinerary. An itinerary that can be altered to suit even shorter daily distances!

Soon after stopping at Trappers Hut in the Walls of Jerusalem for a rest and snack, we met another couple. They were doing the 3 day hike and asked our plans. When I told them, the chap paused and then responded with a wistful look in his eyes, “I don’t mean to sound rude, but that sounds a bit indulgent!”
Similarly, the Investigator Trail near Port Lincoln is advertised as a 90km/56mile, four-to-five-day hike. We did it in seven, but also dropped some of the less interesting parts and split it into two: one three-day hike followed by a four-day hike separated by a rest day. We did this to manage pack weights, water availability, maximise enjoyment, and allow extra flexibility to avoid bad weather if need be, or to allow a less experienced group member to bail if necessary.
Use various blogs, web sites and publications for information, ideas and guidance, but don’t let them proscribe what you do.
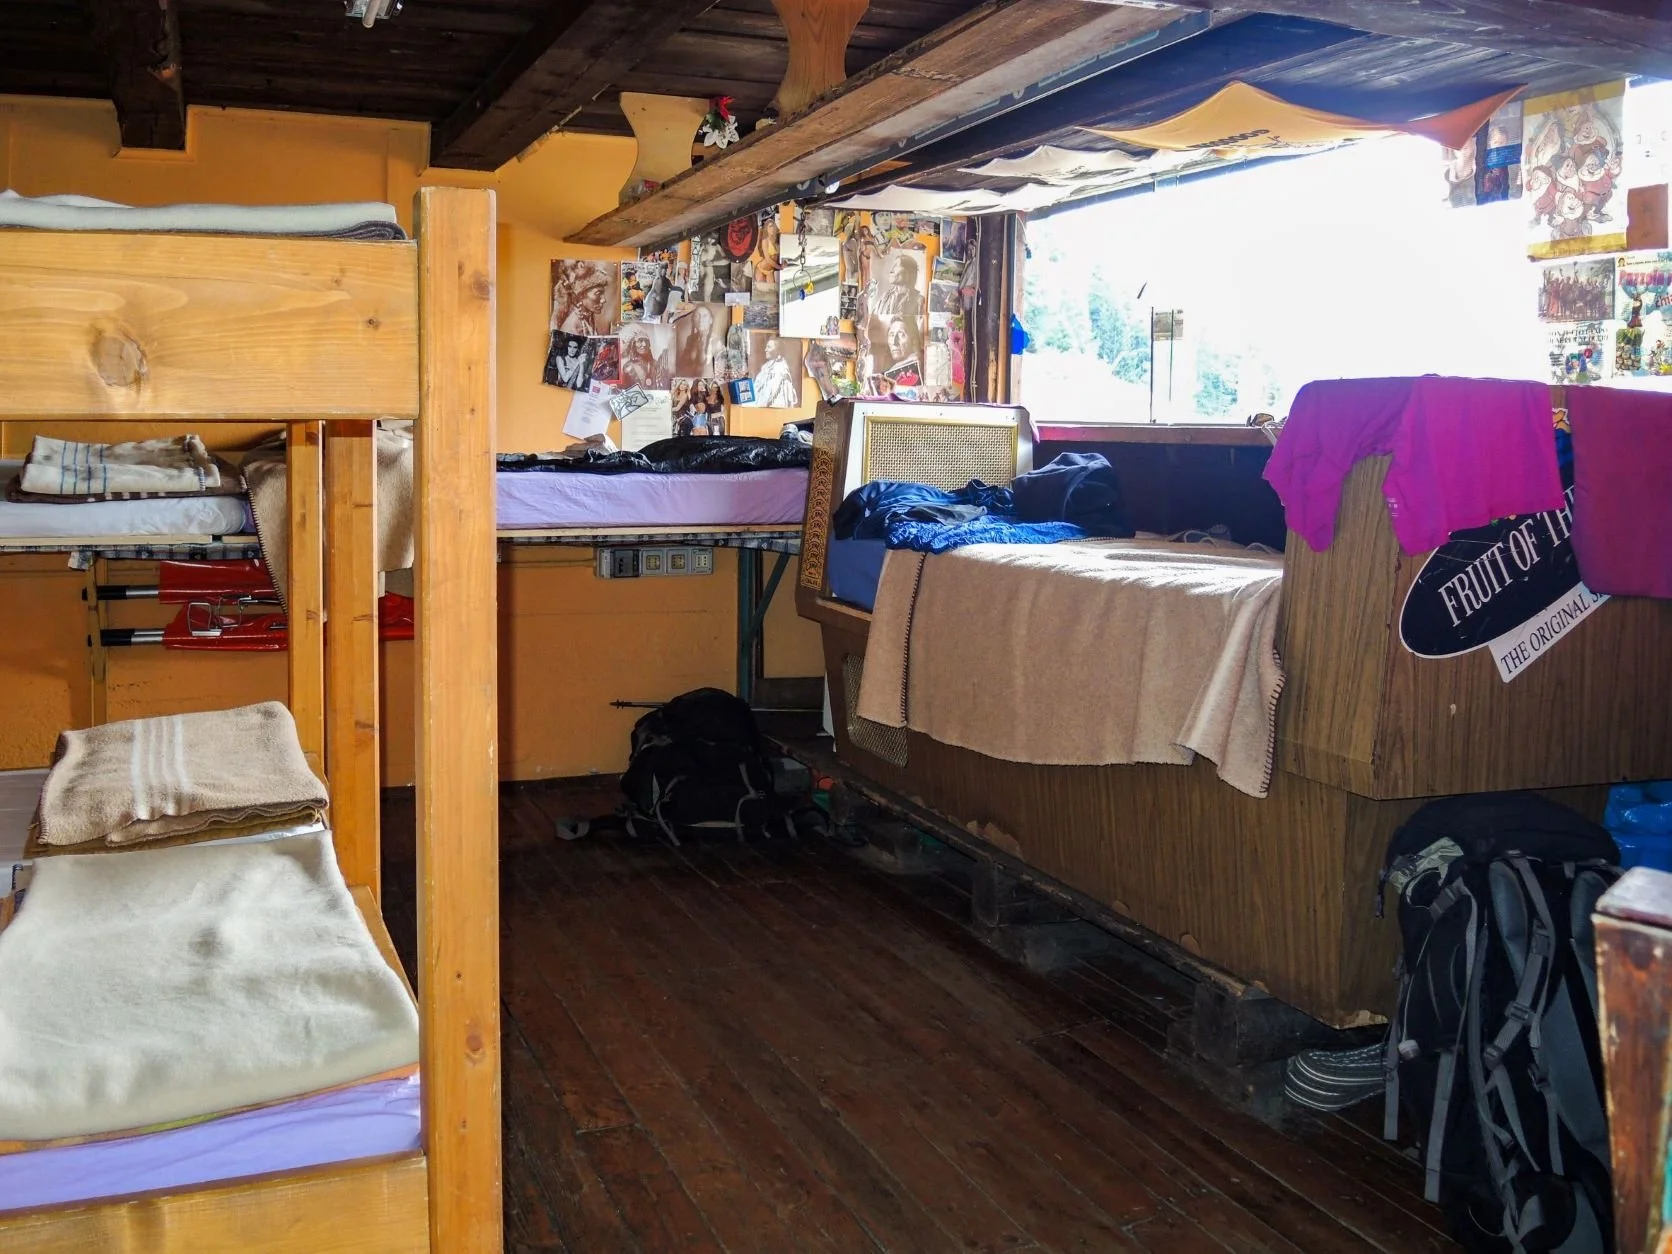
Accommodation
We figure that where and how you spend your nights and sleeping is also important. It’s good to know for how long you’ll be in a:
Tent - bush camp? designated site?
Hut?
Rifugia?
Caravan Park?
Hotel?
B&B?
We much prefer bush camping in our tent than sleeping in huts, even for extended periods – but that’s us. We obviously stay in other places as well, but like to know the mix for our hikes.
Staying in rifugias in Europe involves trading off personal space for a much richer cultural experience, which we’ve always found worthwhile.
You get a feed of local food and glass of wine in the evening, so eating at a shared table and sleeping in a mixed dormitory is fine for a few days. And everybody usually respects each other’s space as best they can. You’ll also find that some more upmarket ones have separate twin share rooms that can be booked.
But it pays to learn some of the basic language:

Per favore una birra !
In extreme weather, a hut may be preferable to a tent. And often when you’ve been hiking for a few days you quickly fall asleep: where you sleep doesn’t seem to matter much.
Respect local rules. For example, we had planned on the Hellismannaleid track to stop short of a protected area and wild camp, just as we did the day before, but there were no sheltered camp sites, and the weather was worsening. So we pushed on and, although we passed a number of good spots within the protected area, they weren’t legal. Sure, we could have got away with stealth camping but, if everybody did that, the exceptionally sensitive wilderness would be no more! Instead we had an extra-long day and a comfortable warm hut for the night. No damage done to us or the environment!
Win-win: have a plan A and B.

Wild camping in Iceland allowed us to get away earlier and wow, what a remarkable place to sleep.
Hike Destinations and Points of Interest
From your research, identify the most interesting places and also second tier spots. Prioritise these shortlisted destinations within the hike when considering potential routes.
Understand the Big Picture
We still like to use large paper topo maps as well as aerial imagery to get a whole of hike perspective. Tiny screens or turn by turn navigation lines provide no context particularly in poorly marked, untracked and remote areas, where context and handrails are more useful navigational aids.
A decent scale helps you visualise the hike in the context of the whole landscape: elevation, terrain and vegetation. We usually buy 1:50,000 topo maps to identify alternate routes. Data layers at that scale are also often available through Government websites – particularly for overseas countries.
Satellite imagery and Google Earth provide more detail, particularly for vegetation density and landcover characteristics.
How long a hike?
You have two variables: time and daily distance. Try not to squeeze one into the other. One will be the limiting factor so let it be – and just let the non-limiting factor go up or down to suit.
From experience, in “easy” walking conditions, 15km/9.5miles per day is a nice upper distance for us that is readily repeatable with the odd 18-20 km day thrown in. We can do more but enjoyment wanes towards the end of the day. We always aim to enjoy our hikes, not endure them! And that distance drops quickly as the temperature rises or if there are large elevation gains (or steep descents).
What distance are you comfortable with?
If you’re unsure, go for a long day walk in a nearby park, and record it on your phone/watch/GPS. Repeat somewhere with rough tracks and more elevation gain.
What is your normal hiking pace? How does it change with elevation gain, track roughness? We normally walk at least 20% faster during our training walks, because we’re not stopping to enjoy views, and Helen isn’t taking photos!
Anyone who comprehensively documents hikes – whether through videos, photos, even pen and ink or watercolour – knows just how much time this takes. If you’re taking time to document your hike, it probably comprises an important part of your enjoyment as well. I enjoy reliving wonderful memories through Helen’s photos, and photographing wildflowers comprises a significant part of Helen’s enjoyment during the walk itself.
Make sure to allow time for the activities you love.
What are the available daylight hours? We plan to get to camp at least one hour before sunset. That allows at least an hour to set up camp and organise dinner. We also allow an extra hour during the day for distractions, delays (eg sheltering during a storm) or to have time to enjoy special spots. If none of those eventuate, we have an hour spare to explorate around camp.
In winter in Australia, you may only have 6 - 7 hours effective walking time (allowing time for breakfast, packing up etc). Hence for us, 15 – 18 km is a practical upper daily limit in winter. We could easily cover much bigger distances in the Icelandic summer, when the sun didn’t set till 11pm! (But still would prefer not to).
Irrespective of how much light you have, it’s a good idea to limit the normally daily time spent actually walking to six or seven hours.
Make allowance for time to stop for rest breaks and lunch – we normally stop every hour for a 5 minute break and every second hour includes a 10-15minute snack break. A decent stop for lunch is also refreshing: 30 - 45 minutes, sometimes longer. Whatever your individual daily structure, try to stick to it. It’s false economy to skip breaks to save time because you’ll become fatigued, end up walking slower, resulting in a longer day than if you had stopped anyway. And I guarantee it will be less enjoyable!
How will track and terrain conditions affect your normal daily hike distance?
This last point is so variable between hikers it is hard to provide guidance. But the following provides insight to the impacts of terrain and track conditions and how we consider them.
Naismith’s rule: It takes 1 hour to walk 5 km. See, we think he already doesn’t suit us: we would never plan to walk 5kmh/3mph on a multiday hike in the kinds of places we go, plus an extra hour for 600m/1970ft elevation gain! That’s a 12% climb. so I’d suggest the rule is for very fit people, without a pack, walking a relatively short distance. Or for people who walk everywhere, as they did in the 1800s when Naismith was alive. But you get the idea.

It took us a little longer than Naismith might have predicted… but we got there and had plenty of time to enjoy the views of Skaftafellsjokull
Trail Hiking Australia offers the following, more realistic, outlook:
1 km/h (0.62mph): Climbing up a steep sloping spur with thick scrub
2 km/h (1.24mph): Scrambling over large rocks along a steep sloping creek
3 km/h (1.86mph): Walking down a steep sloping spur
4 km/h (2.48mph): Walking along a flat track (this pace can be maintained all day)
Throw in some boulder hopping, soft sand, or pushing through scrub and you can see things can change quickly. And when you’re in terrain that’s slowing you down, it’s important from a safety as well as pleasure perspective NOT to try and RUSH.
The guidance from Trail Hiking Australia is still, for us slow hikers, a little optimistic, particularly in harder walking conditions. So as a guide:
I work on a “normal” walking speed of 3kmh/1.9mph
I reduce our expected walking speed down by 25% for each 200m/655ft of climbing that we will do during the day – in other words, allow an extra 20-30 minutes for each 200m/655ft elevation gain, assuming the gain is not steep (I reckon anything over 10% is steep), in which case I allow for a walking pace of 1.5kmh/.93mph (ie 50% slower than normal).
For soft sand walking research suggests a 10% reduction in speed and a 10% increase in steps taken. So, for us 2.5kmh/1.6mph is about as much as we can comfortably manage.
If we are bush bashing, 1kmh/.62mph would be our upper limit. Much of Tasmania’s more challenging hikes include scrambly, overgrown terrain.
Or you might like to try out the Munter Time Calculation that Johanna in the comments likes or for a deeper dive, the Wild Guide , the OmniCalculator and many more. Make sure that you adjust the average walking speed to suit yourself (rather than a recommended standard). Of course, these are all just guides and things always vary once you’re on trail: you can’t predict everything before you make arrangements. For example: an unseasonably hot day slows you down, as do sections of inundated track or frequent deadfall.
Whatever time estimating system you use, “calibrate” it to your own pace and always allow contingency time in your planned day.

Note to self:
add ladder category to hiking speeds list!
Remember, it’s not just about the extra time: in more challenging terrain, you’ll need at least as much energy to walk a shorter distance as to walk a longer distance faster on easier track. So try not to use extra time in the day to squeeze in a longer distance. Plan for your normal walking time, and accept you’ll be covering a shorter distance. ENJOY the day!l
A couple of examples:
From various blogs about tracks beyond the main walk in Walls of Jerusalem, most people commented on track conditions being overgrown with a lot of deadfall. Many people reported losing tracks and needing to re-find them, or having to push through dense vegetation. Navigating some sections would be tricky and we could expect delays so, even though elevation gains were modest (after the first day), we set our target average daily walking distance to 10km/6.2mi rather than our usual 15km/9.3mi.
When we were planning to walk the Bibbulumun Track we noted that most of the days were around the 15km/9.3miles range but there are periods of 20km/12.4mi or a little more per day, with no camping allowed between huts. Our average daily distance was 16km/10mi. We knew the track was relatively flat and in good condition and would walk the longer sections in mid spring, so we had 10 hours or more each day, which is plenty. But we still changed things up a little during the hike to nurse a minor injury through the toughest part of the hike, and then on another day sped up in the rain!
A notorious bouldery gorge section of the Larapinta Trail that requires a swim, combined with a subsequent day on a steep, scrambly spine and descent, regularly catch out hikers who have been covering double the distance on other days. If unsure, plan conservatively. You can always arrive a day early at the end of your hike, but struggling to make a deadline can suck out every bit of enjoyment and we saw a number of hikers in that situation.
Consider Rest Days and/or Contingency Days.
We allow a rest day every 5-6 days, or at least one per week: ie we add one extra day for every 5-7 days of walk time.
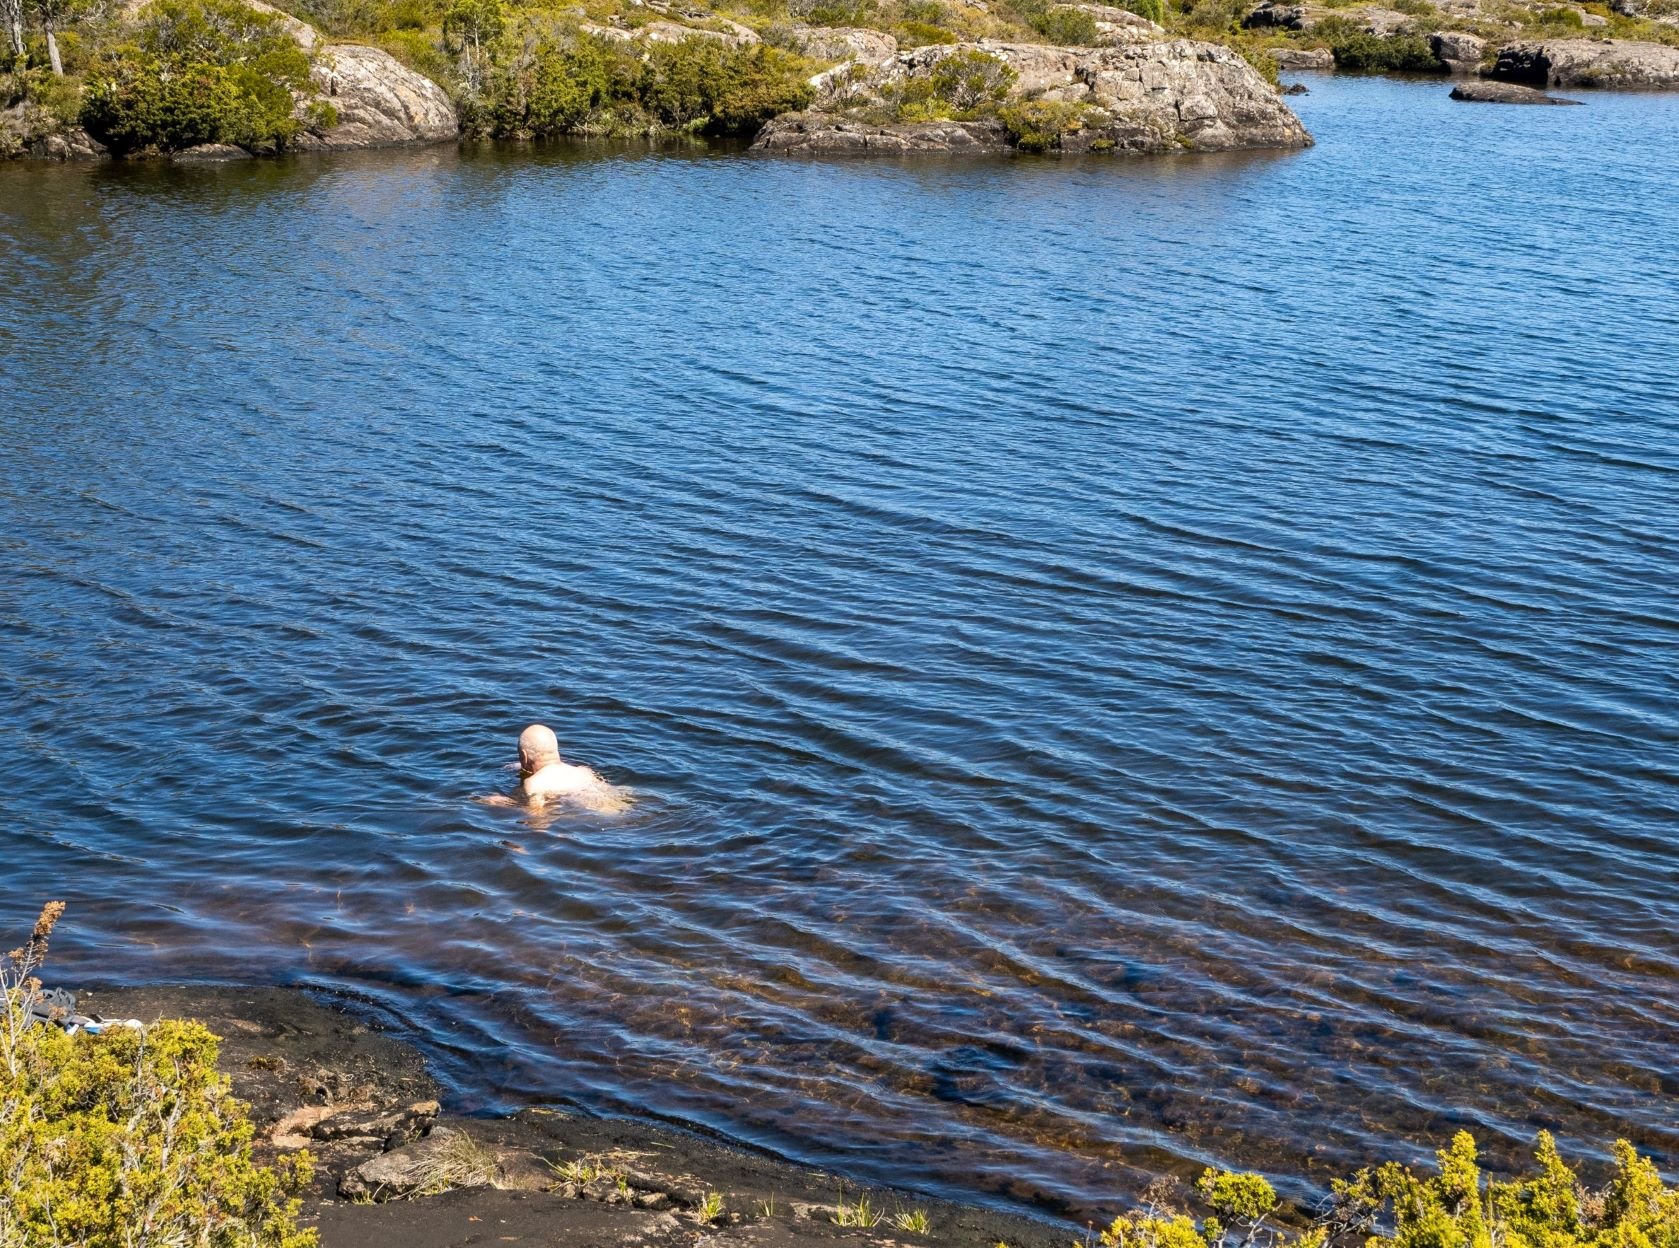
Rest Day
Time for a swim and a soap-free wash
For our Walls of Jerusalem hike we could carry eleven full days of food, but would need a rest mid-way. We allowed for a rest day in the middle of the hike plus extra time at the end so we weren’t running for the bus and could absorb a lost day due to severe weather or extra slow walking due to injury. If we stayed on schedule, then the extra day at the end could be used for a day walk so we chose a pickup point with that option.
For us this meant a travel distance of around 90 km +/- 5 km, over eleven days (nine days of actual walking at an average of 10km / 6.2 miles per day, and two ‘spare’ days).
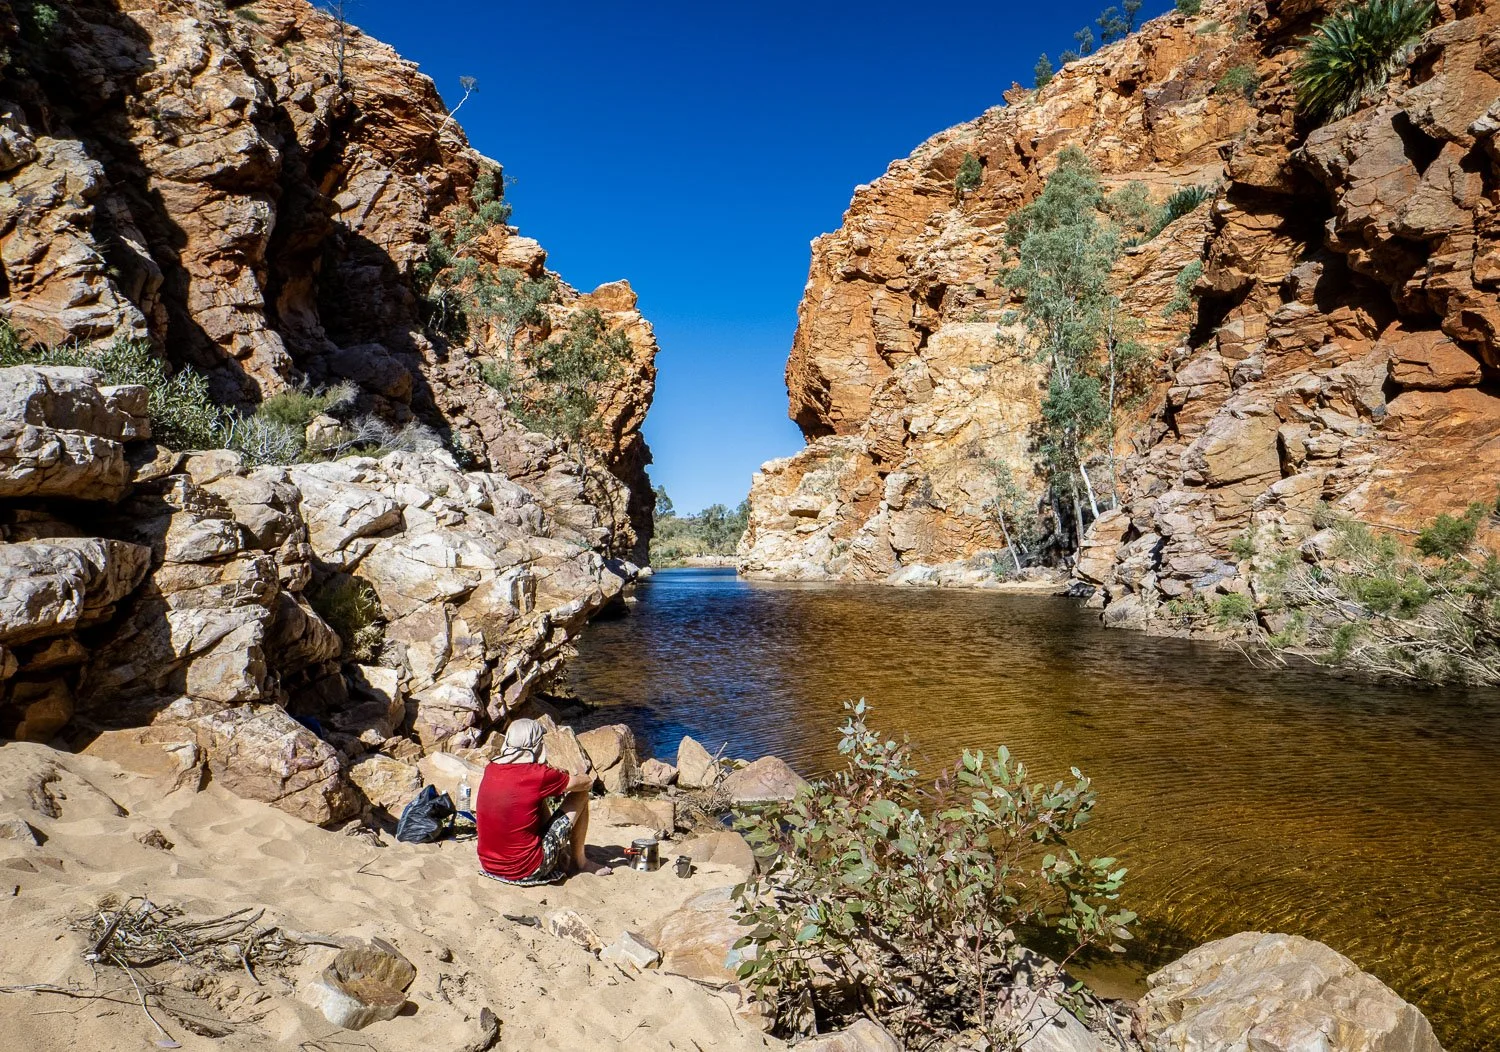
A marvellous rest day at Ellery Creek North on the Larapinta. We watched an eagle snatch fish from the water as we boiled up our cuppa. It was a diamond day to make banner memories.
The more demanding the hike is (relative to your own ability), the more remote it is, and the more potential for extreme whether, the more important it is to plan conservatively. The South Coast Track in Tasmania has river and estuary crossings that are impassable in high winds, tides and/or storms. A day at high elevation is impassable in stormy weather. Do you have time to wait out conditions? There are no intermediate drop off or pick up points unless you are evacuated by helicopter. Because you are dropped off at or picked up light aircraft operating under VFR from one remote end of the trail without road access, low cloud means your flight won’t happen. Have you factored in an extra day or two to allow for this? Read our South Coast Track Planning and Tips for an example of adapting a remote and challenging hike to a slower itinerary.
How much Water and Food?
When you know your base weights (without consumables) and maximum comfortable pack weights (with consumables) you can calculate the weight of consumables you can carry. For me, I can carry an extra 10kg/22lb above my base weight for extended periods, for Helen it is 3kg/6.6lb. Both of us can cope with an extra kilo for a day or two – but usually only at the start of a hike leg. So effectively we have 13kg/29lb of food and water capacity between the two of us. What is your base weight? Your comfortable carrying capacity?
The killer is water. If only it could be dehydrated! Secure water available at the end of each day simplifies matters. You can then, through route planning, ensure that water is available at the end (and therefore start) of each day, even with low daily distances and a slow pace. In Europe you often only need to carry a small amount of water with regular safe watering points along the trail. In Tasmania we allowed for 4 litres(1 US gal) of water per day between us. I still carry more water than we need even with water enroute because it’s amazing how quickly it gets used – growing up in a semi-arid environment with only 250mm (one inch) annual rainfall might have something to do with it!
So, our food and fuel weight capacity at day 1 is typically 13kg/22lb for all consumables including water. If we assume there will be water at the end of each day and we share 4 litres (1 US gal) between us then we will have 9kg/20lb left for food and fuel – that will ordinarily give us enough for eleven days, but we need a spare (in case we get delayed) so that is effectively 10 days planned hiking. (See Helen’s blogs on dehydrated food and menu options).
But as we’ve said, water is the killer: if it can’t be secured daily then food carrying capacity drops fast.
On our recent Larapinta Trail we needed to carry up to 10 litres (2.6 US gal) of water on some days so only had 3kg /6.6 lb left for food and fuel on those days. Our Larapinta Trail hike itinerary therefore needed to meet pack weights on days requiring a heavy water load between food re-supply locations. We took advantage of every official food drop location, and hiked west to east so that we could maintain our leisurely hike pace.
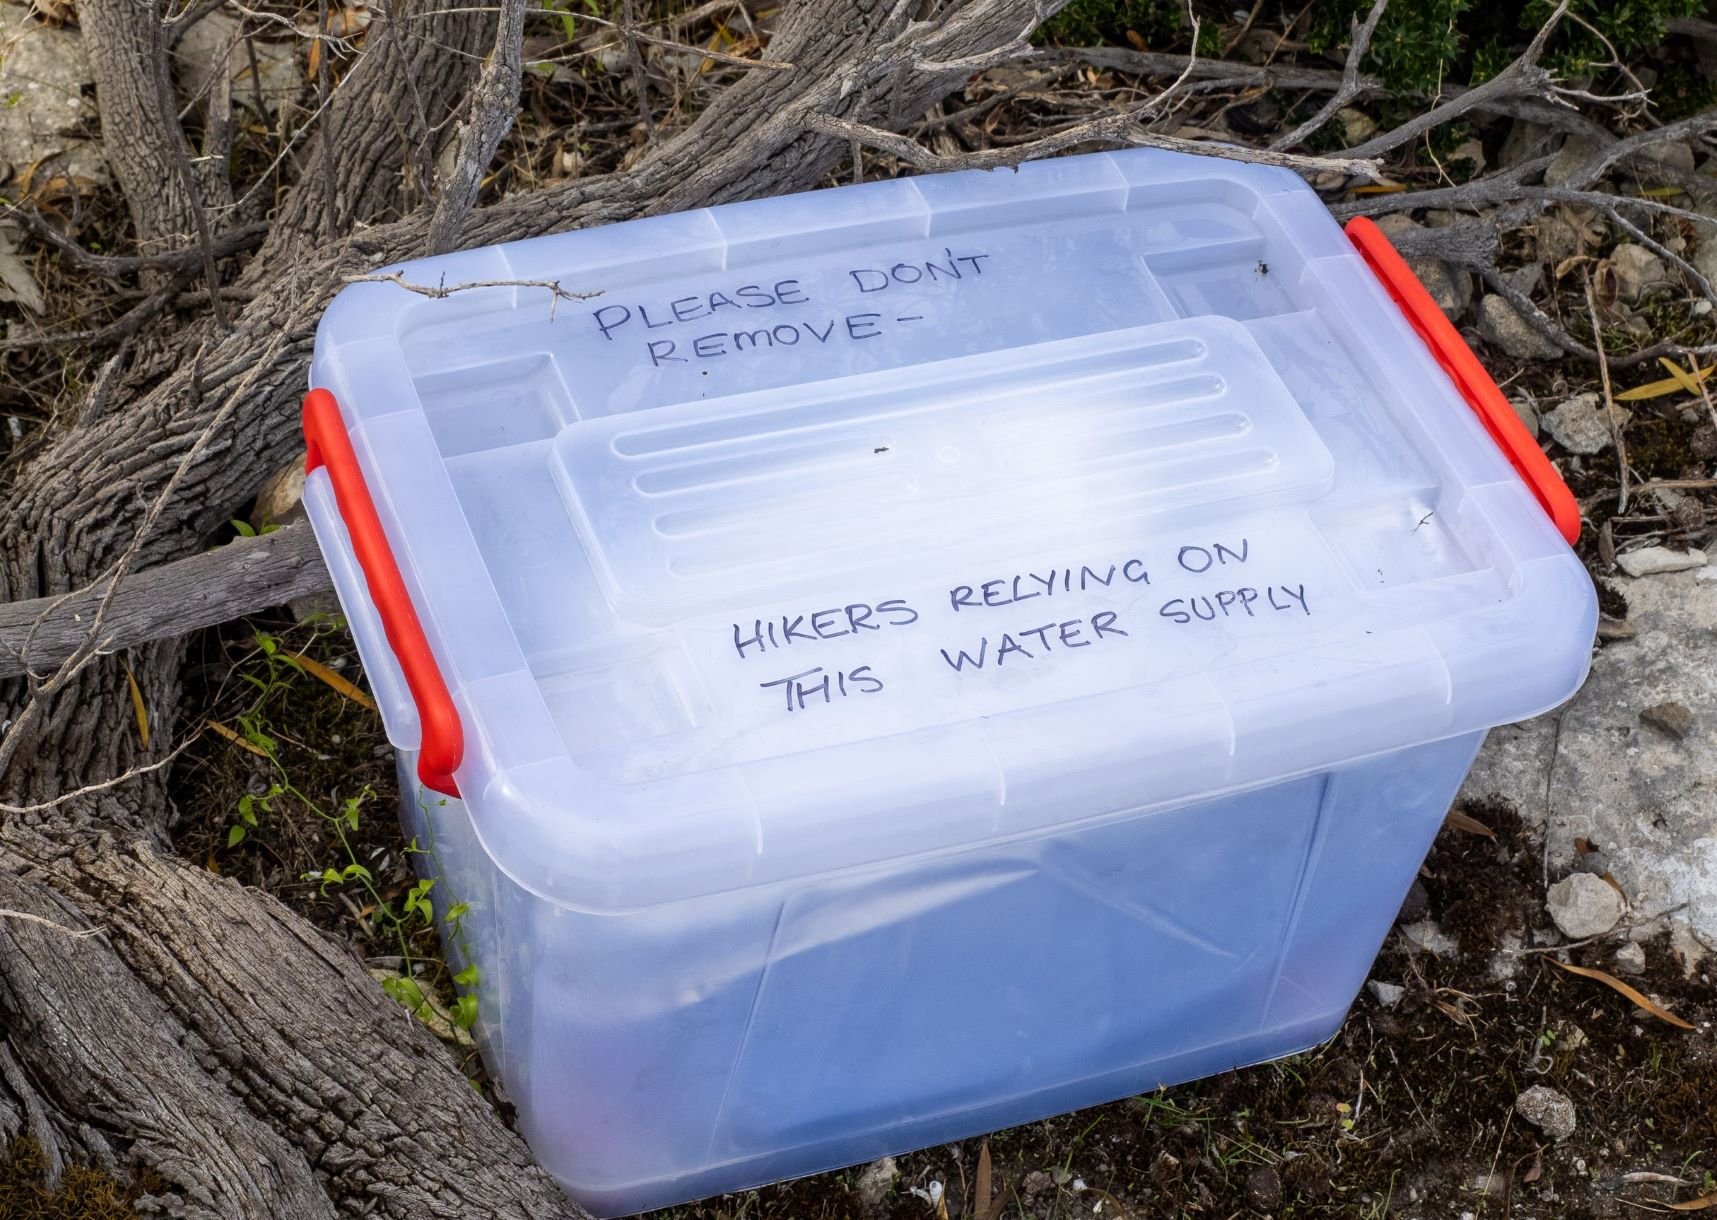
Where access is possible beforehand, food and water drops can be placed out of sight near intended camp sites.
Ensure they are sealed and vermin proof.
And for our Gammon Ranges hike, we determined that water would only be available every second day. So our overall hike length was reduced accordingly to reflect the reduced food we could carry.
Food - Where is it?
Do you need to be completely self-sufficient? If so:
Do you need to resupply?
Where can you resupply?
Do you need food drops?
Resupplies add an extra complication, but they are not difficult so don’t be put off. It can be done through volunteers, commercial operators or yourself (either via post or dropping them off) if you have access. Rest assured that if it’s a long multiday hike, and not in an extremely remote location, then at least one of these options will be available. For example:
Bibbulmun Track – Visitor Centres supported by volunteers and local Councils store your resupply boxes for you.
Larapinta Trail, (Northern Territory), and Wilderness Trail (Kangaroo Island SA) – Commercial operators help for a reasonable price.
Investigator Trail, Australian Alps Walking Trail – self-placed drops.
Can you purchase meals along the way? Buying food enroute is great if you can afford it. We planned our hikes in the Central Highlands of Iceland to take advantage of a couple of cafes. We didn’t have to, but we could lighten our packs (always welcome), enjoy some local produce and culinary culture, and contribute to the local economy. If you want basic infrastructure around to support you, then you need to support it!

Local cafes along the way (here, Mont Blanc) are a great way to sample local produce, experience cultural differences, support the local economy, and add variety to daily meals.
Map Routes of Interest
The first thing to do is get a map. It doesn’t matter if it is electronic or hard copy. We are old school and always buy hard copy maps of the area, finding them more useful for a good overview of the hike. When you are a slower hiker, common itineraries will likely be too fast, so you need tools to tweak routes to suit.
I use open source QGIS package to fine tune distance and elevation gain calculations if we are visiting areas not already well documented. But you can use any other spatial software, even Google Earth. Or, if you prefer, just stick with hard copy maps; make a few photocopies so you can write or draw routes on them. But be aware that information on hard copy maps is not being updated as regularly as it once was (ie before digital mapping products became widely available) and so some of the finer details on the maps might be outdated.
If you’re going electronic, then data layers can be found in Google Satellite, Open Street Map, government spatial data sites, and Parks web sites. Hike planning software apps include Gaia, OutdoorActive, Strava, and more. These all help build a better understanding of options. Commercial packages we’ve used include Avenza Maps, All Trails, Wiki Loc, Mapy.cz and FarOut. Many people use only one app for certain trails.
We mark campsites, water supply, food supply points, tier one and tier two points of interest, as well as access and egress points.
We then highlight/draw on the maps trial routes using existing tracks that connect camp sites and points of interest, and estimate distances between camp sites, water and food sources. If designated camp sites seem too far apart, consider wild camps if it’s legal in the area to create shorter days (notingyou will most likely need to carry extra water if you are wild camping, at least in Australia).
Once you have a first draft of your route, identify potential escape routes. It is always good to have a Plan A and a Plan B. If something goes wrong on the hike: eg an injury or deteriorating track/weather conditions, then you need to know options AHEAD OF TIME for how and where to abandon the hike. A couple of examples:
In our Walls of Jerusalem hike, even though we got into some remote areas, we planned the route so that we always had an alternative exit route so we were always within one day’s walk of descending from the plateau in caser of a storm.
For the Gammon Ranges, the weather was unseasonably hot, so we reviewed our Plan A and Plan B when we arrived which meant we could develop Plan C on the fly for a less demanding walk than it otherwise would have been.
For well-known hikes (eg Overland Track, Bibbulmun Track, Wilderness Trail, Larapinta Trail), main track location and distances between camp sites or huts is published and readily available online. Similarly, in National Parks, park brochures provide information on trail routes and distances in popular walking areas. You can also try local hiking groups as they are normally helpful and informative.
If this information is not available, then I use the maps we have and any reliable recorded GPS data sets to estimate distances. If you’re downloading tracklogs, use reputable websites and be aware that other hikers might lose the track or go on side trips along the way!
This is a base map for our Investigator Trial hike planning. Blue lines are walking trails associated with the standard 4-5 day 90 km hike. Yellow stars are potential camp sites, green triangles possible water points (assuming rainwater tanks have water in them), pink dots Parks designated waypoints associated with the walking trail. Numbers along the blue lines are distances between waypoints in metres. I used this information along with Park brochures to develop our 7 day hike plan for our 70 km with rest day version of the Investigator Trail in Lincoln National Park.
Elevation gain and loss information is also usually available for popular hikes through friends groups, commercial packages, or tracklogs posted online. Similar warnings apply regarding reputable sites and side trips.
If not, they can be estimated by counting contours on hard copy maps. Or, if you’re going electronic (you by no means need to be an expert) you can use Google Earth, Alltrails, or you can download digital elevation data yourself. Most governments have central national elevation data sets available free online (for Australia via GeoScience Australia web site). These data sets are usually sufficiently accurate to support hike planning. You can then use QGIS or similar spatial packages to extract information along your intended hike route.
Create a Table of your Hike
The trial route is then put into a table with distances between camp sites and elevation gains for each day (if you have it). That is easily done in excel or similar, or just on paper. The information lets you estimate the duration of each day – based on your assumed walking pace.
You then adjust the route to keep the total daily walking time within your preferred set time. Check water and food availability, and highlight access and egress points – that helps identify bailout options if you need them during the hike. Adjust the route again if need be.

An example hike planning table
The above table is an extract of the first 7 days from our early Larapinta Trail planning. To the left of the table is the information available through the Northern Territory Government web site. The elevation gain data in the table was taken from freely available track logs published on the Wiki Loc web site.
Many tour groups spend one day per section of the hike, but there are usually designated campsites mid-way through each section. Use them to keep daily distances down. We allowed a rest day after 6 days at a well-known resupply point (shaded green in the table). The other colour coding in the planning table is blue (water available at the camp site), or orange (no water). That meant we would need to carry two days water at the end of the first six-day segment. That is ok because our combined pack weight at the start of day 5 (when we will need to load extra water) is around 22kg/48.5lb, so we have capacity for an extra six litres of water (1.6 US gal). Whilst elevation gains on these last two days are significant, the distances are short, particularly on the last day, where we should easily reach our destination by lunch time.
The end result: we took 23 days including rest days to do our 230km/143mile hike, while some commercial groups power through each section in a day for a total of between 12 and 14 days with no rest day. Good on them… but not for us!
And if you check out our Larapinta Trail planning or itinerary posts you’ll see that we applied the same logic to hike west to east (for a range of other reasons).
We like to take our time to absorb and enjoy views.
You can also highlight access and egress points – that helps identify bailout options.
Daily distances and elevation gains can then also be used to estimate the relative difficulty of each day. That can be done intuitively using tabulated data… but I’m an engineer, so I’ve developed a formula based on some online searches, adapting the information to better reflect our profile.
I use the difficulty indicator to finetune hikes by ranking the days in a hike, and try to avoid clustering harder days together by adjusting campsites to vary daily distances. If that isn’t possible then I plan more frequent or multiple rest day(s) within or around the clusters.

Fimmvorduhals trail Iceland
Sound daunting? It’s actually pretty simple, so just start with a shorter multiday hike and see how you go! Or practice in your local area with day walks. You’ll be surprised how easy it is and how much more enjoyable the experience is when you’re walking to your own schedule and objectives. And all that background planning will help you make adjustments as you always need to, and good decisions during the hike.

A welcome beer on the TMB.