
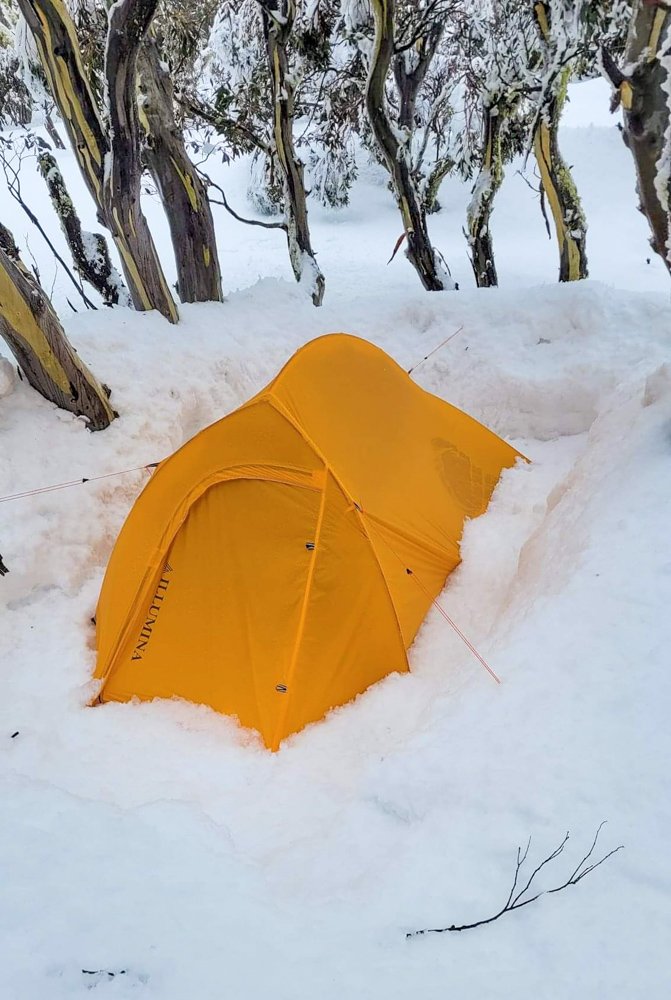
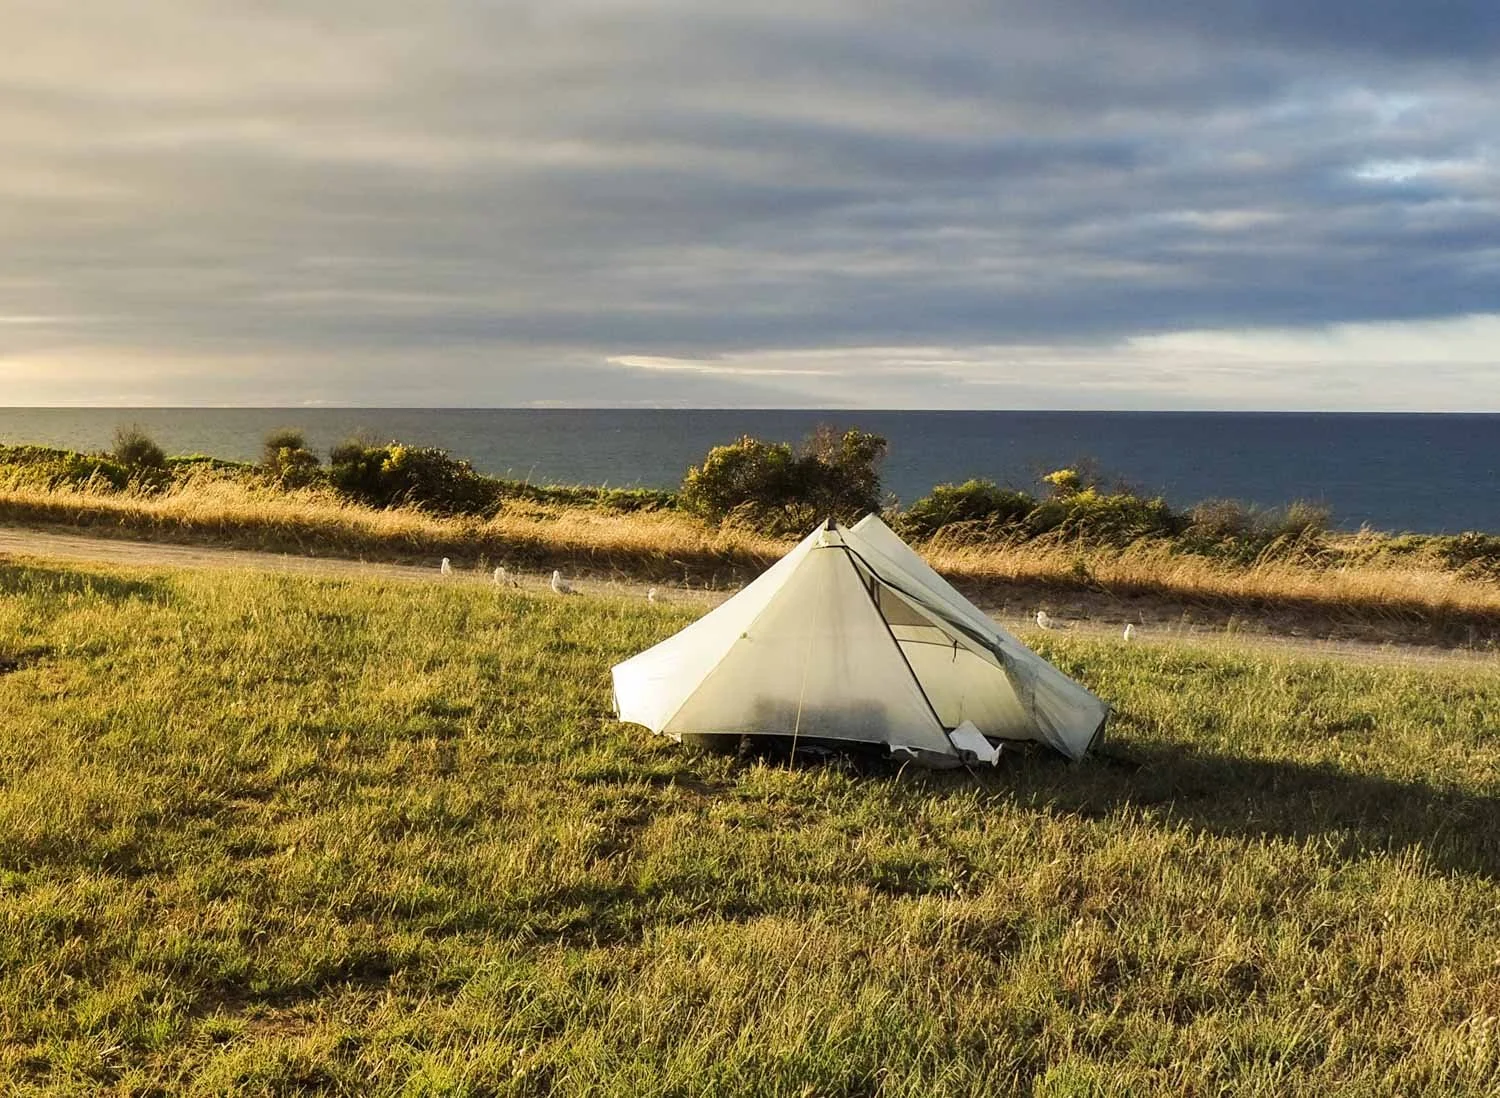
How to Stake and Guy Your Tent: Snow, Rock, Sand, Platforms and More
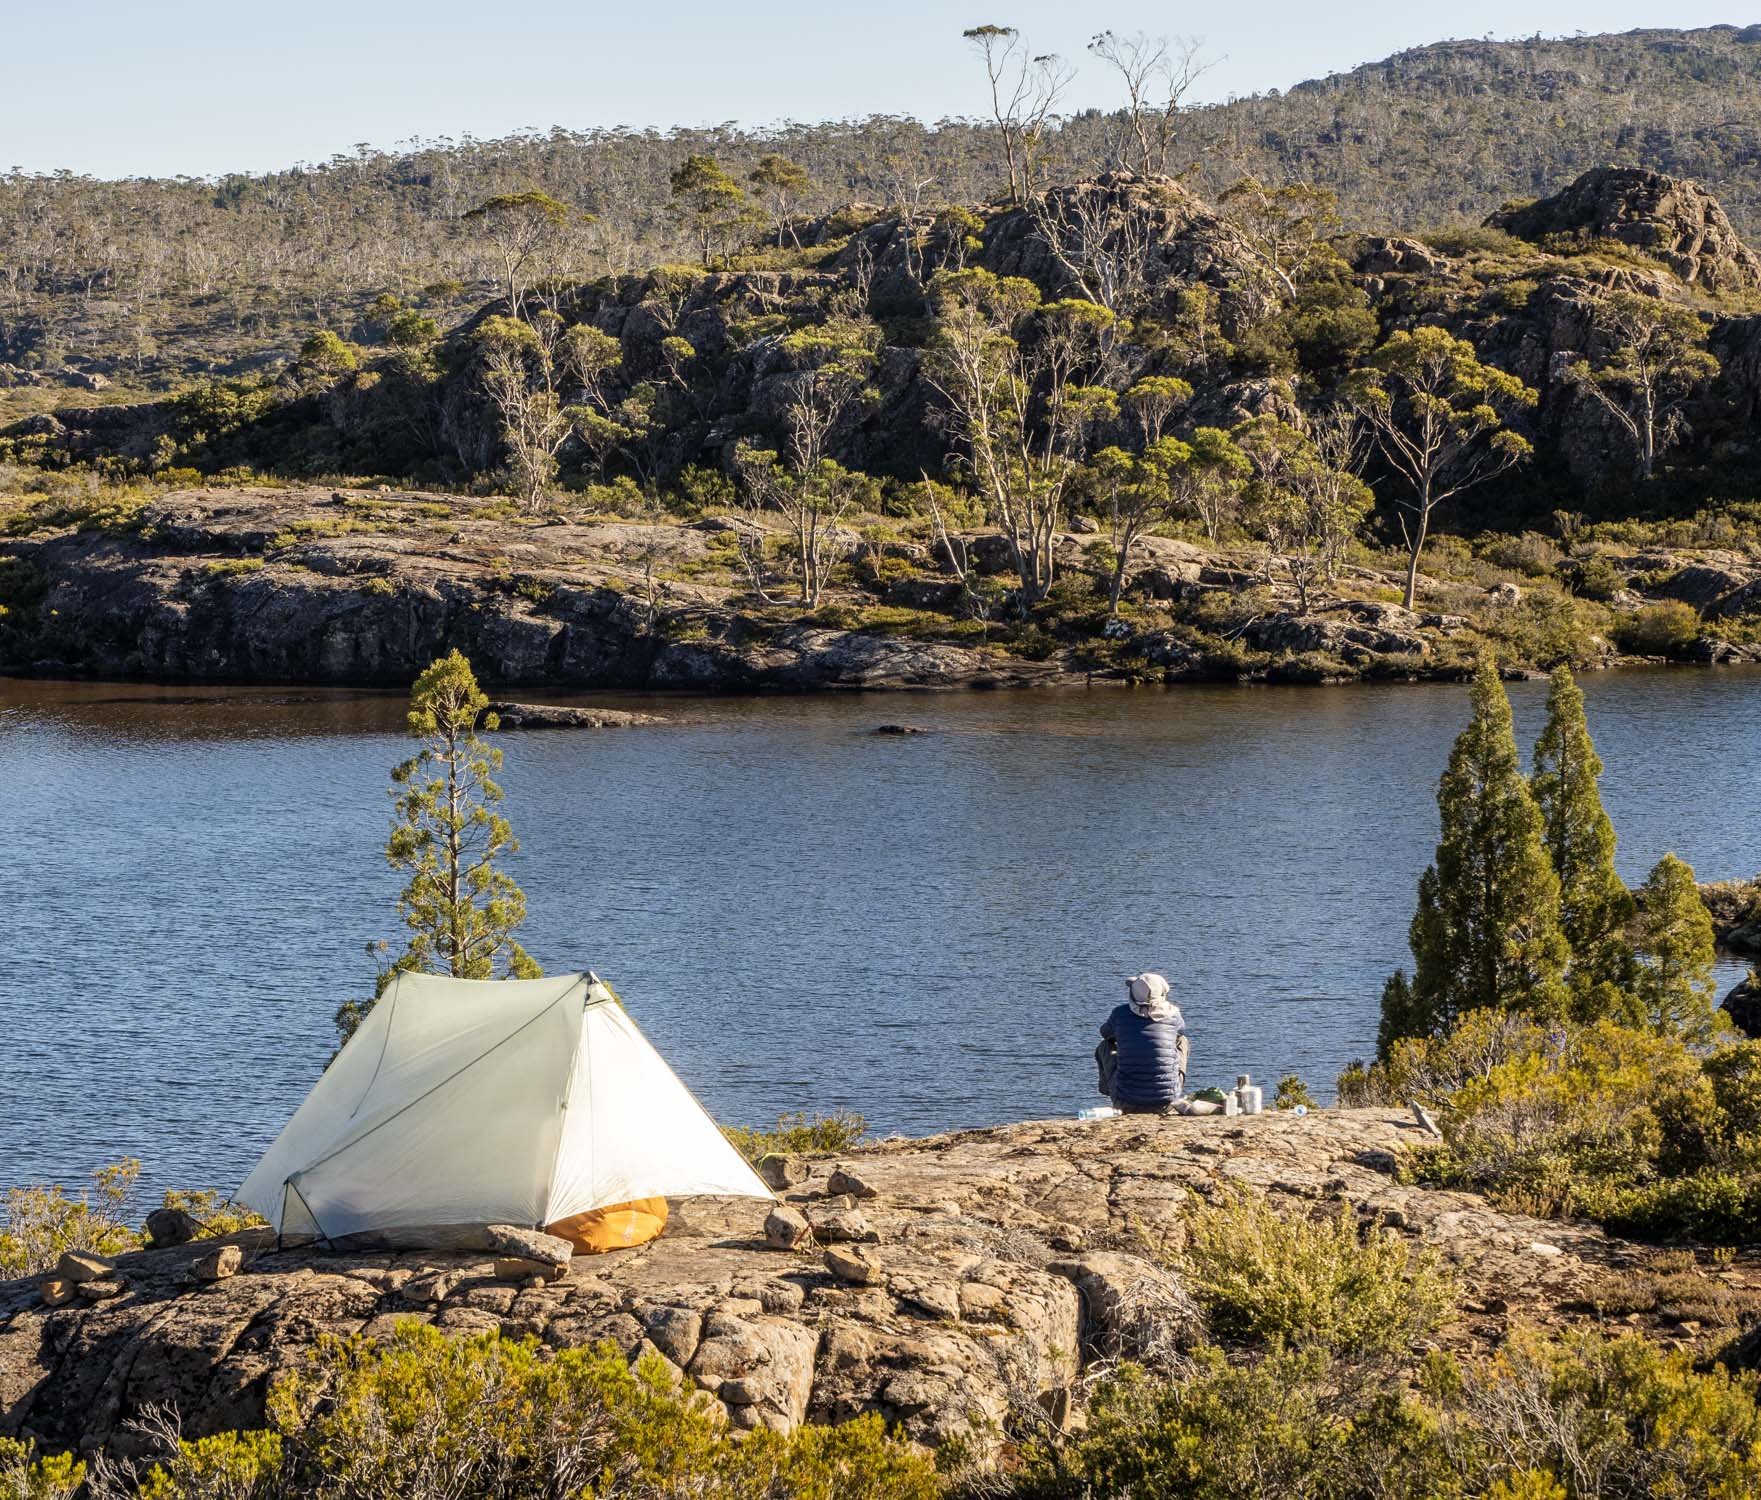
Solid granite, no problem! Walls of Jerusalem NP, Tasmania
This article is designed to be read in conjunction with Part One, which describes how substrates have different physical and chemical properties that affect how they interact with stakes of different shapes and sizes. Let’s now look at the kinds of real world substrates we’re likely to encounter, and how we can best anchor into them. We’ll consider:
Different Substrates (rock slabs, hard soils, medium loams, stony soils, sand, gravel, snow and scree, shallow sod over rock, dense tussocky vegetation, rooty soils, and tent platforms and pads)
Guylines (length, stretch, strength, absorbency, line extensions, basic knots and fastenings)
Anchoring techniques (rocks, deadman, modified deadman, tent platforms, snow, double-staking, logs and branches
Using your Stakes (choice, number, tent considerations and deployment tips)
Different Substrates
As we saw in Part One, matching stake to substrate is essential to get the best holding power but, for backpackers, weight and size mean there is a compromise, because none of us can carry a set of 1m star droppers!
As well, hikers invariably recommend the stakes that work best for them, but this depends entirely on the substrates on which they most often camp, substrates that may be completely different to those you usually experience. Factor this into your decision making when perusing forums, groups and blogs, including this one!
If you’re unfamiliar with the different stakes mentioned in this article, jump to ‘Different Stakes’ in Part One for pictures and descriptions.
1. Solid Rock

A tunnel on frosty Mt Blackwood, Tasmania (Image Credit: Esmeralda Jones)
These are straightforward because you know that no stake, even a titanium nail, is going to penetrate granite. Nor will you be able to bury a deadman, so the modified deadman technique (see below) and other workarounds are the only options left.
2. Hard, Dense Soils
Hard soils with small particles have excellent holding power when dry. You may need to hammer in stakes, in which case choose Ti nails, Ti wires, needles, Eastons, or mini Groundhogs in aluminium or ultralight titanium (Disclaimer: slowerhiking was sent the ultralight Pioneer stake for testing). If the soil is damp and you can push stakes in with your boot, almost any stake other than a sand/snow stake will do. Some titanium V-stakes are horribly easy to bend – take extra care or use DAC J stakes.
3. Average/Medium loams
These are medium-firm but not hard (rarely soft in Australia). You can get away with almost any stake except sand stakes, which won’t drive in, or nails, which are too short to hold. If rain is forecast to significantly wet soil, err on the side of stakes with more holding power rather than less: thicker stakes rather than thinner, longer stakes rather than shorter ones. If these substrates are vegetated rather than bare, veteran Australian hiker Roger Caffin points out that fibrous plant roots almost always mean that even Ti wires will provide sufficient hold.
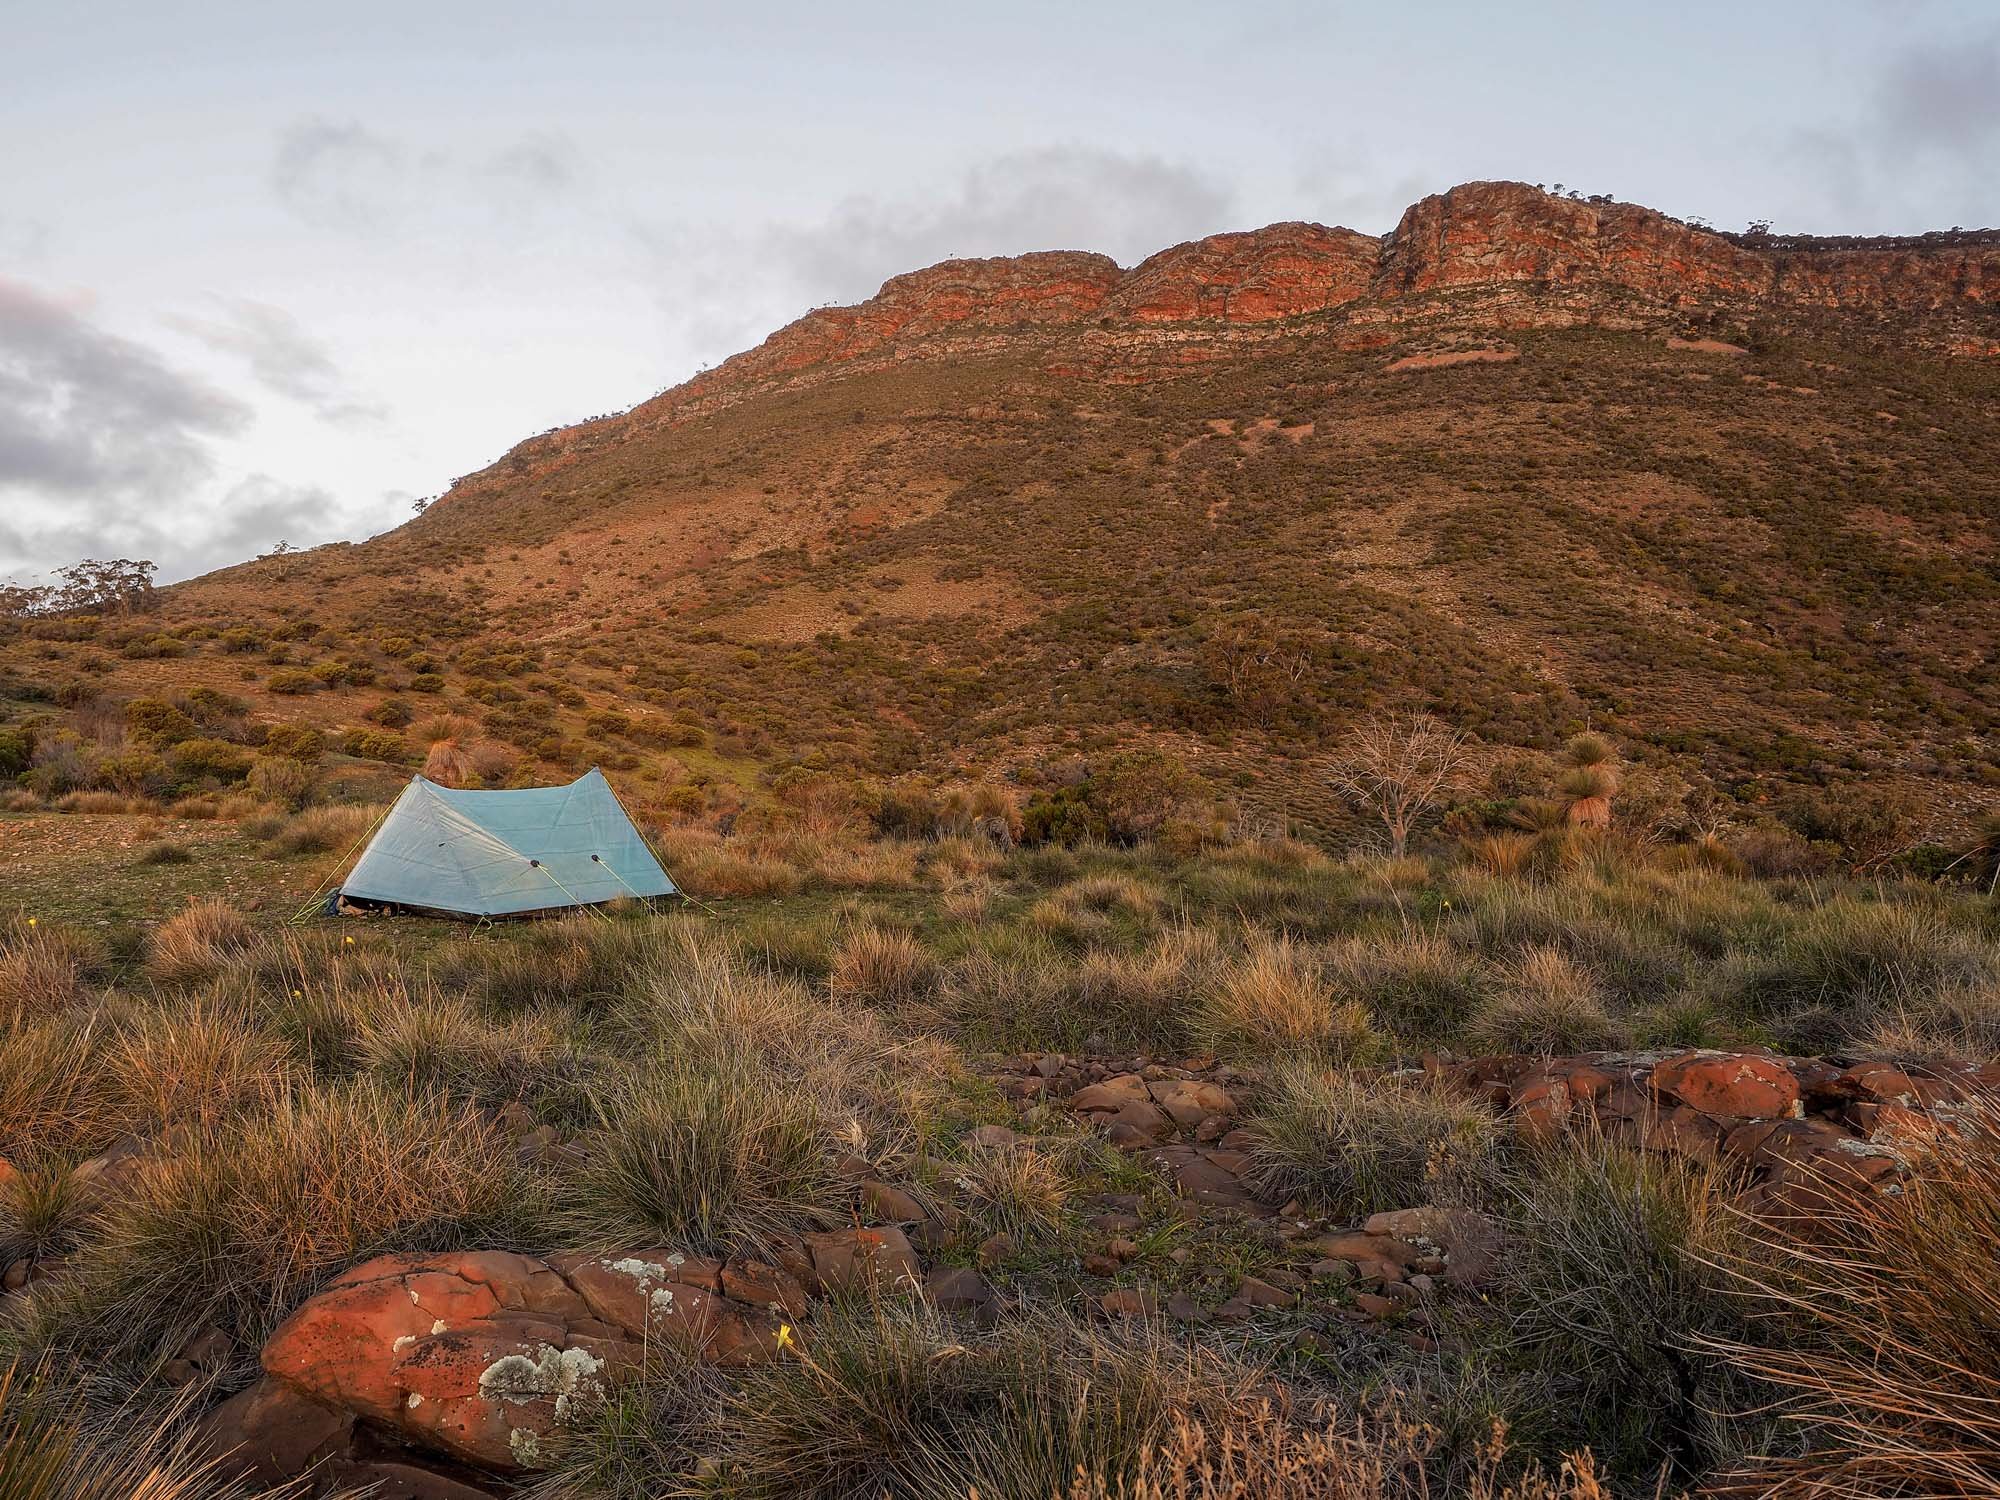
4. Rocky/Stony Soils

Dry, hard, rocky soil in the Gammons, South Australia. And yes, we have pitched on similar ground!
Rocky soils are difficult to stake. You’ll get the first few centimetres in (if you’re lucky!) before striking a rock; often, you discover this as your V-stake or shepherds hook folds under your boot; this has happened to us numerous times in South Australia. Sometimes you can use stronger nail stakes to drive through or crack softer rocks or rock strata, or needles to find their way through gaps.
Roger agrees:
“I have hammered Ti wires into crumbly rock – a kind of mudstone —in parts of the Blue Mountains in Eastern Australia, which I would not attempt with any sort of aluminium pegs. The rock I was using as a hammer disintegrated after a few blows!”
Other times, you can try different spots and luck upon a rock-free one. However, this is problematic for tents with little play in staking position, such as the strut corners of the Stratospire Li, the corners of the XMid, or perimeter guyouts along the bottom edges of domes and tunnels, especially at doors. In these cases, line extensions, modified deadman anchors and double staking techniques are great alternatives (see below).
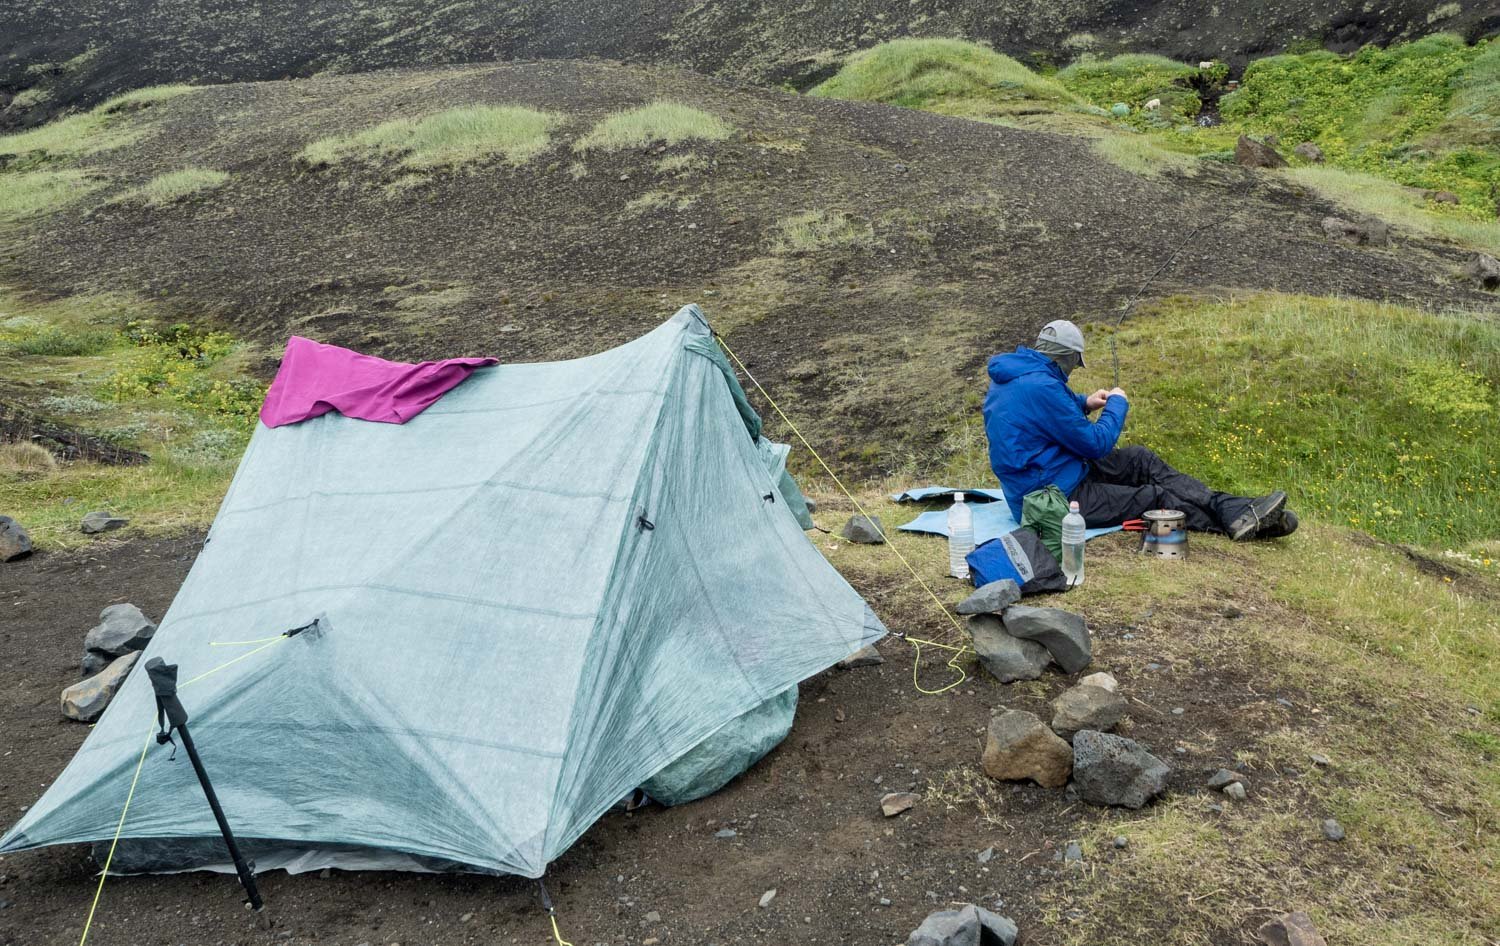
5. Sand, Snow Gravel and Scree

Loose, deep gravel in Iceland. We used lumps of lava to anchor our tent this time, but burying our stakes as deadman anchors would have been effective had we not been near an outcrop.
Sand/snow stakes and anchors work in all of these substrates, especially if you attach the guyline halfway down the stake and push it in. However, backpackers usually prefer lighter, less bulky stakes, and deadman anchoring using sticks, bags or conventional stakes is the most weight-efficient and effective staking method in any substrate that is loose and easy to dig.

Larkshead or loop a guyline extension through one of the lower holes in a sand or Titanium V stake to transfer the loading to the bottom part of the stake for superior holding power in loose substrates.
In snow, the T-deadman (described later) is the most common technique. Many hikers also use skis, snowshoes and skipoles as anchors (see below).
6. Shallow Sod over Rock
This is a surprisingly difficult substrate, not least because it often occurs in sensitive environments where you can’t disturb the vegetation. You need a large surface area to hold in the spongey sod, but the rock is too close to the surface for a long stake.
Delta ground anchors are one solution, but when you think their 49g weight is equivalent to about five mini groundhogs or four Eastons, full-sized groundhogs, or J-stakes, it puts their holding power into perspective, especially when using double staking techniques and deploying the smaller stakes at the correct angle. Which option is the most versatile?
The smaller, lighter Titan anchor (22g/0.78oz) with a large surface area has potentially excellent holding power but user reports are mixed. This may be because pull tests have been conducted at different angles — we saw in Part 1 what a difference this can make.
Other alternatives include a wide, short snow anchor (Roger points out that his DIY titanium snow anchors, below, slice through not only snow but also alpine turf), or as for sand, a sand stake, snow anchor or v anchor with the guyline extension attached near the bottom so that the attachment point is buried as deeply as possible, with the guyline cutting through the sod as it is tensioned.
7. Dense Tussocky Vegetation

A challenging XMid pitch on alpine buttongrass, Mary Creek Plain (Image credit: Caz Derby)
Sometimes the problem is not the substrate itself but the dense vegetation growing on it! Your stakes may not be long enough to reach soil, let alone penetrate it, especially if you have short stakes!
Australia is a huge and variable country, from baked arid deserts, to tropical rainforests to temperate dry sclerophyll forest and alpine moss, with every conceivable substrate… and vegetation. Sometimes, as in alpine grasslands and shrublands, you can flatten clumps a little, or stake into the base of them – fibrous rhizomes are remarkably dense and hold stakes well.
A small clearing amongst the spinifex in arid central South Australia. Unlike most tussocky vegetation that can be smoothed down and/or anchored into, spiky spinifex will easily poke holes in your expensive tent. Fortunately, spinifex is an exception!
Roger explains:
“I have pitched on sand a few times, but 98% of the time I camp on soil with vegetation. The presence of vegetation, or wide-spread root masses, completely alters the situation. This applies in the wider Blue Mountains, in the Kosciusko region, and I’ve also seen it across Europe on some very long trips.
“I carry a couple of 7mm tubular pegs to serve as almost deadman anchors at the ends of my tunnels, but for the rest I use good Ti wires or shepherd hooks. I am happy to use the wires at the ends of my tunnels as well. I have never had any problems in our soils with these: the vegetation holds far more than the bare soil.”
Vegetation varies and some substrates are notoriously sensitive: moss can take decades or, in Iceland, even centuries to recover, so tread lightly. However, if you are not wild camping but in campgrounds, pitches are almost always bare; this may mean the soil is nicely compacted… or soft and muddy.
8. Rooty Substrates

Plenty of tree roots, Tasmania
These substrates can be difficult to anchor into as well, especially with thick stakes. Try thin titanium nails and wire stakes; you may need only one or two of them, or line extensions to work around roots.
9. Tent Pads

Firm tent pad, Kangaroo Island Wilderness Trail before the bushfire.
Tent pads are usually highly compacted; try ti or steel shepherd’s hooks, nails and needles, short Eastons and Mini Groundhogs in aluminium or titanium. We’ve struggled getting full-sized groundhogs to penetrate. However, the substrate is generally homogenous without rocks, so you can often tap in less robust stakes.
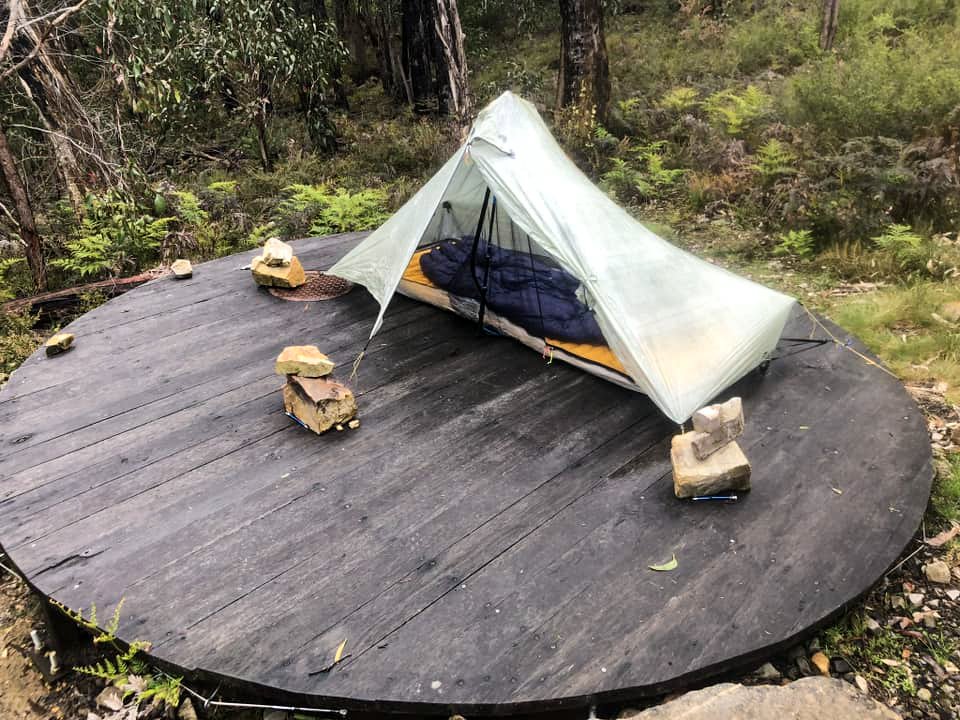
10. Tent Platforms

Duplex, Overland Track, Tasmania
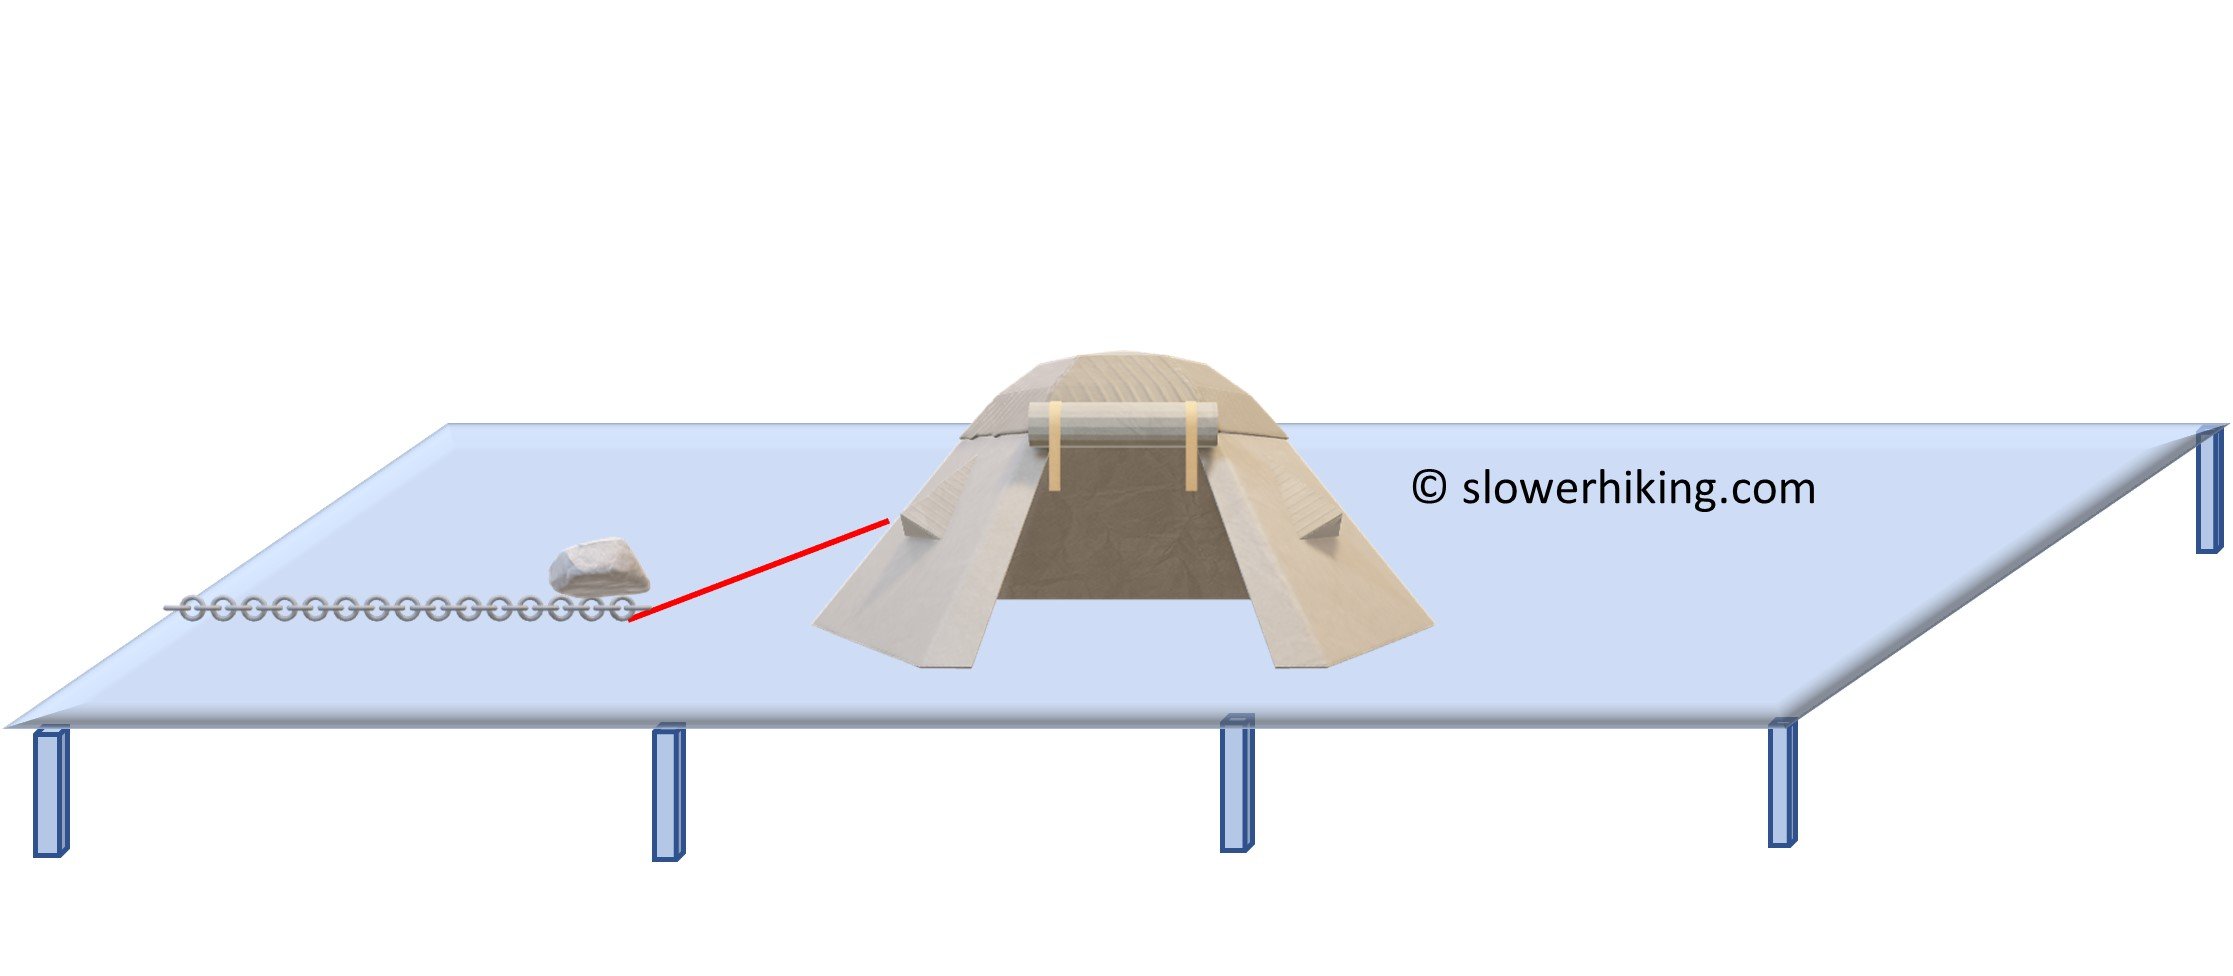
More than any other substrate, tent platforms are a cause of angst. They are usually made of timber decking, with narrow gaps between the slats. New platforms may be FRP (fibreglass reinforced plastic) grating.
Tent platforms have chain or wire either coming to the centre or around the perimeter, to which you attach guylines. You’ll find nails around the perimeter, and sometimes also in gaps between timbers. See anchoring techniques for specific tips.
Guylines and Line Extensions

Guylines connect your stake to your tent and, as we have seen in Part One, their length and angle contributes to load transfer and the stake’s holding power.
Line Thickness
The loads borne by even very thin guylines are unlikely to break them if they are of high quality: it is usually abrasion or knotting that causes failure. We had 1.3mm dyneema line on our earlier Duplex model. That line has a breaking strength of over 90kg (200lb), more than enough for what they are likely to experience, but long thin lines like this are horribly prone to tangling. Geoff and I swapped out our thin line for slightly heavier line for this reason rather than strength, and ZPacks changed to thicker line on subsequent tent models. The weight increase is negligible even on ultralight tents, but Roger has this neat solution:
“On my blue tent I have Spectra guys less than 1mm (0.04”) diameter. They do not tangle, but there is a trick here. I have nothing at the ends apart from a very small loop (to go over a wire). I find that when there is any weight at the end the guys do tangle, but without any weight I just chuck the loose guys onto the middle of the tent and roll it up. Works fine for me.”
Roger’s MYOG tent with 1mm Spectra guylines (Image Credit: Roger Caffin)
Line Material
As we saw in our strong wind articles, guylines should be non-stretch to most effectively transfer load from the tent to the stake and soil. Guylines should also be strong and non-absorbent, especially for below zero conditions and snow, where you don’t want the line to freeze in place. In Australia, you can find relatively cheap spectra line in sailing supply shops.
Some dyneema (aka spectra) line, like our yellow one from Zpacks, comprises a core and a sheath. Lawson ironwire is extremely strong (the 2mm has a breaking strain of 294kg (650 lbs) but, after we bought ours, we realised it’s massive overkill: your tent will be pulled apart before the line breaks, and you always want your line to break before your tent! Both the zpacks and Lawson line should have cut ends melted to maintain cord integrity and prevent separation of the weave or core.
Hilleberg 3mm guyline (80kg/176 lb breaking strain) has vectran interwoven with polyester so there is no sheath to slide; vectran has even less stretch than dyneema which can slip or separate over time.
Line Length
Guylines that come with reputable tent brands are usually of optimal length to create the best angle for load transfer. Resist the urge to shorten them to save a few grams.
Hardware, Attachments and Knots
As we saw in Part Three of Tents in strong wind, clam cleats are widely considered more reliable and less likely to slip than are linelocs, particularly on very thin line. Clam cleats are easy to undo one-handed with cold clumsy fingers. Worth knowing too are knots such as tautline and midshipman’s hitches and the trucker’s hitch (aka dolly knot, lorry driver's hitch, harvester's hitch). If your lineloc slips, place a slippery half hitch below it. Watch Andrew Skurka’s excellent video if you’re considering knots instead of plastic hardware to adjust your guylines.
It’s worth half-hitching to stakes or looping the line around twice to prevent abrasion as the loop slides around the stake, particularly with split lines and in windy weather.
Line Extensions
Line extensions are an invaluable addition to your kit. Several short ones are more versatile than one long one (you can always connect several together). Our half dozen or so are 0.4-1m (.44-1.1yds) long. We add them whenever utilising rocks in an anchoring technique so that abrasion can’t damage the guyline, only the extension, which is easily swapped out. Our extensions are of various thicknesses; some have loops on the ends, others nothing, others have tautline hitches, depending – ahem – on how they were last used. Several made from replaced line even retain their clam cleats.
Some hikers utilise cordage from backpacks at a pinch — inventiveness and adaptability are always useful!
There are many ways to attach extensions to guylines, but avoid knots that are hard to undo. We often larkshead the extension to a stake and pass it through the loop of the guyline or just loop a stake through the line extension if little wind is forecast: to separate, you just pull out the stake:

Line extension loop passed through guyloop, then stake placed through line extension; when tensioned, the stake is firmly held; there is a little rock at the other end, ready to go behind a big rock.
This terrific Hilleberg video on guylines has lots of useful information.
Anchoring Techniques
1. Rocks on Stakes
Rocks on stakes. You can see the line is also touching the rock (our bad), which is a surefire road to abrasion and failure in wind.
This is the simplest way of increasing the holding power of any stake in any substrate. In well-used campsites, you’ll usually find convenient rocks close by but, if you have sufficient stakes, double-stake (described below) instead: rocks are an important habitat for all kinds of reptiles and invertebrates.
Another method is to use a line extension, and then place the rock on it directly in front of the stake. We know from Part One that as well as physically blocking the stake from moving forwards, this hugely increases the bearing strength of the soil at the surface, preventing failure.

Stake should be near vertical because the guyline extension is kept horizontal by the rock and it’s best if the rock doesn’t actually sit on top of the stake.
If you use rocks, follow LNT principles: move as few as possible, and replace them exactly as you found them.
2. Deadman anchoring
Deadman anchoring is a technique, rather than a specific stake; almost any stake or object can be used as a deadman anchor. The term derives from the construction industry and involves burying an anchor or stake. The deadman is usually placed horizontally, rather than vertically, so that the weight of the substrate is acting laterally on the entire length of the anchor. The deeper the deadman is placed the more effective it will be because the bearing strength of the soil surrounding it increases with depth.
Anything can be used as a deadman (other than an actual dead person, of course!): sticks, stakes, rocks, ice, ditty bags, contracted trekking poles, camp shoes, spoons, water bottles, socks filled with sand or gravel… there is sure to be something suitable to hand.

Almost anything can be used: we have resorted to a plastic shopping bag filled with sand on one paddle/hike trip!

If you loop around a stick rather than tying, you can simply slip the guyline free rather than having to disinter the stick, a great advantage in snow.
Because deadman anchors involve burying them, they are used in substrates too loose for conventional staking: snow, sand, scree, gritty riverbanks, and volcanic ash plains or gravel. Understanding this anchoring technique frees you from the need to carry dedicated stakes for those substrates.
The most common method is the T-deadman, with a horizontal slot or trench for the stick, plus a perpendicular channel for the guyline. You lay your deadman, with untensioned guyline or extension looped (not tied) around it, in the bottom of the trench, then bury the lot. Tension the guyline. Failures are usually because of insufficient depth or, for very loose substrates, an anchor that has too little surface area.

Having said that, dedicated deadman anchors do exist. Fabric deadman parachutes like this and this are light but, once you understand the principle, you’ll be able to jerry rig them using materials at hand. Titanium snow anchors are expensive but also light; many hikers DIY them.
2.1 Modified Deadman Anchors (Big Rock-Little Rock)
Modified deadman anchors are usually deployed on rock where you can’t bury your anchor nor insert stakes of any kind. The best-known is the ‘Big Rock-Little Rock’ method, whereby you tie a small rock or stick at the end of your guyline extension and then place a large, heavy rock on the extension directly in front of it. This method is preferable to tying your guyline or extension around a big rock because, in the latter, more line is in contact with potentially sharp edges that can abrade the line to failure. A deadman also needs less line for the same holding power.

Big rock-little rock (modified deadman): note that the guyline is attached to the line extension and it is only the latter that touches any rock.

The famous big rock-little rock anchoring method. Note that a line extension is being used, rather than the guyline. The stake is only being used to connect the guyline to the line extension as described above.
Placing a rock on a guyline extension in front of a modified deadman is often preferable to placing a rock directly on a stake, especially perimeter ones, where the rock can abrade the fly. As well, rocks not directly centred on stakes can dislodge – a modified deadman is more secure.
You can also use a longer stick, trekking pole or paddle to secure multiple guylines. Place a large rock in front of your tall skinny deadman at each end, or pile multiple smaller rocks along its length. Use logs and sticks instead of big rock-little rock in rooty forest environments.

Paddle being used as a modified deadman. You could use a branch and many smaller rocks instead. (Image Credit: Screen Grab from Hilleberg Video )
Deadman and modified deadman anchors also work on tent platforms:
3. Anchoring on Tent Platforms

Tent and tent platform showing anchor wires, perimeter attachments and non-deadman (Image credit: Jeanette Learned)
Freestanding tents are generally straightforward on tent platforms, but the rising popularity of non-freestanding models requires a broader understanding of anchoring possibilities. There is no question that trekking pole tents are trickier to erect on tent platforms, but it is by no means difficult. There is always a way to tweak a pitch without carrying anything extra, but a few lightweight doodads make pitching much faster.
Spend a few moments assessing the attachment points on the platform and how they might best suit your tent. Lay out your tent, then look again. Consider its orientation and placement rather than automatically centring the tent: platforms are perfectly flat (and often sheltered), so you can orient for wind direction and/or for guyline placement. For example, you could align one side of the tent along the edge of the platform so all those guyouts, at least, are easy to attach. Conversely, a diagonal orientation might work best.
Carry line extensions (see below). These provide greater flexibility and reach to anchoring points
Think outside the box – literally! If you have line extensions, you can anchor into the ground around the tent platform, as well as on it.
Ignore the wires and use the rocks that are usually nearby or even on the platform as above for straightforward modified deadman anchors, here big rock-little Easton stake (Image Credit: Eric Zehrung).
You could also anchor to the ground beside the platform, or tie to a stout branch.

Lateral thinking, literally: if there are two tents on the platform, you may even be able to anchor to each other! (Image Credit: Rob Margono)

Use a modified deadman anchor technique through the decking near the edges where you can reach the underside. Tightly tie the guyline or line extension near the centre of a stake but slightly closer to the top (in case it slips), and drop the stake through a gap between the decking. Allow the stake to twist a little, then tension the guyline. In the morning, loosen the guyline and reach under the platform to retrieve the stake, or twist it so it can be pulled up between the gap again.
However, anchoring like this in the centre of platforms can be problematic because, although stakes are easy to slip down between the timbers, it can be hard to orient them perfectly to get them back up. In Australia, platforms are sometimes high enough to shimmy under to retrieve stakes, but they are a favourite shelter for both hairy-legged little things and slithery bigger things.
You can also loop an extension or guyline around a stick and slip it carefully down in the gap, let it twist and pull tight to secure. In the morning, simply release the guyline tension and jiggle the loop or untie it, so the stick falls down below the platform — no need to retrieve it!

Use a few fishbone anchors. They’re not essential but can save a lot of time dicking around, which you will appreciate in bucketing rain. The popular red ones suit most tent platforms, but not all: some decking is too thick, some gaps too narrow. You don’t need the spring (unwind it) or carabiner many come with: larkshead the anchor to the fishbone; tension will hold it in place. (Image Credit: Shine Trip)

Geoff and I prefer this kind of anchor (Amazon, Temu etc) anchor: they grab well to the underside, fit through narrower gaps and thicker timber, and the guyline loop attaches easily. Unwind the spring: it is unnecessary. Some people use bent cotter pins to similar effect. You don’t need these anchors for every guyout; we usually carry only a couple (5g/0.18oz each) if we expect platforms. You can shorten the hook part to reach through even thicker planking.
If you are carrying the right thickness Y or V stakes, you may be able to wedge them a short way into gaps for sufficient holding power
Cup hooks: Some people recommend these but Parks Services request that you not use them. Screwing into the tops of platforms damages the timber and speeds deterioration.
Non-freestanding tents rely on lines of tension in the fabric to maintain their structure, and attaching a guyline to a long chain, or excessively lengthening a guyline that is normally short, will not work effectively in wind. This is because long attachments are great for horizontal stability, but less effective at holding the tent down, and it’s the downward force that keeps trekking poles in place. In windy conditions, the tent fly can lift up, allowing poles to pop out of alignment as described here (go to 5:15). This was exacerbated by the drafty FRP grating. Deploying the apex guyline to the ground beside the platform would have helped.
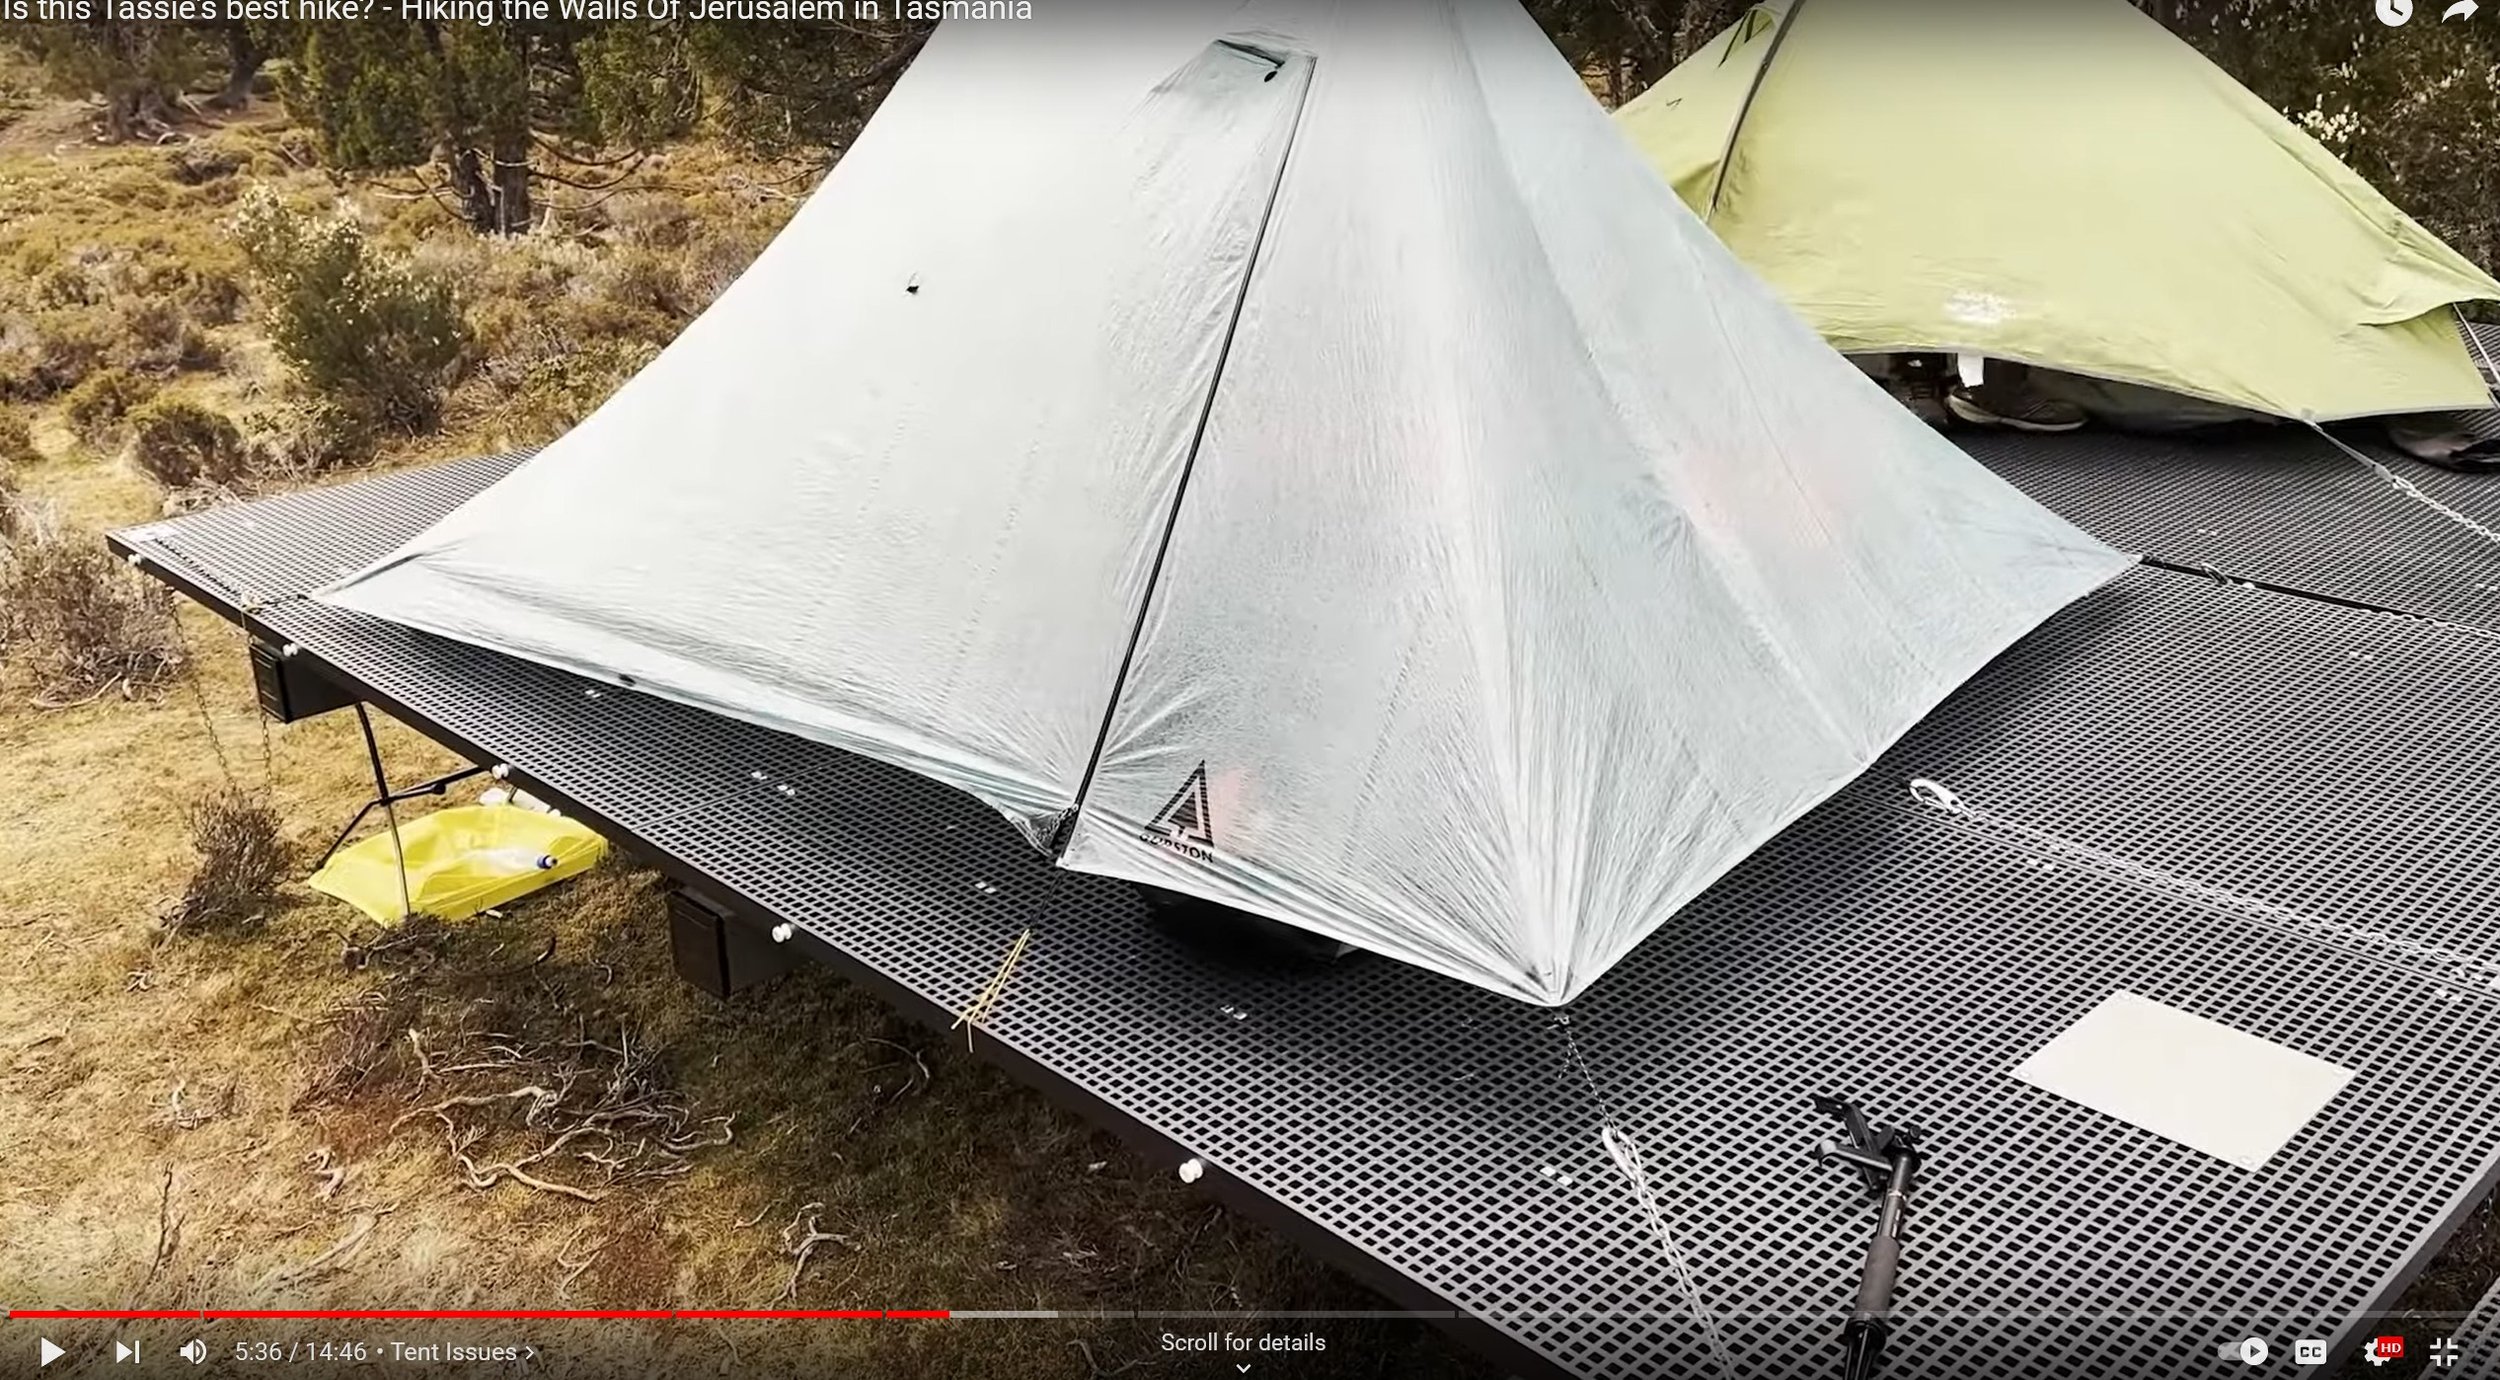
The chains on the right hand side provide lateral stability but are too long to sufficiently hold down the fly of the non-freestanding XMid Pro 2 (Image Credit: Screen grab from Ultralight Hiker).
You can use any of the modified deadman anchoring techniques above, or place a rock on the chain right beside where you’ve attached the guyline. Alternatively, orient the tent so the chain is used at its shortest possible configuration. These considerations also apply to platforms that only have cable or chain around the perimeter of the platform.
Rock on chain to create correct guyline angle on tent platform
The FRP grating in the above video may be too small for our stainless anchors, and it may also be very difficult to retrieve stakes used as deadman anchors from underneath. Instead, using a stake to hook the line back up, tie a line extension directly to the grid, or thread the extension under and up, placing a deadman stake on top of the grid. Be creative: there will always be a solution.
The grating below on a local footbridge is slightly larger but suits for illustrative purposes and we experimented with line extension to come up with these possibilities; there are doubtless many more. Depending on the size of the grating and the angle of the guyline, a long stick with a bit of a knob or fork at the top can be pushed vertically down as if you are staking it into soil. The needle stake fits through smaller gridding too, and is particularly handy to hook loops back to the top:

A kind of reverse deadman; we used the needle stake to catch the loop and bring it back up
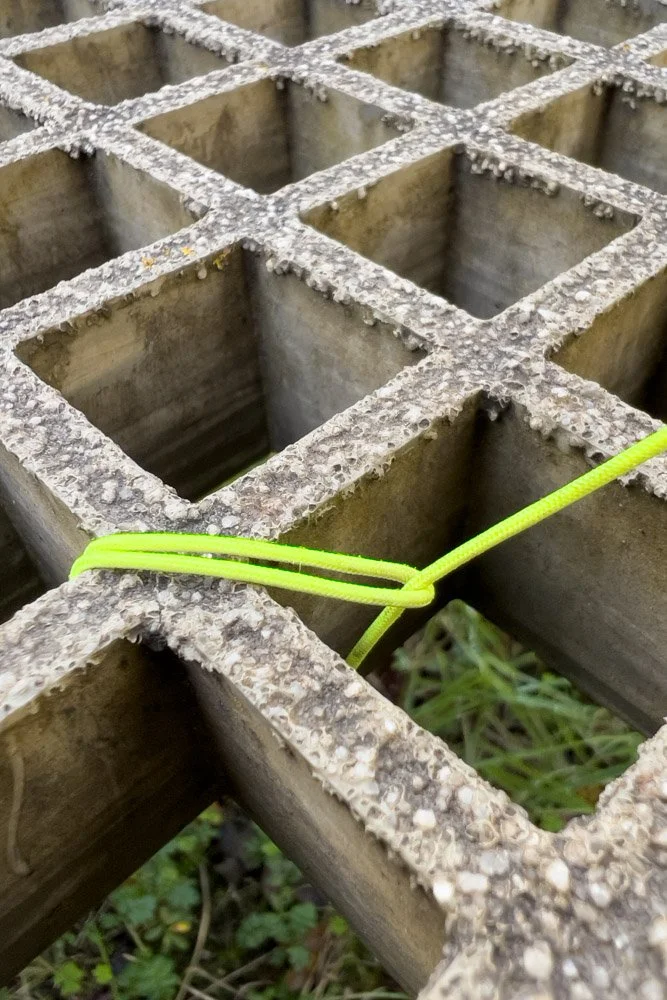
Extension loop hooked up with end slipped through to attach directly to grating

Our anchor; this wouldn’t fit through tiny grating but we could simply cut off one arm and it will fit through even tinier gaps; longitudinal forces are unlikely to break or bend the steel even when halved
There are no rules, be inventive and creative. Don’t be afraid to anchor outside the tent platform on the ground beside it. Play with anchoring chains, because they are often in the wrong place or at the wrong angle:

A creative solution!
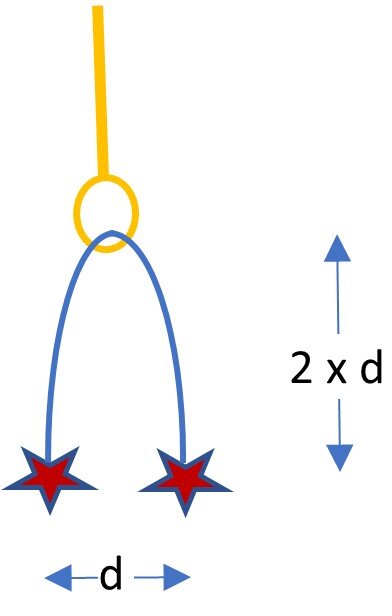
4. Double-Staking Techniques

Double inline staking aka back staking with DAC J stakes; note how the back stake is reversed for additional holding power against the horizontal direction of pull (Image Credit: Dave Parker)
From time to time, you will be faced with poor soil and stakes with insufficient holding power in strong winds – time to use two stakes, you think! Staking side by side is more effective than staking inline.
If you use them inline, then according to the Advanced Textiles Association the effective pull-out resistance of having the second stake is 1.22 times as much as just having one stake: not that much better really. If you have three in line then the effectiveness factor jumps to 2.76. So better perhaps to use two stakes side by side, or three stakes in line.
And if you do need to use them inline then the Advanced Textiles Association go on to say: “A rule of thumb for double staking suggests that the distance between stakes be equal to one-third the depth of the stakes in the ground.” So for 200mm stakes that’s 66 mm apart: not really feasible unless you have stakes nearly vertical, because there will be too much soil disturbance.
Remember that the stakes the Advanced Textiles Association have tested are a lot bigger than our backpacking tent stakes so the information transferability is unlikely to be exact.
Nevertheless, we have probably all been putting the stakes either a little too far apart, or too close. Keep them as close as you practically can without the installation of the second stake compromising the soil and hence stability around the first stake.
This video shows effective back staking at 13:49; the stakes initially move a little as they overcome the surface soil-to-soil friction but, as soon as the first is vertical and the loads begin transferring down the axis, both hold.
You can also extend the distance between the two stakes and place a largish rock between them on top of the extension; in our experience this method is so bomber that we have never had a failure:

Two stakes inline, joined with a short line extension, and a medium rock placed on the extension greatly increases holding power. The back stake should be vertical.
To double stake you can either:
(i). Loop an extension to the stake and place a second stake a short distance inline and behind the first as described above; this second stake can be lighter or shorter
(ii). Add a second guyline to the tie out point:

This method is particularly helpful in high winds rather than soft substrates as it supports the tent pole over a wider wind direction arc than a single guyline, in addition to halving the load on each stake.
(iii). Add a short line extension through the end of the guy loop and stake with two pegs side by side instead of one:

If you’re a bit more organised, you can use two stakes with a line extension when you pitch. This method is particularly useful when there is a rock right where you need your stake to go, and your tent’s design is less flexible about where certain stakes need to be eg strut corners, doors, ground level perimeter points.
However, when you connect your guyline extension and use two stakes that are not inline, you introduce a change to the geometry of the fastening system. This can if, not catered for, result in an increase in load on the two tent stakes and significantly reduce their effectiveness - exactly opposite to what you were trying to achieve. Tim Hunt from Slingfin describes a technical description based on anchors for belaying climbers. The solution is simply to ensure your guyline extension is at least four times as long (more is OK) as the distance between your two tent stakes:
If your stakes are 100mm (4”) apart then they need to be at least 200mm (8”) away from the end of the guyline, and your guyline extension should be more than 400mm (16”) long to reach each stake.
You should apply this principle whether you are connecting two extra stakes to your guyline stake, or to the guyline loop or for any other similar staking configuration.
(iv). Loop an extension around your first stake and place two stakes behind it at an angle:

If you carry line extensions, this is a quick and dirty fix for the middle of the night if your windward stake is pulling out and you have a few spares. We have done this with embarrassing frequency! Use the same 2:1 triangular distance ratio as described above.
(v). Place two crossed stakes in one place. This technique is common but loosens soil: you are much better off placing them side by side, or inline.
5. Snow Anchoring
Sticks deployed under the snow as deadman anchors on Mt Feathertop (Image Credit: John Carolan)
Geoff and I lack experience in snow, and incorrect anchoring in snow can be life-threatening. As well, Australia’s often wet snow presents specific challenges not seen in the Northern Hemisphere, and our snow can fall at any time of year. Choosing the right non-absorbent guylines, guyline attachment techniques, snow compaction, burial depth, stake materials (titanium or aluminium) and more can make huge differences in not only securing your tent, but packing up the next morning; you can spend longer retrieving your frozen stakes than you did setting up your tent!
Hypothermia is a real risk from incorrect anchoring in snow, so you must understand techniques thoroughly before venturing anywhere remote. We lack the expertise to authoritatively write on this but, for Australia, here is the highly experienced Roger Caffin again:
“It is possible to anchor guy ropes to snow without using proper stakes, as Mike Clelland shows in his [excellent but paywalled] article Ditch Your Stakes: A Guide To Alternative Shelter Anchors. Using sticks as stakes or buried deadman anchors is fine. Whether it is best to dig a hole and bury the stick as a deadman or to just poke the stick into the snow depends on snow conditions. Sometimes you can just poke sticks in, and that will be quite enough if they are long sticks:

Sticks used as stakes near Mawson Hut, Kosciuszko (Image Credit: Roger Caffin)
“However, some of the methods Mike shows for use in snow are rather specialised, while others have definite disadvantages under many conditions. For instance, buried stuff sacks and fabric snow anchors do work, but take some skill in use and if the snow freezes overnight it can be extremely difficult to get them out in the morning. Using your skis as stakes means that you can't use the skis for however long the tent is pitched.
“Most walkers use stakes in the snow, but not ordinary stakes. Nail and wire stakes just won't do much in snow. Even the Y-stakes and the tubular stakes Will Rietveld tested in his [paywalled] article Tent Stake Holding Power won't be of much use. You need a lot more surface area in the snow. Just how much depends on the snow and the weather.
“Some people swear by SMC T-anchors. These are actually a form of deadman anchor, and the general principle of having a large holding area is perfect for the main anchor points of a tent. You can of course make these anchors yourself.
“There are also a range of aluminium angle stakes and curved channel stakes available commercially, but again you can make these from cheap aluminium angle.
“The biggest problem with aluminium stakes is that the oxide surface bonds well to ice and snow: so well that retrieving the stakes from the frozen snow and ice the next morning can be a nightmare. I broke the carbide tip off a ski stock trying to get one angle stake out. On the other hand, the thin aluminium was not strong enough to take much rough treatment during the extraction process. It crumpled.
“This led me to experiment with making my own UL snow stakes out of 0.5 mm 6Al4V titanium alloy sheet. The surface of titanium bonds only lightly to snow and the metal is much harder. The end result is that the angles and anchors go in very easily, stay in provided they are covered, and come out in the morning fairly easily.
“However, titanium is extremely hard and the cut or drilled edges of the stakes can abrade even Spectra guylines under storm conditions, as I found out in When Things Go Wrong. [ED: This is a fantastic paywalled article for Australian hikers thinking about winter hiking in our alpine country].

Roger’s DIY Titanium stake projects can be found, behind a paywall, here . And here are some Swiss Piranha plastic snow anchors, showing placement in the video.

Titanium can be sharp and difficult to smooth and this eyelet modification prevents the fretting that causes line failure
“Firnification is a key technical concept you need to know for staking into and pitching on snow: a bit of digging and lots of stomping, and all will be well. When ice is put under pressure it melts just a little bit. So when you stomp on the snow the tiny ice crystals (ie snow flakes) melt ever so slightly where they touch each other. Then, when your boot leaves and the pressure drops, the water freezes again - but now the snow flakes are bonded together. Give them 10 minutes and they all lock together into a solid mass better to peg into than fluffy snow.
I stomp the snow while making the tent platform. It is no trouble to slice a wide titanium deadman into the set snow, and the thin Spectra trace on the deadman goes into a slot made by the same deadman before it is placed deeply. If using deadman anchors rather than pegs, you’ll of course firm the snow after burying them.”

A secure pitch on a stomped platform, Upper Snowy (Image Credit: Roger Caffin)
“A few final tips:
Attach the guyline or extension to centre load distribution on peg; the line will end up below the snow
Use spectra or other non-absorbent guyline
Attach red flagging to anchors.”
Because snow is so slippery (think how easily skis slide), we know from Part 1 that, until the stake freezes in place, soil-to-stake friction is almost non-existent. Therefore angle your stakes close to perpendicular to the guyline to maximise snow-snow friction/freezing. Many of these techniques are illustrated in this video, while MSR has fascinating information on the evolution of their snow flukes here.
To learn more about snow camping, join a hiking club or contact a company that runs snow camping and safety courses; there are several in Australia. They include
Australian School of Mountaineering
and, for keen photographers, K7 Adventures combining photography and snow camping skills.
6. Logs and Branches
These often make excellent anchors. You can use them as modified deadmen, or tie guylines/extensions around them using a tautline or trucker’s hitch. Instead of tying your guyline or extension around an entire trunk, search for snapped side branches and tie around these instead.

Guylines to modified deadman logs, branches and rocks support this tipi hot tent in New Zealand (Image Credit: Dave Parker, PAST Outdoors).
Using Your Stakes
1. Tailor
Match the stakes you carry to the substrates you expect to encounter, don’t simply assume the stakes you normally use are the ones that will work best.
Terrain, weather and vegetation all influence choice of stakes and careful site selection can influence what stakes you need. If you are travelling to unfamiliar areas, then a few extra stakes may save time and effort, although alternative solutions are almost always possible. Your ability to select good sites is a major factor — a sheltered spot with good soil means fewer stakes and guy lines.
Remember that other items can be adapted for use as stakes. Some trowels make a good spare, especially in sand. It also works to protect your hands when inserting stakes; a small dent in the trowel helps prevent stakes from slipping while pushing them in.
To save weight, many people remove cordage from stakes, but consider retaining one or two to assist in removing other stakes. We also recommend retaining cords on nail stakes because it’s difficult to gain sufficient purchase on their small heads when removing them from the very hard soil in which they are most often used.
2. Carry enough Stakes
Yes, XMid owners, our tents might stay up with four stakes, or even none for a freestanding tent but, on anything other than an overnighter or where you are 100% sure of the weather, bring enough stakes for every anchor point of your tent. As we saw in Part Three of our tents in strong wind articles, stakes are an integral structural component of all tents, not just non-freestanding ones, and they will fail instantly in strong winds without them.
3. Carry a Range of Stakes
This point is probably the critical takeaway from this article; most experienced hikers carry a range of stakes on every hike. They are rarely the stakes that come with your tent from the manufacturer, who can’t possibly tailor to every possible substrate on earth.
Tailor your stake bag for each trip. These titanium stakes are too expensive for many people to consider as an entire set, but one or two extremely strong and ultralight all-roundersare excellent to complement different stakes (eg wires), to swap with a couple of weaker aluminium Y stakes for those rocky guyout points, for double-staking and for different substrates (Image Credit: Teragon Gear)*
Ways to tailor include:
Carry primarily your main stake but add or substitute one or two different ones to cater for different substrates
Carry an extra main stake or two on long trips in case of loss or breakage, or to double stake
Carry one or two lightweight stakes (eg titanium wires, carbon or carbon cores) as backups or to double-stake. Titanium stakes are expensive but they are strong and light; an all-rounder is a good choice for keeping in your bag as one or two extras, rather than as a full set
If your main stakes are all short, eg 15cm (6”) Mini Groundhogs, swap one or two for longer ones that can be deployed on the windward side of the tent should you encounter bad weather. Similarly, if they are all long, bring a few shorter ones for shallow substrates.
If you carry primarily MSR carbon core or carbon stakes, a Ti nail or needle stake is great for making pilot holes for them should you encounter hard or rocky ground.
4. Know your Tent
The Stratospire’s strut corners, here far right and far left, not only have several lines of tension running to them, but the steeply angled short guylines required to hold them down also mean these two points need particular attention when staking.
All tents have stakeout points, but all stakeout points are not equal: some bear greater loads than others. Apex guyouts, corners and, of course, windward guyouts generally require more holding power. Certain tents, such as the Stratospire Li, have design features such as the strut corners that requiring stronger staking, especially in windy conditions. Other tents benefit from specific staking at doors to reduce tension on zippers. Carrying a range of stakes, or extra stakes for double-staking, and knowing where they are likely to be needed, is invaluable.
Conversely, perimeter guyouts on the centre edges of panels and lee side guyouts require less holding power, and stakes like shepherd’s hooks may suffice; illustrative are these stake sets for specific tent models that include stakes of different holding power for different stakeout points.
You can tweak this mix for your tent and substrate to save weight and optimise your anchoring. An example might be Groundhogs or Eastons for the highest stress points (eg apices, ends), mini groundhogs or J-stakes for secondary (corners) and Ti wires, aluminium needles or lightweight carbon core or carbon stakes for mid panel perimeter points.
Consider your own stake bag. Are all the stakes the same because, well, that’s what you first bought? Which might you swap out to either save weight or to best serve on a particular trip? Other than stakes, what might suit your bag?

Daniel Hannah describes his DIY modified deadman anchors for the Sierras: “I don't use stakes, I use pads. The Sierra laughs at stakes, but there are always rocks and/or sand. Cut from ultralight polyester tarp, dinner plate size, with a 2" (51mm) hole in the middle, these weigh less than half of Titanium stakes. I have a square corner on each pad that I folded over with a 1/4" (6.4mm) grommet. I actually use a tiny s-biner on each to attach to the guyline. They wear but are cheap, easy, and extremely light.” ED: Pads made from Ultra material would be light, strong and durable. (Image Credit: Daniel Hannah)
Stakes are particularly critical for non-freestanding tents that rely entirely on stakes to maintain tent structure: correct stake selection is essential. Geoff and I carry full-size groundhogs as well as a few minis, ti nails, eastons and/or wires for when the soil is too hard or rocky for groundhogs. On some trips we swap them around: we won’t be taking full size groundhogs on the Grampians Peaks Trail, for example. However, there are usually quite a few in our bag: our substrates and weather are simply too variable to rely on mini Groundhogs alone, although they suit hikers in many parts of the world.
Some tents require more stakes than others, and those with ultralight tents may be dismayed to see their stakes approaching the weight of their tent! However, remember that every additional stake reduces the load borne by each one; you may get away with more lighter stakes, as opposed to fewer beefier ones.
5. Hand, Foot or Rock?
Although many camping experts recommend a hammer for stakes rather than your foot, this really only applies to car campers: a hammer is not something we hikers add to our packs! However, using your foot to push in a stake often applies sideways as well as downwards forces that are more likely to bend them than when using your hand. If hammering with a rock, try to hit the stake square on, using multiple light taps rather than a few hefty bashes. Experct most aluminium stakes to break or fail after repeated bashing; DAC J stakes are an exception.
6. Don’t Lose your Stakes!

Pitch on alpine grassland, Dead Horse Gap; it is very easy to lose thin Ti stakes in this substrate! (Image Credit: Roger Caffin).
On every trip, almost without exception, Geoff and I return home with more stakes than we left with. A routine when setting up your tent and before you leave the campsite to account for every stake is useful because it is so easy to lose them. Without a check, you won’t discover the absence until your next pitch, 8 hours and 15km later. On a long hike in wet weather, a missing stake can significantly increase pitching time as you devise a workaround.
You have numerous routines and checks to choose from. Here are a few ideas:
Carry the stake bag while you pitch, removing one stake at a time so stakes are never anywhere except in the bag or in the ground
Place stakes in your pocket and take them out as you go: stakes are never anywhere except in the bag, in your pocket or in the ground
Count your stakes before putting them back into your bag
Paint dull stakes with bright paint or tie bright pull cord to them
Just before you leave, walk around the campsite once everything is packed and on your back to scan for any items left behind; do this also in any adjacent areas you’ve used eg huts, picnic tables etc. Once all your stuff is packed away, it’s easier to spot things left behind, including things left behind by other people!
7. Deploy Stakes Correctly
As we have seen in Part One, deploying stakes at the correct angle and depth maximises their holding power. This is rarely an issue when you’ve perfectly matched substrate to stake, but is important at times when you’ve misjudged or when rain wets and loosens soil, and the stake begins to move. Changing the angle or pushing it all the way in, so the guyline is right at ground level, can be enough to stabilise the stake.
We also saw in Part One that guyline length (hence angle) changes how the forces are borne by the stake and soil. Apply your new knowledge and think about whether you need to lengthen your guyline to achieve a firmer hold if you have reached the limit of adjustability for your stakes.
Deploy the guyline at the correct angle from the tent. This usually means extending the line of a seam, or exactly out from a corner, but some tents have little quirks, such as the peak guyline of the XMid that is best slightly offset to the door side instead of exactly inline with the ridge. Research your particular tent online and watch manufacturer videos to learn its quirks.
Always test your stake with a little pull on the guyline (or a decent tug if you are expecting strong winds). Even when you are tired at the end of the day, it will be easier correcting it now, than in the middle of the night when your stake pulls out. Knowing your tent is perfectly secured is also preferable to lying awake in your sleeping bag, wondering when you will need to restake!
Silnylon stretches when it absorbs moisture and in these tents it’s essential to plan for this so that there is enough play to tighten your guylines after your initial pitch without having to move your stakes. Check your guyline tension before you go to bed, and be prepared to tighten them further if rain or heavy dew arrives during the night. Some hikers attach bungee loops to their silynylon tents to take up this slack:
Roger advises,
“This is absolutely NOT recommended for the windward end/side. That way lies death and disaster. However, although bungee should never be attached to the windward side, short bungee can save a lot of readjustment on still nights or on the leeward side/ends [of tents with a single dedicated orientation into wind such as tunnels].
“On my tunnel tents I have very short loops of 3mm (0.12”) nylon cord at the windward corners, and the pegs at this end go in first. At the lee end I have 150mm (6”) loops of 4mm (0.16”) bungee cord, and these get stretched maybe 50%. The nylon may get wet and slacken off a bit, but the bungee takes up the slack and the tent stays taut. I do this for both my summer tents and my winter tents.”
Because silpoly and DCF materials don’t absorb water nor stretch, you won’t need bungee for tents made of them; being able to tension your tent and know it will remain so throughout the night if your stakes stay put is one of their biggest advantages.
A few LNT Tent Pitching Principles:
None of us like pitching in a trampled bog surrounded by toilet paper, trenches, broken stakes, scattered rocks and other signs of predecessors. Leave our campsite in the state we would hope to find it: as if no-one has ever been there before.
Before each new trip, clean tent stakes to prevent the spread of soil-borne diseases such as Phytophthera. If it’s possible, do so between campsites as well.
We all love pristine wild camp experiences but, if you are on a track with established campgrounds, please aim to use them. Tracks with established campgrounds usually host many hikers and, if all of us wild camp, all the most beautiful and pristine locations will cease to be so.
Rock slabs and durable surfaces are always preferable to other substrates in sensitive environments, especially alpine ones. Choose lichen- and moss-free areas of rock if you can.
If possible - and it isn’t always - avoid pitching on moss, which can take years to recover in alpine Australia and decades in the far northern Hemisphere.
In degraded areas, choose the same established campsite rather than pitching in a new spot, which only spreads the damage further. In very lightly used areas, choose a nearby spot to allow the other spot to recover. Sometimes pitching directly on a track in a remote area helps prevent damage and the spread of disease.
Never “trench” your tent. Us old farts were taught to do this as youngsters, but it is hugely destructive and unnecessary with the bucket floors and waterproof materials of today’s tents.
Double stake your tent in preference to moving rocks. If using rocks, try to choose ones that have already been moved, and replace all in the same position and orientation as before.
If using branches to guy to, ensure they are strong enough not to snap.
Before you leave your campsite, scan the area for anything you may have inadvertently left behind.
Final Thoughts
With many campers in many countries over many decades, equally many clever tweaks and workarounds have been devised for specific and tricky situations, and we don’t pretend to know even a fraction of them. We’ve covered the most common and obvious ones but, if you have any clever tips, please share them with our readers in the comments below, or contact us and we will edit to include them (with attribution).
Whatever you carry, your most important tool will always be your adaptability and inventiveness: take the concepts in this article and put them in your mental toolbox ready to deploy along with your stakes and guylines!

A stoutly pitched Hilleberg near Ahlberg Bay (Image Credit: Esmeralda Jones)
*Disclaimer: slowerhiking was sent a titanium Pioneer Tent Stake for testing.