
The Rain Shell: Clothes for Multiday Hiking Part 4
How to choose the best [rain] shell for the way you hike, in the terrain you hike, in the weather you hike.
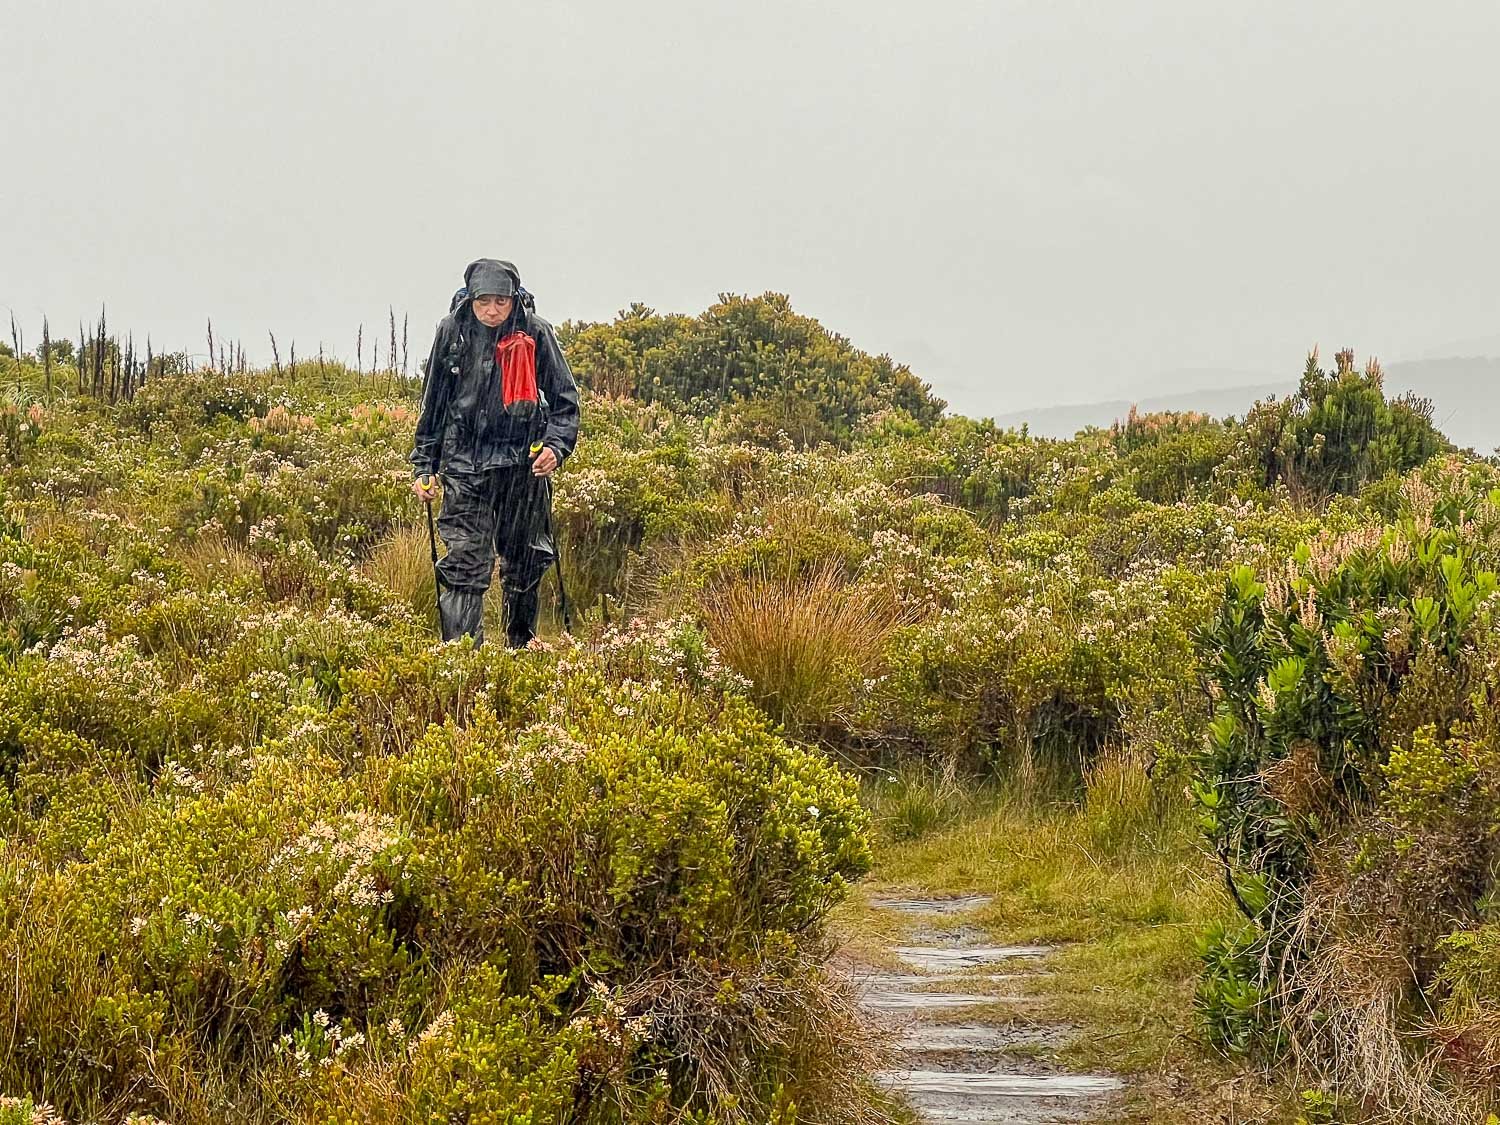
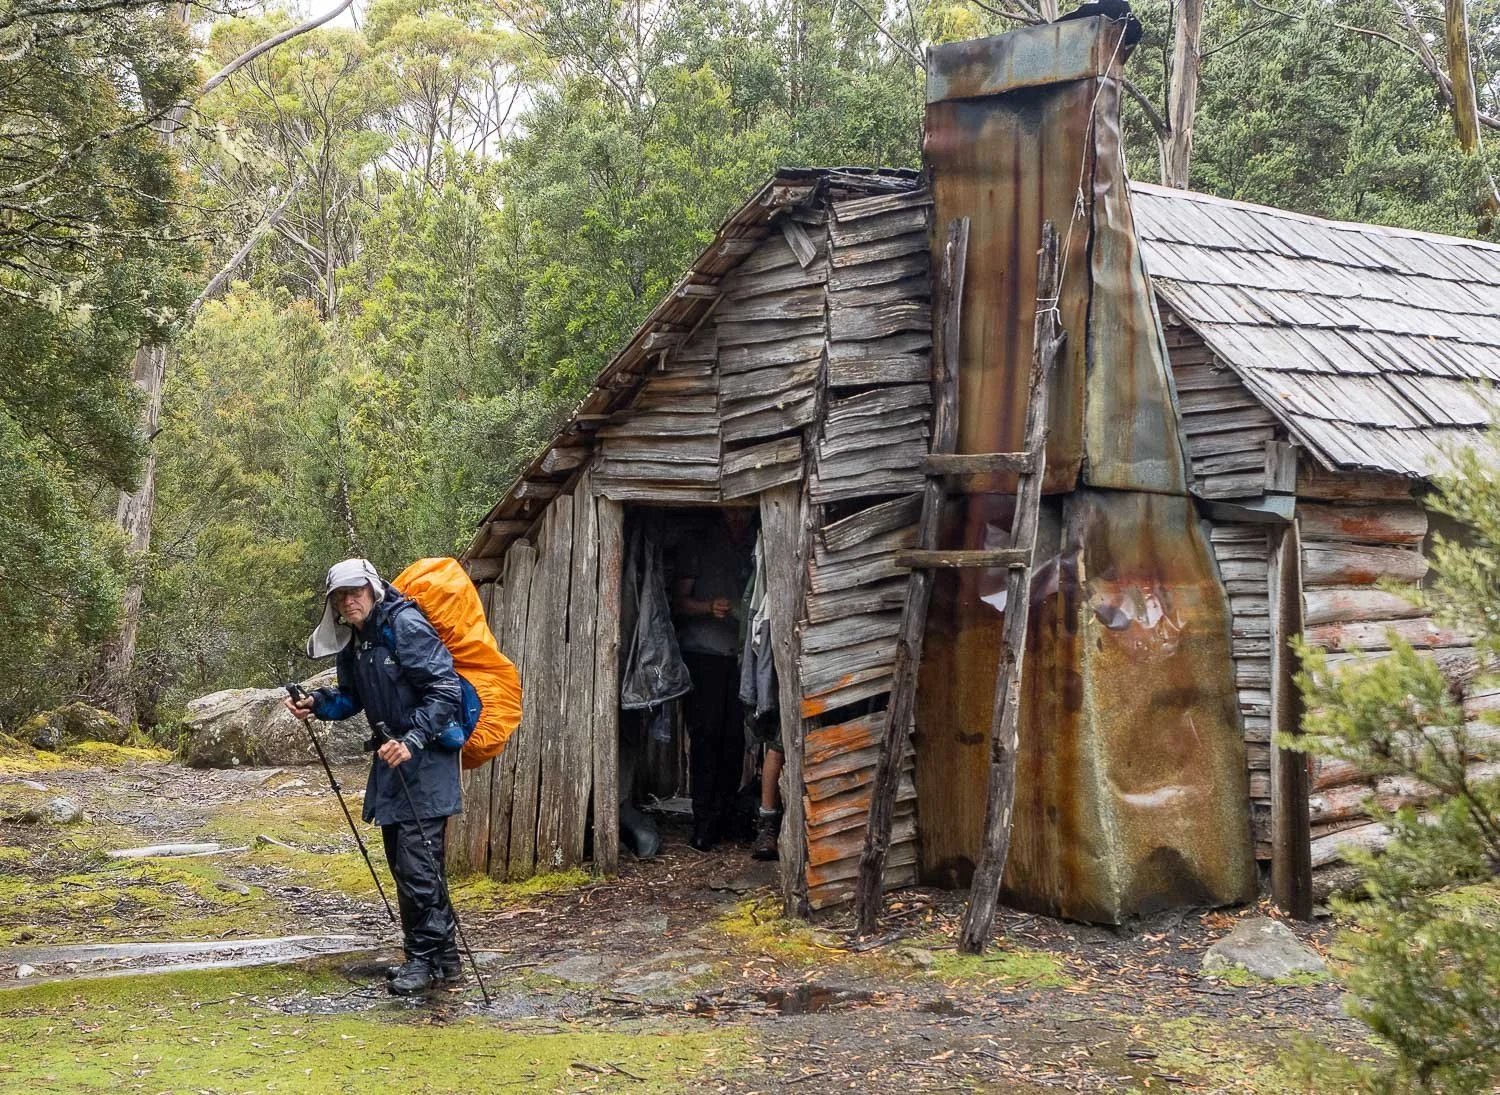
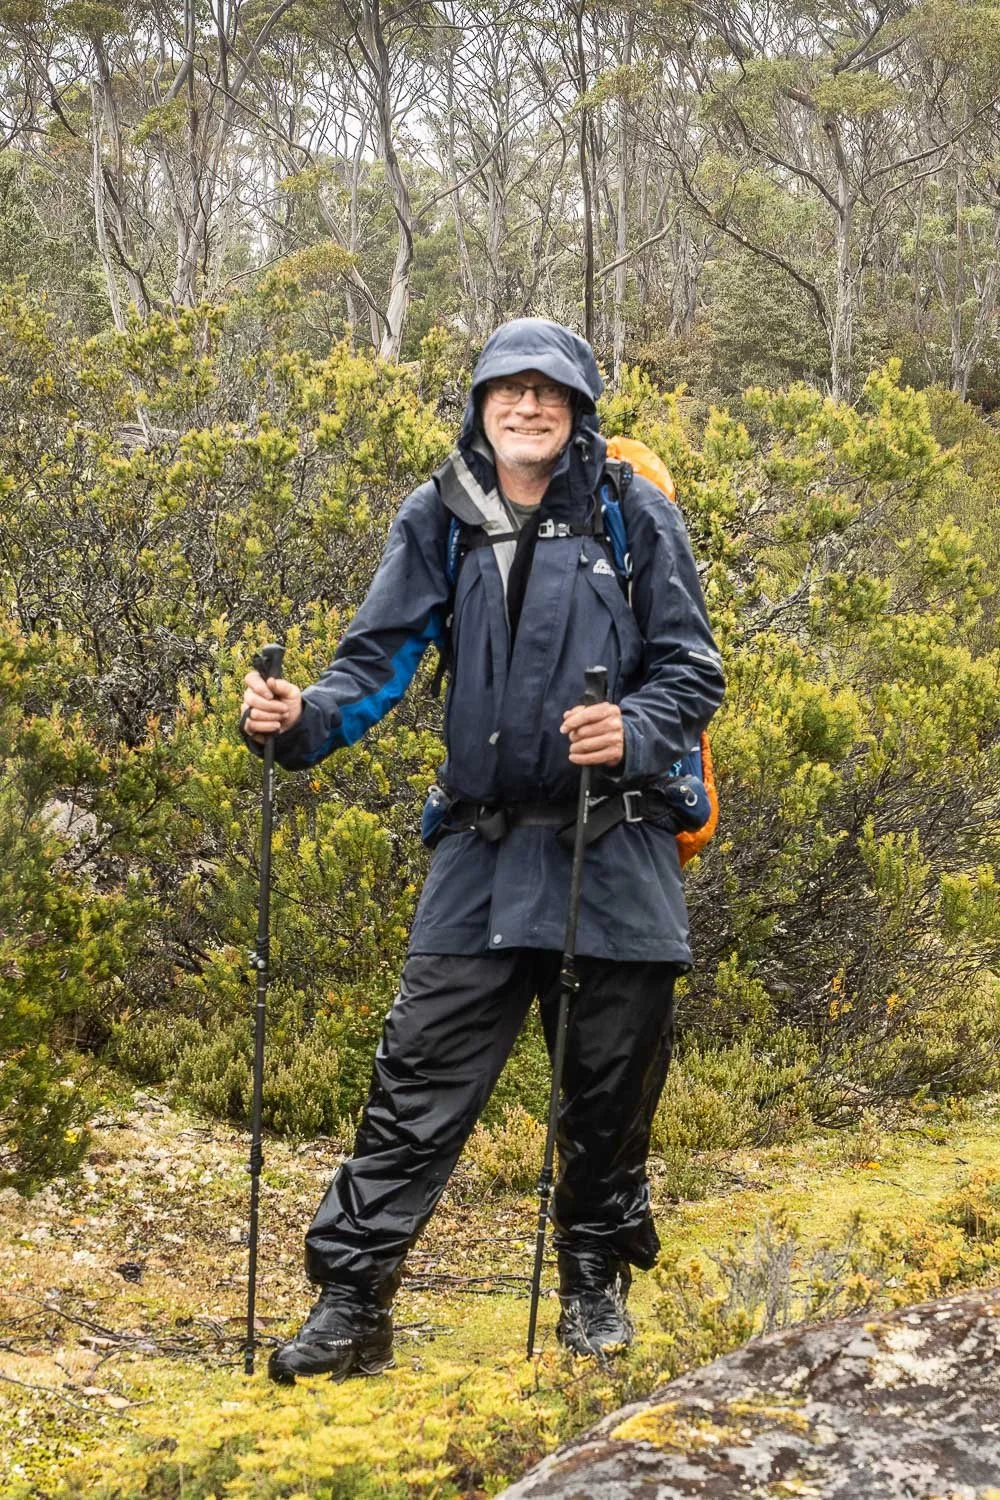
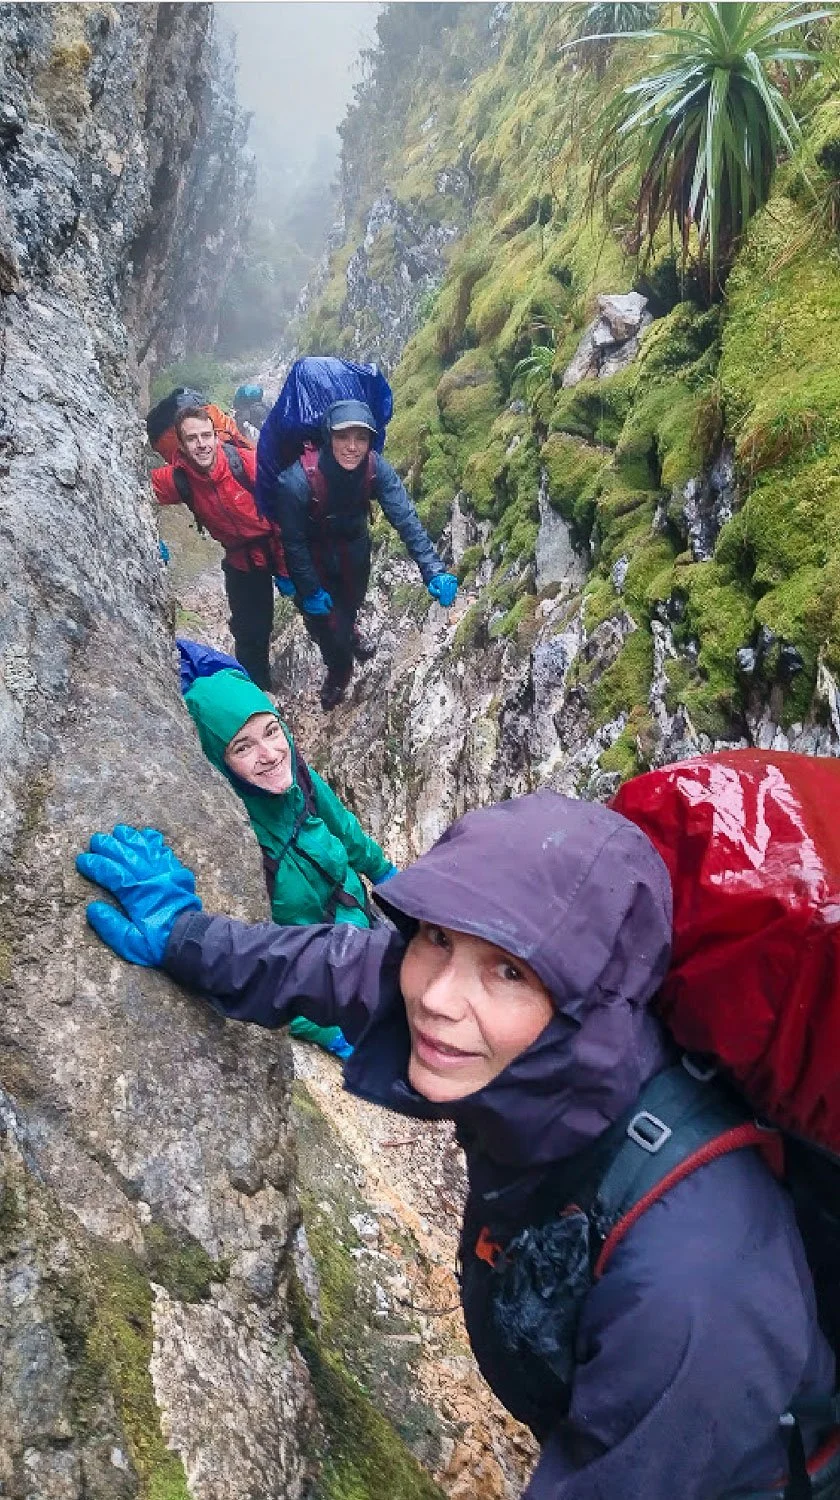
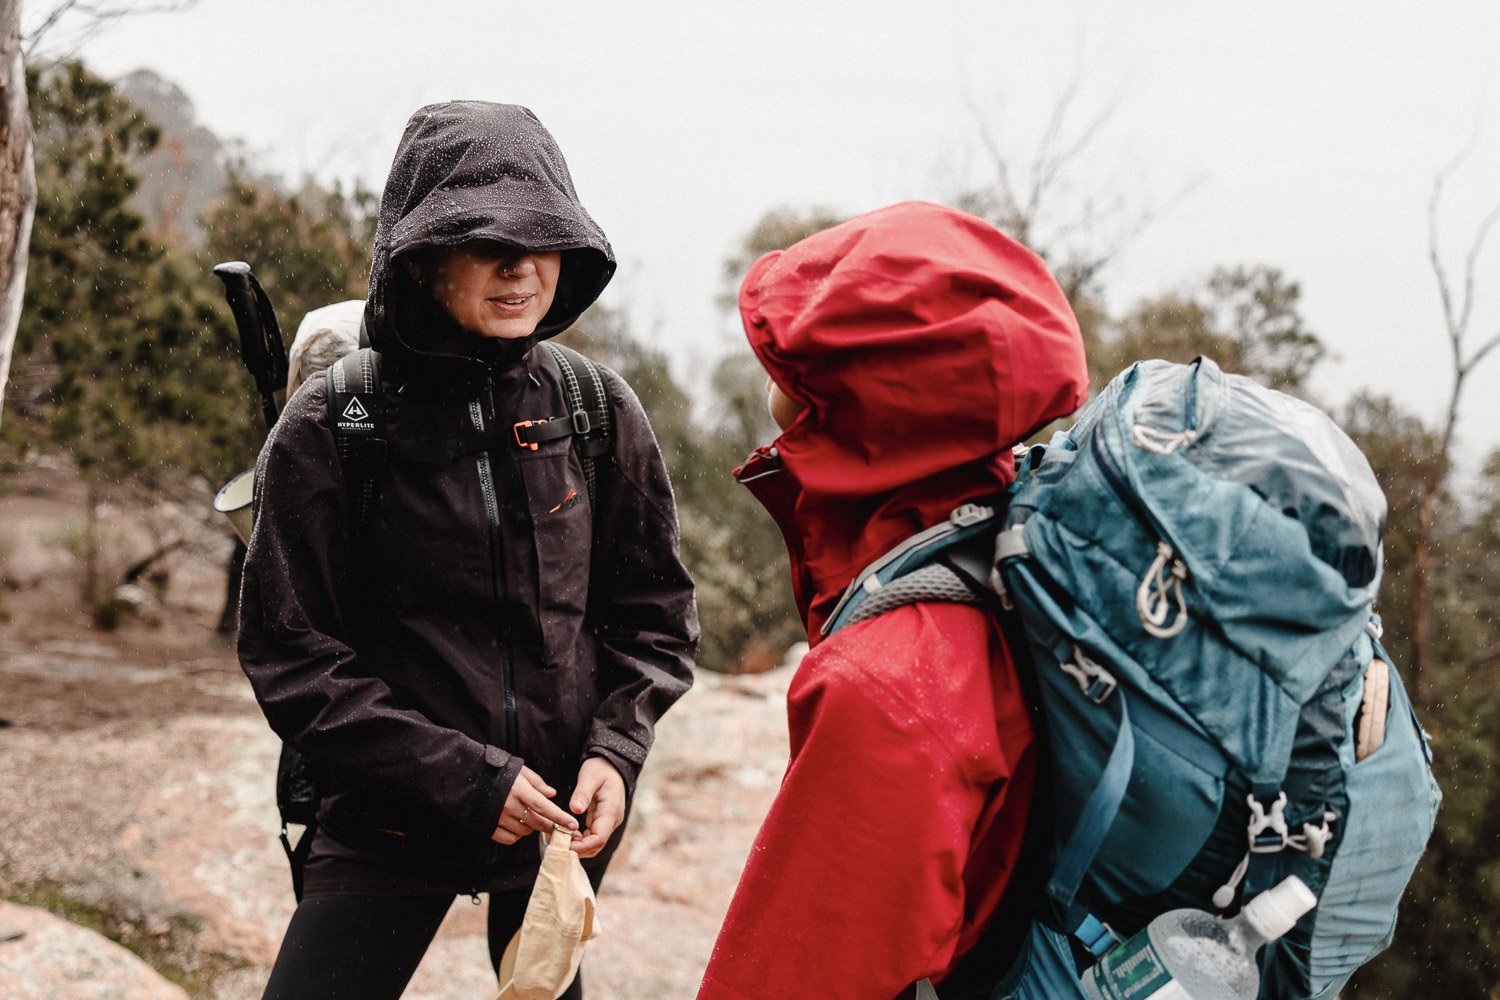
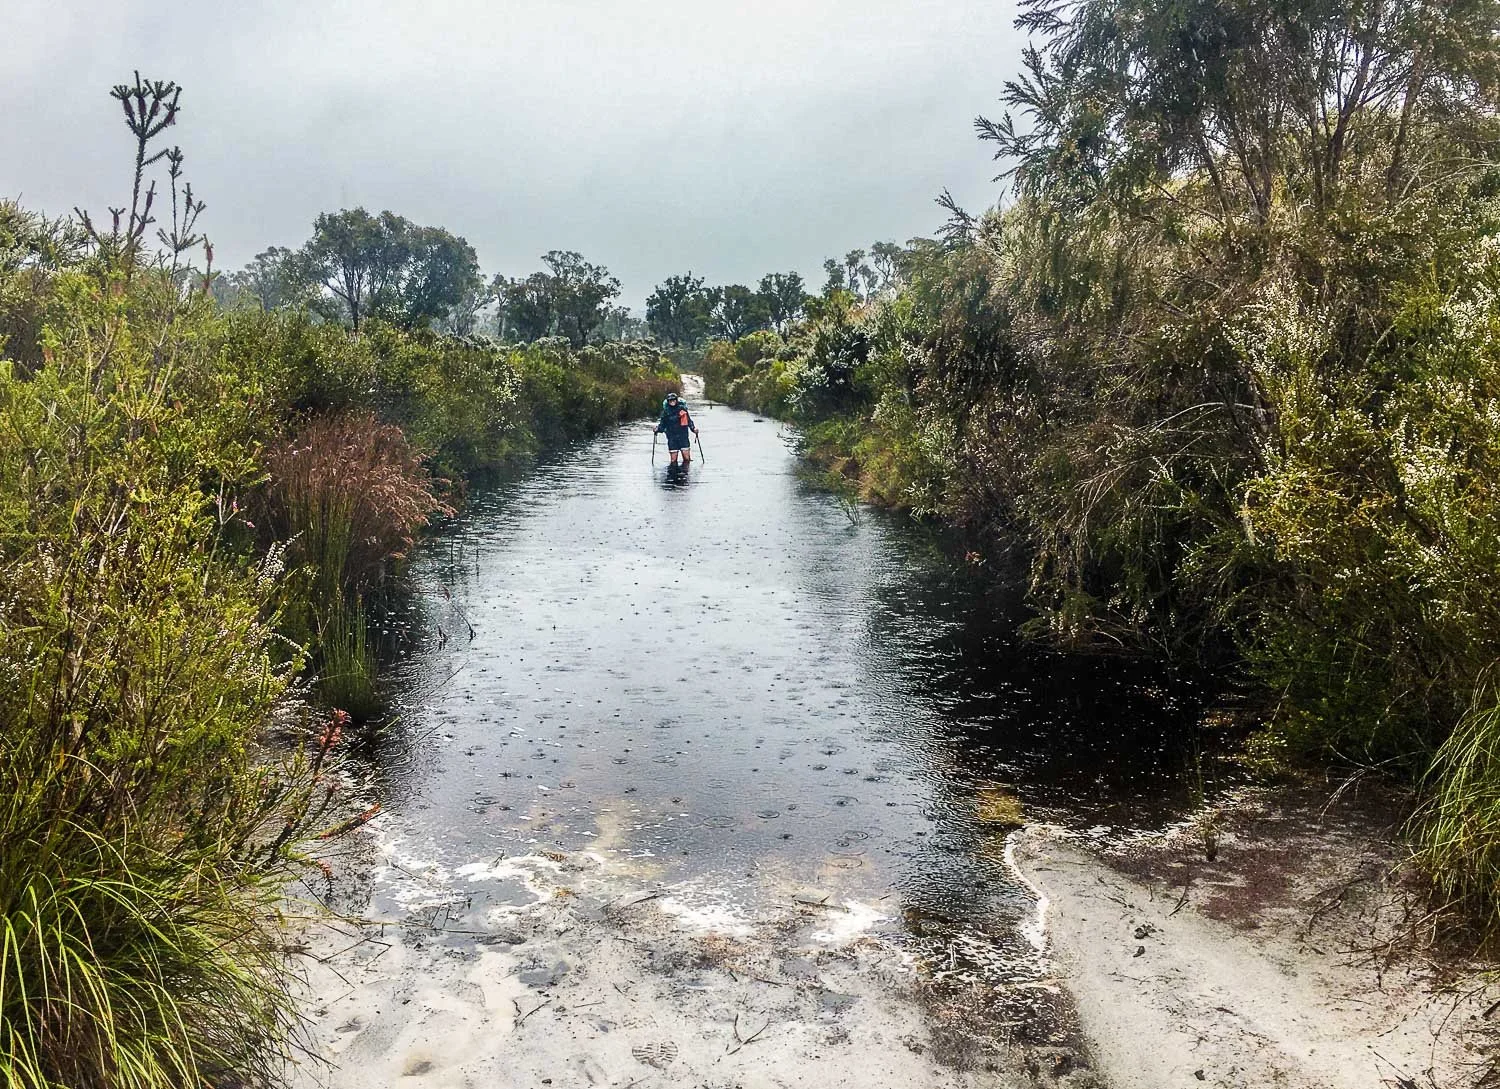
Geoff peering up from under the brim of his shell during a downpour on the South Coast Track, Tasmania.
Do you trust your shell wear? Will it handle any weather you experience on your multiday hike, be it wind-blown sleet, hammering rain or whiteout snow? The right shell protects you from the elements, but how do you find the ‘right’ one?
Peruse any outdoor clothing website and you’re confronted by dozens of options, described as all-round, ultralight, breathable, 3, 2 (or 2.5) layer, waterproof/resistant, HH, WBM and DWR.
Shells work best with complementary base and mid/insulation layers as part of a system. If you haven’t yet done so, please read Parts 1-3 of this series:
When you understand all three layers – base, mid and shell – you’ll be confident in selecting the right combination.
This article won’t tell you what brand to buy. Instead, you’ll discover the properties, strengths and weaknesses of different shells, and their importance in the context of climate, terrain, other gear and safety. This article includes (jump back in over several visits if you like!):
One Shell to Rule Them All?
Safety: Am I feeling Lucky? (climate, hypothermia, the Peltzman Effect)
Terminology (Waterproof Breathable or non-breathable, Waterproof Breathable Membrane, 2, 2.5 and 3 layer, Durable Water Repellent coating, Hydrostatic Head, Moisture Vapour Transmission Rate, Perfluoroalkyl and Polyfluoroalkyl substances etc.)
Other Shells: Non-breathable, ponchos, kilts, pants, emergency, umbrellas
One Shell To Rule Them All? (Spoiler Alert: No!)

Bombproof shells in Hornstradir, Iceland (Image Credit: Robert C.)
Does any other item of hiking clothing generate as much dissent as the outer shell layer, be it called hard shell, soft shell, rain shell, rain jacket or spray jacket? For every hiker who swears by a particular shell, another insists that it failed. How can this be?
Hikers are not lying: NO Jacket Rules Them All.
Different hikers hike differently, in different environments. Even on the same trail at the same time, a high-output fast-packer dripping sweat is different to leisurely hikers like Geoff and me. Hikers schlepping 20-25kg (45-55lbs) packs need different shells to ultralighters with 8-10kg (18-22lbs).
Nor is all precipitation the same. Tropical rain has different impacts (and consequences!) than that in cold wet Tasmania, or snowy but dry Northern Hemisphere winters.
Australia is a big country. The Thorsborne trail on Hinchinbrook Island in tropical Queensland: hot even in mid-winter. No need for bomber shell wear here!
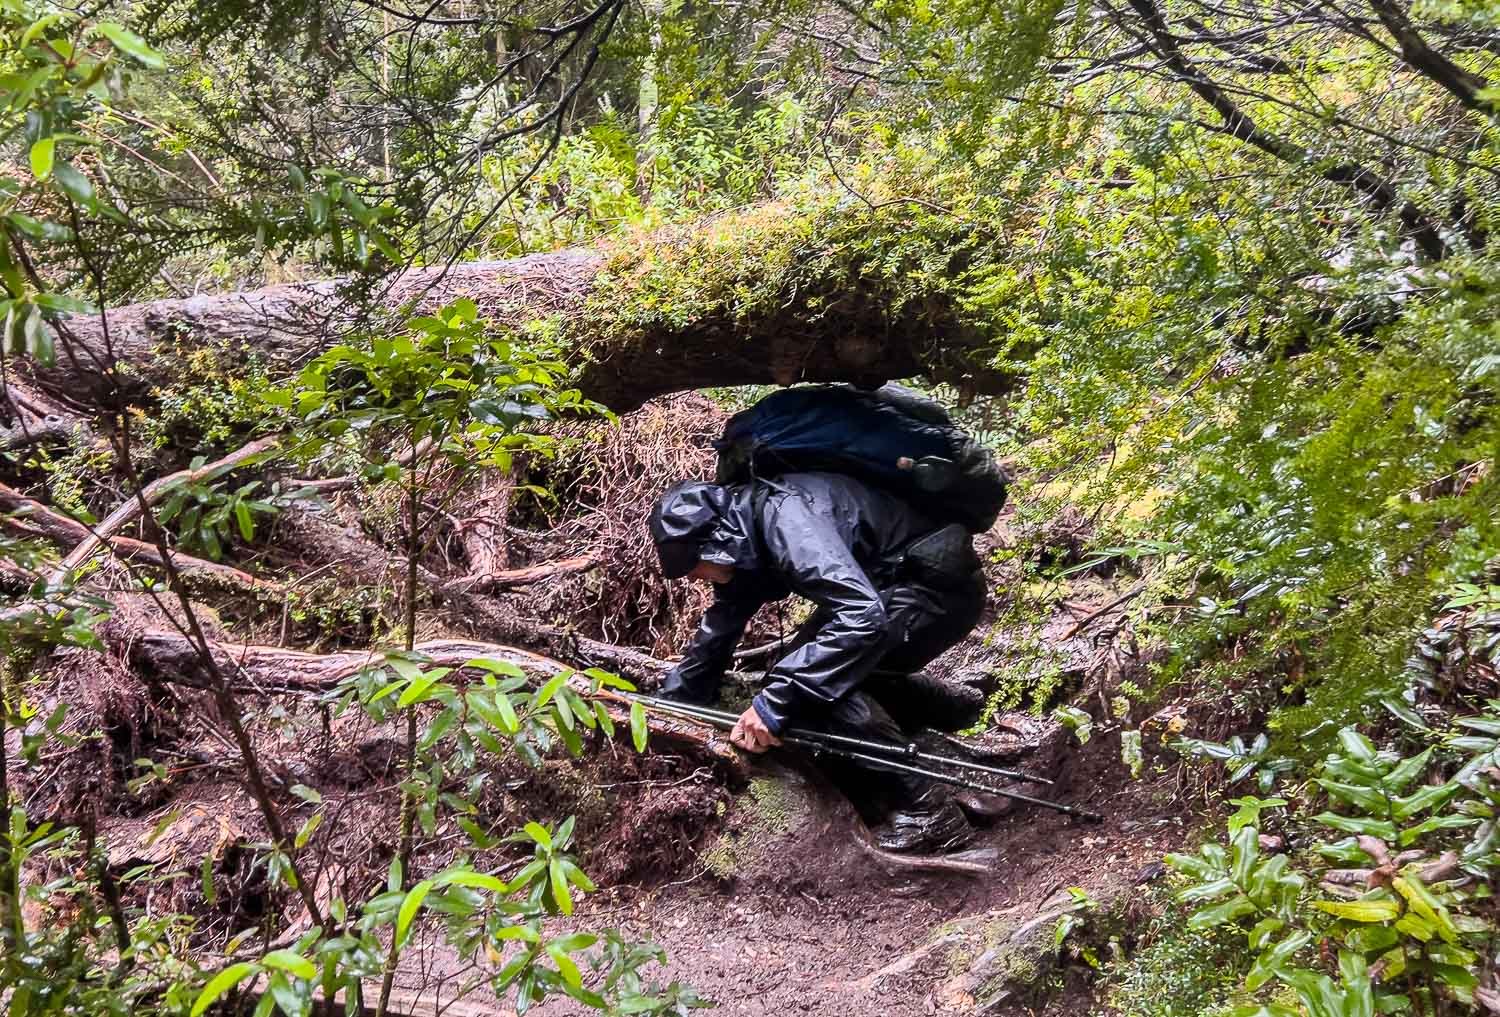
Hikers themselves have different needs. Thru-hikers covering hundreds or thousands of kilometres prioritise weight. Hikers in remote alpine parts of the Australian Alps or Tasmania’s central plateau need a bombproof layer to protect them from extreme rain, wind, sleet and snow… year-round. Hikers on manicured trails won’t need heavy-duty robust versions like those bush-bashing overgrown tracks through New Zealand scrub, Southern Australia’s spiky sclerophyll, or scrambling Tasmania’s Western Arthurs.
Environment: Dry vs Humid Air, Temperature Gradients
Frenchman’s Cap, mid-summer, Tasmania. Snow and blizzards happen in central Tasmania’s high country at any time of year.
In Northern Hemisphere winters, atmospheric water vapour freezes so air is cold and often (but not always) relatively dry. However, vapour inside a warm, humid waterproof shell condenses and even freezes when temperatures outside are below -10C to-15C (14F-5F): if your body heat is insufficient, the shell surface is just too cold and precludes the breathable membrane from functioning. Because precipitation is not liquid at these temperatures, many hikers therefore prefer a non-waterproof but far more breathable soft shell or wind breaker.
Air is warmer and more humid in Northern Hemisphere shoulder seasons and our Australian winters. Even alpine and montane areas like Kosciusko NP or Tasmania’s Central plateau, have daytime minimum winter temperatures around +/- 5C (23-41F), rarely to -10C (14F), with only night temperatures consistently falling into double digit negatives. However, wind chill drops effective daytime temperatures to -10C to -20C (14F to -4F): hypothermia is fast for hikers without adequate protection.
Snow is cold, but doesn’t form a blocking film of water on your jacket as does rain: when breathable jackets “wet out,” they still resist rain ingress, but the film prevents sweat passing out. In sustained rain or drizzle, humidity reaches 90-100%, so moisture vapour has little to no gradient to move through conventional breathable shells, especially in otherwise mild weather. Whilst hiking – and sweating – you become damp inside any shell without adequate ventilation, regardless how waterproof or breathable the material is meant to be. In cold ambient temperatures, sweat condenses inside inadequately ventilated shells and potentially saturates insulation and/or base layers. Many Northern Hemisphere hikers are unprepared for Australian alpine and montane conditions.
Conversely, if it’s warm without significant temperature or moisture gradients, eg sub/tropical rainy seasons, any shell relying on a membrane functions like a sauna.
So it’s not only water from outside that shells must manage: clothing drenched by sweat conducts heat as quickly as clothing drenched by rain so non-absorbent, wicking base layers are essential. You aim to regulate body temperature inside a shell: overheating with excessive sweat is as bad as shells that leak rain. Swap inner layers as needed during the day to match conditions; Geoff and I often find a base layer under a shell is sufficient whilst hiking in cold Australian conditions, and only when we stop, move slowly or are in bitter wind do we add an insulation layer. See Parts Two and Three for more temperature regulation techniques.
Shells and Safety
Fully layered and ready for anything (Image Credit: Cameron S.)
When you’re confident of weather forecasts on day hikes a few hours from your car in benign and/or non-remote areas, shell failures are less consequential, though hikers still die of exposure just hours from car parks (below). However, on multiday, remote hikes with deteriorating forecasts, appropriate shells not only make the difference between fun and misery, but are also potentially life-saving.
Hikers on the Overland Track, in New Zealand’s high country and even on day hikes in exposed terrain such as the Tongariro Crossing (‘None of the group were wearing thermal tops and only one had a rainproof jacket,’ or Cradle Mountain just 3 hours from the car park) have died because of inadequate shell wear.
It’s not only in Tasmania, either: two women died within three hours of their car in Victoria in spring, and a couple with insufficient clothing and gear were rescued during a multiday hike in Kosciusko NP in winter.
A shell must effectively protect against all the elements you could expect to encounter. It is your first line of defence that lets your base and insulation layers keep skin dry from sweat and regulate body temperature respectively.
Wet clothing robs body heat up to twenty five times faster than dry clothing, even faster when wind is added to the mix.
Therefore, consider safety and consequences for each hike. If the potential consequence of shell failure is hypothermia, then appropriate selection is as essential on a multiday hike as food, water and shelter.
As we saw in Parts 1, 2 and 3 of this series, there are many places to save money on outdoor clothing. Shells are not one of them. In anything other than guaranteed dry and/or warm conditions, a quality shell’s prime function is safety. Quality is not brand, it is any shell with the correct properties for the conditions so, when buying shell wear for cold/wet weather hiking, understand and identify what features you need, then choose the best match that you can afford.
Accept Dampness in Hiking Clothes, and Reserve a Dry Layer for Camp

Geoff has kept his warm puffy and thermals dry for in camp; here they’re worn under a shell.
On multiday hikes with consecutive cold days of rain, clothes eventually become damp, even with appropriate shells. Together with your sleeping bag in its waterproof bag in your pack, carry a set of dry base layers – long-sleeved thermal top and bottom, socks – to change into, plus an additional lightweight insulation layer such as a puffy. Reserve them for wearing only in your tent/sleeping bag, or around camp if you’re sure they’ll stay dry. Together with your tent, sleeping bag and insulated mat, this dry clothing is essential, because hypothermic people warm up much faster in dry clothes than when naked or in wet clothes, even inside a space blanket or sleeping bag.
Of course, this means that the next morning, you must doff those dry clothes and don your damp ones from the previous day. Cold, clammy socks are one of my least favourite things on trail, but keeping a dry set is more important!
Please watch this video about the importance of rain shells, and the impacts of wet clothing on hypothermia and decision-making. Seriously hypothermic hikers become delirious and are regularly found naked because they have taken off all their clothes! Just as for hyperthermia, you must act to restore normal body temperature before you are seriously out of whack. Regardless of your shell, if you’re becoming too cold, stop, set up your tent, and warm up.
A False Sense of Security? Huts, Other Hikers and Satellite Communicators.
Ready to go again after a stop at Lake Meston Hut, Walls of Jerusalem. Three lads inside were saturated with no dry clothes to change into.
Nor do huts remove the need for appropriate shells, because a lot can happen on trail between those huts to prevent you reaching them! When you’re hypothermic, you no longer think or navigate effectively.
Satellite communication devices (Inreach, SPOT, Zoleo) and Personal Locator Beacons have also lulled us into a false sense of security. The Peltzman Effect, aka risk compensation, describes how when
“…safety measures are implemented, people actually tend to increase their risky behaviours [because their] perception of risk decreases, and so [they] may feel that they can now afford to make riskier decisions.”
But pressing the SOS button is not like dialling 000 in town, with help arriving within minutes or the hour. Instead, if, as often happens, poor weather precludes aerial SAR, you have many hours to wait, even overnight or days. If you’re injured, moving slowly or stationary waiting for help, shell and shelter are indispensable in keeping you dry and preventing hypothermia.
Hikers with incorrect clothing on busier tracks like the Overland may expect other hikers to assist, but this is not guaranteed. During the day, faster hikers may be oblivious to the state of people whom they pass; slower hikers are likely last into camp. Another hiker might notice you missing in the hut and return for you… or not. Hikers who stray off trail in whiteout are invisible to others.
Although we’re focusing on multiday hikers, day hikes can be equally dangerous with incorrect clothing because you’re not carrying a tent. Just because you expect to return to the trailhead later the same day, doesn’t mean you will. If an injury or delay – say, into the night when temperatures drop, or with the sudden arrival of a cold front in midsummer – may cause hypothermia, then you must carry the right layers – and especially shell – to survive.
Why are we banging on about this? Because inappropriate clothing, particularly shell wear, has caused too many hiker deaths through hypothermia, and we therefore want to convey a deeper, broader context and understanding than “Top Ten Shells of 2025”. As described in Parts Two and Three of this series, base and insulation layers are key to keeping your skin dry and warm, but the shell is essential for this to happen in bad weather. Please take a moment to read this coroner’s report.
Ask yourself: Do I have the correct layers? Or am I feeling lucky?
Shell Layer Terminology

Geoff in his ultralight breathable shell on the Larapinta Trail. It was cold (-8C/17F with wind chill), drizzly and, yes, windy!
When you’re researching shells online, reviews and specifications include a plethora of technical terminology. You now know why it’s worth understanding what they mean, because they determine performance in different conditions. Let’s dive in.
Breathable and Non-breathable
That plastic yellow rain slicker some of us (ahem) older folk wore to school, and the plastic ponchos sold at sporting events, are non-breathable. Just like thick plastic bags, they are impervious to air and water. They are 100% waterproof. Rain kilts and hiking ponchos are two examples that are often non-breathable.
Conversely, breathable shells supposedly always allow moisture vapour (sweat) to escape through the material whilst preventing rain from entering. ‘Supposedly always’ because, in certain environmental and exercise conditions, they breathe so poorly that they’re not much better than non-breathable shells.
Fans on benches at footy matches or hunters huddled behind bushes aren’t working up a sweat, so non-breathable shells can be ideal. Similarly, some fishing jackets are non-breathable. However, hikers sweat, often a lot, even when it’s cold. If too much moisture condenses inside your shell, you may end up as wet as not wearing one at all. This doesn’t preclude using non-breathable shells for hiking – indeed, many people prefer them – but certain design features are essential (below). These design features are equally helpful in breathable shells.
Waterproof Breathable Membranes (WBM)
WBMs on the South Coast Track: much needed!
Most breathable waterproof shells rely on a special membrane. The most famous of these is Gore-tex but others include Hydronaute (Mont), eVent and Pertex Shield (Macpac), H2No (Patagonia), Outdry Extreme (Columbia), Futurelight and DryVent (The North Face).
Microporous membranes
These membranes all aim to prevent rain from entering whilst allowing sweat to escape.
Goretex originally used PFTE (polytetrafluoroethylene) membranes:
Goretex explains:
“The Goretex membrane has 9 billion pores per square inch, with each pore 20,000 times smaller than a water droplet. These tiny holes are too small for water and wind to pass through from the outside, which is how we can guarantee you'll stay dry and warm in a garment made with GORE-TEX fabric [my italics*]. But these same pores are large enough for moisture vapor to pass through, so your body's perspiration is able to escape and you don't get clammy and uncomfortable.” This is a microporous membrane.
[*Goretex ‘guarantees’ you’ll stay dry and warm in one of their garments but, as we’ll see later, this isn’t an ironclad promise for any waterproof breathable membrane, including Goretex. Whether the shell functions depends on many factors, not all of which are within your control.]
Bicomponent Microporous/Hydrophilic Laminate membranes
To prevent body oils and debris from blocking those pores, newer Goretex PTFE membranes have pores infused with hydrophilic polyurethane that wick sweat away, hence microporous-hydrophilic. For environmental and sustainability reasons, Goretex is phasing out these laminates and replacing them with expanded polyethylene (ePE).
Continuous Hydrophilic Coatings
Mont Austral/Siena shells (image credit: Mont)
Other membranes with hydrophilic rather than hydrophobic coatings include Mont’s Hydronaute, The North Face’s HyVent and Marmot’s Nano Pro. They perform best in colder temperatures around 0C.
Mont writes of their Hydronaute:
“[Hydronaute utilises] a monolithic PU [polyurethane] membrane that uses a non-porous structure to move moisture vapour through the membrane via a process called molecular diffusion. Unlike microporous membranes, which rely on static pores that can become less effective in high humidity, monolithic membranes thrive in such environments. In practical terms, this means moisture from perspiration is actively drawn away from the body, even in wet, high-output conditions such as prolonged alpine climbs.”
Australian SAR in Australia’s coldest environments and the Australian Antarctic Division all use Mont shells.
UK’s Páramo utilises a highly water-resistant rather than waterproof facing material, so it falls somewhere between a hard shell and soft shell:
“Páramo waterproofs are made from Nikwax® Analogy® – a unique fabric system that mimics the action of mammal fur to protect you from rain and manage your sweat. Its two-layer construction and waterproofing treatment repels rain, moves moisture away from your skin, and traps still air to protect your insulation.
“The inner layer, called Pump Liner®, actively pushes sweat away from the body to protect you from a build-up of moisture inside your jacket, which could compromise your insulation and leave you feeling clammy, cold and wet.
“The outer layer is a strong, closely woven, microfibre windproof material that deflects wind and rain, whilst any water that does make it through is pushed back by the Pump Liner.”
Steven Seeber at Backpacking Light points out in this paywalled article that technical aspects of the material make it far more water resistant than its HH suggests, equal to many conventional WBMs, but more breathable. The inner layer separates the shell from the rest of your layers, keeping them dry. Páramo reportedly excels whilst hiking in extended drizzle as often seen in the UK, but is not as effective in deluges, under heavy packs, or when stationary. Páramo is not widely used in Australia so, if you have experience with it, we’d love to hear from you in the comments.
Breathable 2-Layer, 2.5 layer and 3-Layer Hard Shells/Rain Jackets

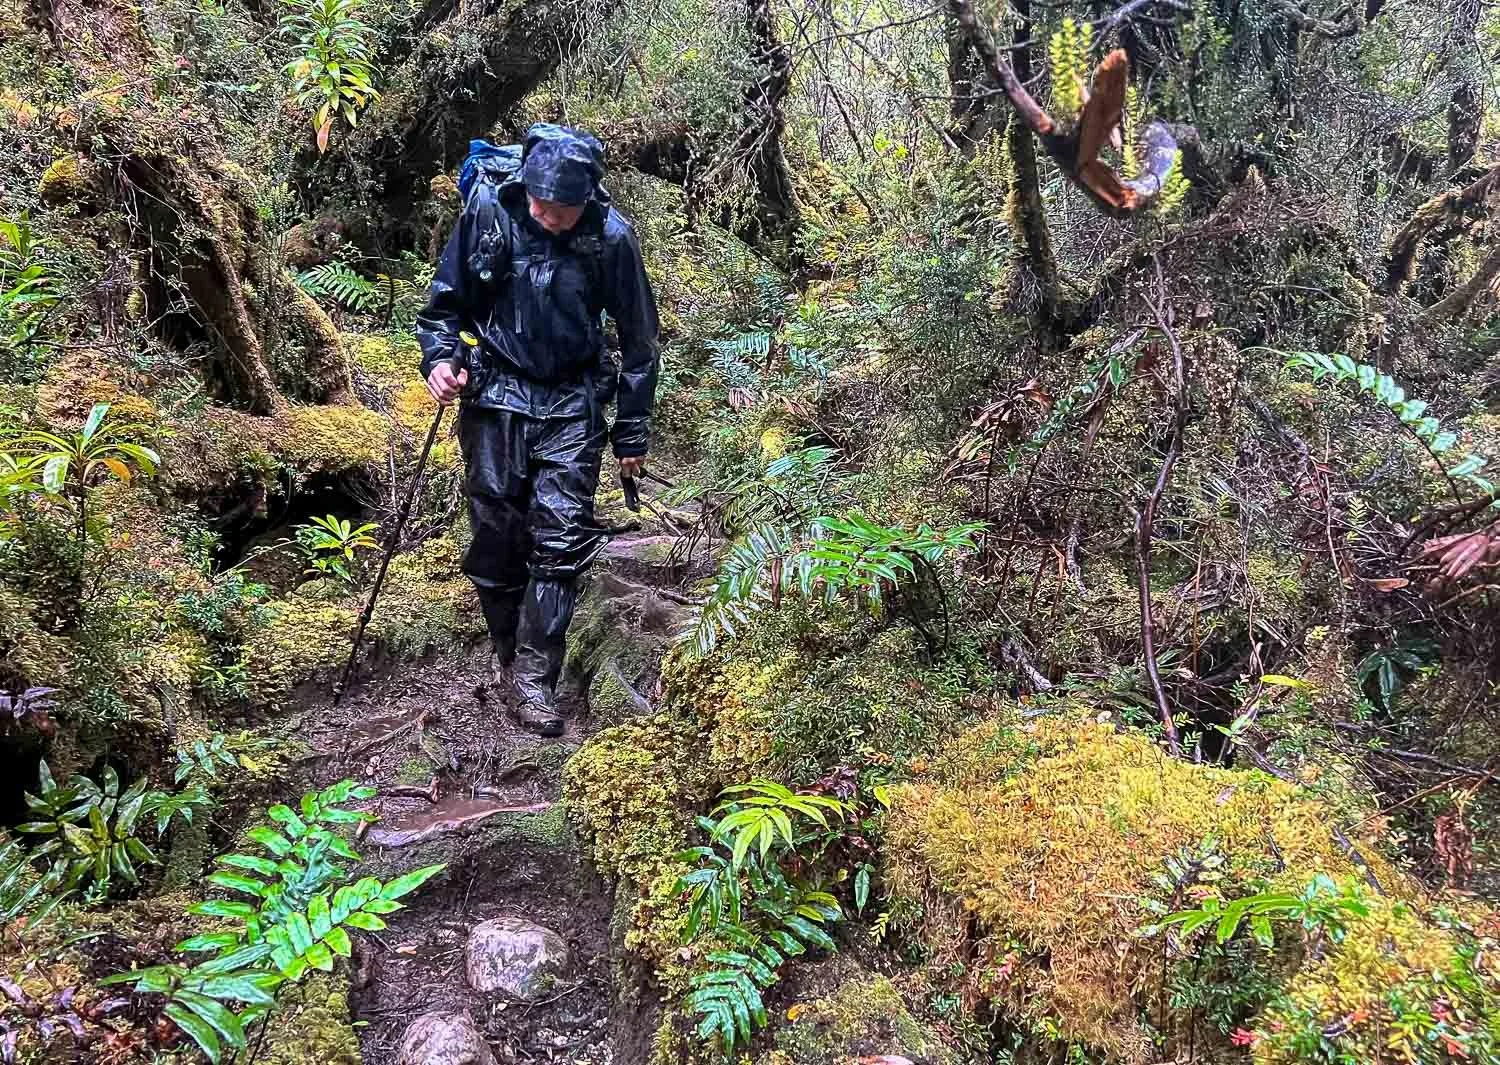
Ultralight Zpacks 3L shell on the Hellismannaleid, Iceland. This was their last trip: they began to fail for the first time.
2- and 2.5-layer shells
Although terminology varies, and 2- and 2.5-layer shells are sometimes referred to as rain jackets rather than 3-layer hard shells, you’ll find all of them under the rain wear tab of outdoor gear websites.
All breathable shells have the WBM (1st) bonded to the face material (2nd), but 2-layer shells lack an integrated additional layer on the inside. Instead, they are lined with a separate mesh hanging liner so your skin doesn’t contact and clog the WBM. You’ll find good ones (Montbell’s original Versalite was popular), but cheap offerings are inferior: you get what you pay for.
2.5-layer shells are similar but, instead of a separate liner, an infused protective veneer (the 0.5 component) is bonded to the WBM. Products include Neoshell, Goretex PacLite, HellyTech, Northface’s DryVent and many more. Depending on face material, these shells can be extremely lightweight and flexible (ie packable) but may have durability issues because the inner layer is prone to delaminating. As soon as this happens, your WBM becomes contaminated with salt and body oils and stops working.
3- Layer Shells
(turn phones sideways for full caption)
Most premium breathable shells utilise 3-layer construction with the relatively delicate WBM (1st) bonded or laminated to an outer face fabric (2nd) of varying deniers and materials, together with an inner layer (3rd) designed to prevent your body’s detritus clogging pores or blocking hydrophilic membranes.
Traditional 3-layer shells are known as hard shells because they tend to be stiffer and heavier – but also more durable – than lighter jackets. Face fabric and lining are strong and relatively thick. They include Arcteryx’ SV and Beta AR, Mont’s Austral and Mountain Pro, Macpac’s Pertex Shield Pro, and Patagonia’s Torrentshell (originally 2.5 layer, now 3) and Granite Crest.
However, with new fabrics and materials appearing on the market, ultralight hard shells such as Zpacks’ Vertice, Mont’s Lightspeed, MacPac’s Lightweight Prophet, Montbell’s Versalite, Enlightened Equipment’s Visp, Outdoor Research’ Helium and many more (every major manufacturer has a version) use light facing materials, so that some of these shells are now as light as 2- and 2.5-layer jackets.
Soft Shells
Soft shells are highly breathable with a water resistant rather than waterproof facing material, and include a hydrophobic inner, usually a form of polyester fleece. They are designed for high activity in damp rather than drenching weather; they’re also preferred by some hikers in Northern Hemisphere conditions when all precipitation falls as snow rather than sleet or rain, and their superior breathability is an advantage. Examples include Paramo, Buffalo TecLite and Marmot’s DriClime. However, once they’re wet, that insulation layer becomes much less effective, especially in wind.
As we’ve seen in earlier parts of this series, whilst soft shells are great for commuting and day hikes where you’re guaranteed certain weather conditions, or in consistently warm regions, in our opinion they are far less versatile for multiday hiking, especially in temperate areas of Australia with cold winters. Layering with separate shell, insulation and base layers is widely considered best practice here.
Durable Water Repellent coating (DWR)
These two shell jackets illustrate one that has ‘wet out’ (left) and one that is still beading (right). Frenchman’s Cap, Tasmania. (Image credit: Steven H).
Most breathable hard shells can’t breathe when the outside is coated or soaked in a continuous film of rain. Instead, the water should bead, allowing vapour to pass through the material between the beads. The facing shell material is therefore factory treated with a chemical coating, making it hydrophobic to promote beading.
Note, however, that this coating is ‘durable’ rather than ‘permanent’. Dust, dirt and abrasion wear away or degrade the DWR so it must be regularly reapplied; we treat ours at least twice yearly, or as soon as we notice any deterioration in beading. Home treatment works well initially but becomes less effective over the years and, in our experience, never achieves quite the perfect beading as original factory treatments.
Never wash your breathable shell with standard soaps or detergents because this reduces water repellency and beading. Instead, use the products specifically designed for breathable shells as recommended by the manufacturer of your shell: Grangers Performance Repel Plus, Gear Aid’s Revivex Durable Water Repellent (DWR) Spray, and Nikwax wash, spray-on or wash-in DWR restoratives.
Remote Equipment Repairs professionally renews DWR treatment for about AUD30 per clothing item. For DIYers, proprietor Jackie King recommends spray-on over wash-in products for waterproof breathable shells because the latter can coat the inside and reduce breathability. She also recommends allowing the treated garment to fully dry and then tumble drying on low heat for twenty minutes to set the coating.
A small number of shell fabrics (Shakedry, Outdry) utilise Permanent Water Repellent Coatings (PWR, see below).
PFAS, PFC, Environmental Sustainability of DWRs.

Green fluorine and black carbon atoms, with others at the head (Image Credit: Wikimedia)
PFAS (per- and polyfluoroalkyl substances) are a large group of man-made chemicals famous for their oil-, dirt- and water-repellency. PFCs (perfluorinated chemicals) are a subcategory in the PFAS group. Both are widely used in the DWR and membranes of shell wear.
Unfortunately, the chemical structure of a chain of carbon and fluorine atoms, with other atoms at the head, includes extremely stable bonds. These bonds not only resist breakdown by microorganisms – they are ‘forever chemicals’ – but also travel widely in air and water to bioaccumulate, being absorbed by various animals and concentrating up the food chain.
In humans, there is strong evidence that these chemicals negatively impact endocrine and immune systems, reduce birth weights, cause liver and thyroid disease, increase cholesterol levels and the risk of kidney, pancreatic and testicular cancers. They are also implicated in other cancers and disorders still under investigation. However, wearing the clothing is not directly dangerous to the wearer: it is the accumulation in our wider environment and the bioaccumulation that is problematic.
The outdoor clothing industry has responded by phasing out these chemicals in its manufacturing supply chain. Mont is in the process of phasing out all PFAS (its membrane already is), Goretex now has ePE membranes, and Patagonia says it is PFAS-free from winter 2025. Look for PFAS- or PFE-free in specifications. Because these technologies are recent, anecdotal reports strongly imply that they are less waterproof than their PFAS predecessors; some manufacturer websites acknowledge that the new DWR technology is less effective. Others such as Arcteryx and Patagonia rely on branding and are coy about specifying precise waterproof or breathability ratings even for their expensive shells; this makes objective comparison difficult.
Hydrostatic Head (HH) or Waterproof Ratings
Hydrostatic head is widely used to represent the waterproofness of a shell: how long and how well it resists water ingress. Technically, it is measured by placing the material at the bottom of a cylinder, adding water to the latter, and then pressurising it for a certain time to see when and at what pressure or “head” the material allows water to be forced through the material. This measurement therefore doesn’t directly translate to shells, because rain falls in droplets rather than bearing on your shoulders as a column, but it is one way of differentiating between the relative waterproofness of different shells.
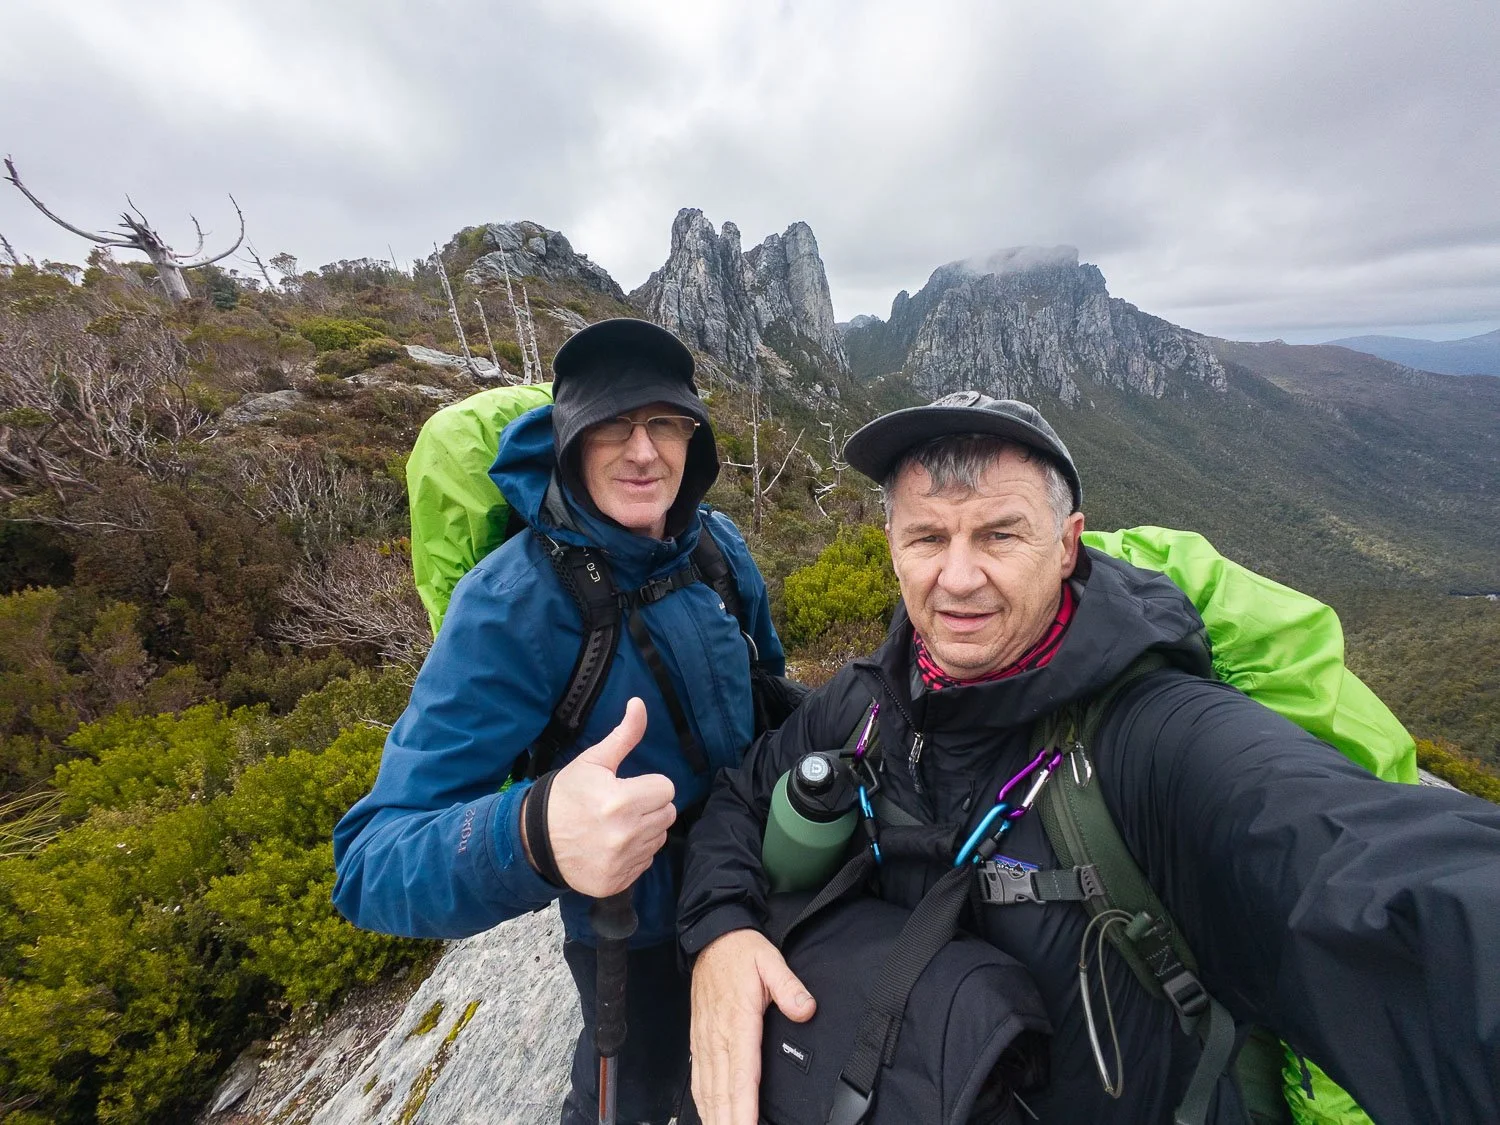
Mont 3L shells in the notoriously unpredictable Western Arthurs, Tasmania (Image credit: Tony R.)
As you’d expect, heavier jackets with thicker facing materials in a company’s line-up provide more protection to the membrane and, depending on fabric construction, yarn count and fibre type are designed to be more durable to abrasion, wear and tear than lighter shells.
They are often teamed with higher HH membranes and together these features mean they remain waterproof for more years, especially those with a woven inner layer, such as those in Mont’s heavier shells. Different design features also significantly affect a shell’s waterproofness.
So shells vary greatly as to their hydrostatic head. Although the “minimum standard to call a fabric “waterproof” is 1,000 mm HH, over a period of 24hrs,” this rating is, frankly, useless for a backpacking shell.
Many experienced hikers have encountered tent floors that are waterproof under inflated sleeping mats, but which seep when you kneel on them. Similarly, shells with a HH rating of 10,000mm may be fine for cyclists or runners but, in our experience, seep under the pressure of backpack shoulder straps, chest strap and/or hip belts, or even the pack cinched tightly against the body or stretching the shell across the shoulders. Geoff and I have worn the same 20,000mm HH ultra lightweight rain shells, bought at exactly the same time and with exactly the same wear on them and, after six hours of bucketing rain, Geoff’s began seeping at the shoulders under his 16kg/35lbs pack, whilst mine remained waterproof under my 10kg/22lbs pack. Our heavier shells never seep.

This was the day that Geoff’s shell seeped on the Bibbulmun Track. Here we’re under a tiny, leaky shelter, with hot soup to warm us up.
It is therefore essential to consider your pack weight when choosing a shell: ultralight shells only work well under ultralight packs. More than a decade ago, long before their advice line, I rang Mont about the suitability of one of their newly released shells for an upcoming hike. I was put through to the technical department and, after explaining where we were hiking, the first question I was asked was, What is the weight of your pack? I was told that the particular ultralight jacket would not work with a 14kg pack.
For multiday hikes in alpine areas of Australia, we and many other hikers prefer heavier 3-layer shells with a HH of around 30,000mm. For relatively dry trails like the Larapinta, or benign environments like the Bibbulmun Track, we as lightweight hikers would still not go below 20,000MM with our packs. Ultralight hikers might get away with less, so YMMV.
3L 700g/24.7oz shells in New Zealand. These 14-year-old shells have been scrupulously cared for with regular washing and DWR renewal, and are still waterproof.
For an idea of relative HH ratings for shells, here are a few better-known ones:
Heavier Traditional 3-layer shells:
Fjallraven Eco-Shell Keb 3L 30,000MM
Mont Hydronaute Pro 3L 35,000MM
Mac Pac’s eVent 30,000MM, now using Pertex Shield Pro (eg Resolution Raincoat) 20,000MM
Goretex 3L >28,000; eg Arcteryx Beta AR 3L (Goretex Pro). Arcteryx do not list HH or MVTR for any of their new Goretex ePE membrane shells.
Helly Hansen Hellytech Professional 20,000MM
Medium to Ultralight weight 2.5-3 layer Shells
Montbell Supa Dry-Tec (was 2 layer, now 3) Versalite >20,000mm
Marmot NanoPro 2.5L >10,000MM
The North Face Hyvent >15,000MM
Mont Hydronaute Ultra (Lightspeed Jacket) 20,000MM
Enlightened Equipment Visp 10,000MM (was 20,000MM)
Zpacks Vertice >20,000MM
MVTR (Moisture Vapour Transmission Rate), or Breathability
When shell wear gets this wet, no material is super breathable! However, at the end of the day, we were only damp rather than wet, and didn’t get cold, even when moving slowly. South Coast Track, Tasmania.
We’ve already seen that clothing can get as wet inside your jacket from sweat as from rain, so breathability – how quickly moisture vapour passes through a material – is key.
You’ll see different ways of measuring breathability, but MVTR is common. Tests measure how easily water vapor passes through a material, expressed in grams per square meter per 24 hours (g/m²/24h).
Of course, this is under laboratory conditions controlled for humidity and temperature, and also ignores individual differences in how sweaty humans get: ie not much like we hikers experience in the real world! But again, it’s a way to compare different shells, rather than an absolute value.
Here are some examples:
Traditional 3L Shells
Fjallraven Eco-Shell 3L 26,000g/m²/24hours
Mont Hydronaute Pro Shell 3L 22,000g/m²/24hours
MacPac’s Pertex Shield Pro (eg Resolution Raincoat) 20,000 g/m²/ 24 hrs
Arcteryx Beta AR 3L (Goretex Pro) do not list MVTR for their new shells, but Goretex Pro is 25,000 g/m²/ 24 hrs
Helly Hansen Hellytech Professional not specified
Medium to ultra-lightweight 2.5-3 layer shells
Goretex Pac-Lite 15,000 g/m²/ 24 hrs
Montbell Supa Dry-Tec (was 2 layer, now 3) Versalite 52,000 g/m²/ 24 hrs
Marmot NanoPro 2.5L 17,000 g/m²/ 24 hrs
The North Face Hyvent 12-15,000 g/m²/ 24 hrs
Mont Hydronaute Ultra (Lightspeed Jacket) 48,000g / m2 / 24 hours
Enlightened Equipment Visp 83,000 g/m²/24hr
Zpacks Vertice 56,000+ g/m²/24hr
These figures reflect and are affected by the
membrane type (monolithic membranes and 2.5 veneers are slightly less breathable)
denier and backing materials (thinner = more breathable)
state and quality of DWR (excellent beading improves breathability)
cleanliness of material (dirt and grease block vapour transmission)
But these are ideal numbers. In temperate Aussie winters, and sub/tropical regions with saturated air, little or no humidity gradient exists for sweat vapour to cross. And backs under packs inevitably get sweaty, unless the pack has a trampoline to separate the two (eg Osprey, Zpacks Arc series).
Ultralight, highly breathable shells are ideal for showery weather as here because they dry between squalls.
We can confirm that the breathability of the original Visp shells is extraordinarily good, but they’re too delicate for scrubby or overgrown tracks. They dry incredibly fast and are, like many ultralight shells, ideal for showery weather: ten minutes after rain ends, they’re dry. However, that breathability works both ways: our original Visps are not as warm and windproof as heavier shells and less suited to moving slowly in cold environments. However, for milder climates, when you’re likely to be carrying the shell for most of the time, ultralight ones can be outstanding.
Other than suggesting multiday hikers avoid anything under 15,000g/m²/ 24 hrs for Australian conditions, we won’t recommend an ideal MVTR, because it is so dependent on how much you sweat and how fast you hike, plus terrain and climate. Fast-packers need the highest possible MVTR, at the lightest weight, that still provides the protection needed. Slower hikers like Geoff and me can get away with less.
If MVTR is important to your hiking style, ask what works for people in backpacking groups wherever you plan to hike most often. If planning a multi-month thru-hike, ask in groups specific to the trail, remembering to specify your sweat factor!
We backpackers all prefer the lightest possible option that keeps us dry from the outside and from the inside, but this truism is worth remembering:
“Most Breathable, Most Waterproof: Pick One!”
Other WB Technologies
Other waterproof breathable shells utilize different technologies. Like all shell technologies, they work more- or less- well depending on conditions. Whatever shell you consider, you’ll find people for whom it has worked, and for whom it has not: investigate those conditions!
Waxed Cotton
RM Williams Drizabone Ranger Oilskin (Image credit: RM Williams)
This old technology retains its place as environmentally sustainable, repairable, durable and lasting for longer than any DWR, but nowadays is more for day wear rather than hiking. Whilst unwaxed cotton is a big no-no as a base or mid layer, waxed or oiled cotton is almost waterproof but also heavy and not highly breathable.
Australians may remember the classic canvas japara; RM still manufactures oilskins or Drizabones. UK outdoor clothing manufacturers – experts in catering to infamously wet and cold conditions – still sell waxed cotton shell wear, but most are lined and too heavy for multiday hiking. Maintenance comprises re-waxing.
Permanent Water-repellent Coating (PWR)
To solve the DWR coating issue, several companies – Columbia’s Outdry Extreme, Outdoor Extreme Eco (PFAS-free) and Goretex ShakeDry (now discontinued) have placed a heat-bonded WBM on the outside of the garment, rather than inside it. The texture is slippery and never wets out, but comes at the cost of weight. These shells are highly sensitive to abrasion as you might experience scrub bashing or under packs or straps: some hikers find it too fragile, some too hot, others lament the loss of Shakedry despite its durability problems. Like every other technology, they work or don’t depending on conditions.
Design Features
1. Features to Prevent Water Ingress
Both these shells have storm flaps, but the one on the right also has a higher collar that, when zipped up, covers the chin and lower face, with fewer trickles into the neck in driving rain. (Image Credit Steve H.)
Of course, no matter how waterproof their material, all shells have big holes. Holes for your neck and face under the hood, holes for your hands, at the zips, and tiny needle holes at the seams. These holes must be shielded, closed or sealed to stop rain entering.
Zips
Today, water-resistant – note, water resistant, not waterproof – zips from reputable brands, such as YKK’s Aquaguard, are on most lightweight shells and many midweight ones now too. In the conditions backpackers use them, even in driving rain, they are as close to waterproof as you can get. Some shells include an overlapping flap on the inside.
Other heavier traditional shells utilise conventional zips, either covered by a storm flap, underlain by a second one, or both. Check that the shell you choose has either quality waterproof zips and/or flaps; zip type and brand and the presence of storm flaps should be listed in the description and/or specifications.
Waterproof zips, hoods and collars with good coverage and velcro cuffs on these shells (Austral/Siena) (Image Credit: Mont)
Cuffs
Cuffs should cinch firmly around wrists, with Velcro generally providing a better seal than elastic. Velcro also allows a tight seal around gloves. If hiking with trekking poles or scrambling in rain, expect some to seep into sleeves. Short-sleeved base layers, or pulling up the sleeves of long-sleeved ones (or insulation layers), prevents them wicking water.
Seams
Some shells are sewn with anti-wicking hydrophobic thread, whereas others use thread that swells when wet; both supposedly prevent water entering holes made by the needle. In our opinion, however, truly waterproof seams need to be sealed with tape, a labour-intensive — ie expensive — process. If seam taping isn’t mentioned in specifications, it probably is not there. In store, check for taping. My Zpacks Challenger jacket lacks taping around the neck and leaks (I noticed only after the warrantee expired).
Hoods
Arcteryx shells are eye-wateringly expensive — we bought ours heavily discounted during sales because full price is, in our opinion, prohibitive in Australia — but their hoods have outstanding adjustability, especially when teamed with a cap.
A well-designed hood is essential, especially for people who wear spectacles. Look for adjustments at both back and sides of the hood to lower the peak and cinch sides closer to face and chin, both essential when walking into driving rain. A wired peak (eg Mont Pro) is also useful.
Ultralight shells often boast hoods with minimal or no peaks designed to be worn with a baseball cap. If you hike with legionnaire’s hats as we do, it is tricky to stow the flaps sufficiently to prevent them wicking water. And these minimalist hoods work poorly with brimmed hats.
Collar
A collar that closes high (mouth level) and well and that doesn’t funnel water from the sides of the hood to wet your upper chest is essential for bad weather. Look for a lined edge to protect chin and face from Velcro, rough outer fabric and zip pulls.
Length
Standard length shell jackets should be long enough to almost cover your bum; those designed for climbing are shorter. Ensure there is plenty of fabric below the hip belt of your pack and consider drop tails for additional protection. You’ll need rain pants if using standard shells in wet environments.
Mid-thigh length hiking shells are an Aussie/Kiwi thing and include One Planet’s Torrent, Mont’s Austral/Siena, Wilderness Equipment’s Deluge and MacPac’s Resolution. They are, of course, much heavier, due to the extra material (600g-750g/21.2oz-26.5oz).
Although they aren’t suited to alpine climbing, they’re perfect for scrambling and pushing through overgrown trails in extremely wet, cold and snowy temperate environments; they’re also ideal for the many Aussies who prefer hiking in shorts (inseam shorter than the length of the shell) plus long gaiters, again a local thing as far as we can tell. Although a small strip of your legs is exposed, your core stays dry and warm. It’s a practical solution because, in many situations, you don’t need rain pants… but remember, hypothermia! If you’re considering bomber jackets like this, definitely compare HH and denier because pushing through overgrown trails requires much stronger materials and a higher HH; DWR is rapidly worn away.
2. Ventilation

Mid-thigh-length shells are practical for warmth as well as rain. Here on the Australian Alps Walking Trail, Kylie has unzipped hers from the bottom for more freedom of movement. (Image Credit: Kylie B.)
Pit zips from the inside of your arm at almost your elbow up past your armpit and a similar distance down to your waist are, in our opinion, non-negotiable for any hiking shell, breathable or not. The difference pit zips make in adding ventilation and quickly dumping moisture is significant, and the area is protected from rain by your arm in all but deluges and/or strong winds.
Front zips that can be zipped up from the bottom as well as down from the top are helpful, especially on mid-thigh length shells.
3. Other Design Considerations

Pocket placement is important to integrate well with hipbelts. (Image Credit: Venecia B.)
Comfort
Check that shells allow you to easily bend, crouch and reach without excessive pulling; articulation at elbows and knees is helpful.
Robustness and Durability
Sadly, there’s no way around it, here is another truism:
Lightweight, Waterproof, Durable: Pick two!
Heavy traditional shells have woven inners and durable face materials that resist damage from pinholing, snagging and abrasion. On hikes where you can’t risk a giant tear in your shell, choose one with a higher denier (heavier) face material. Many quality shells utilise higher denier materials on the highest wear areas, such as shoulders, upper back and outer arms.
Conversely, you only need pass within ten metres of scoparia or grevillea for ultralight shells to shred! And, in our experience, truly ultralight shells are just too breathable for very cold conditions in Oz, because some wind finds its way through. Nevertheless, there are plenty of places where they shine.
We carried original Visp jackets (20,000mm HH, now 10,000mm) on the benign Bibbulmun Track, arid Larapinta Trail and many short multiday hikes in mild conditions. Conversely, on Tassie’s Central Plateau, we chose trusty decade-old thigh-length 3 layer jackets because we were hiking off trail through scoparia, while on the South Coast Track with several days of consistent rain and negotiating horizontal forest, we wore standard length 3L jackets, all with cited HH of 30,000mm. However, only you know where you hike, so choose accordingly.
Buying: Cheap, Breathable, Waterproof: Pick Two!

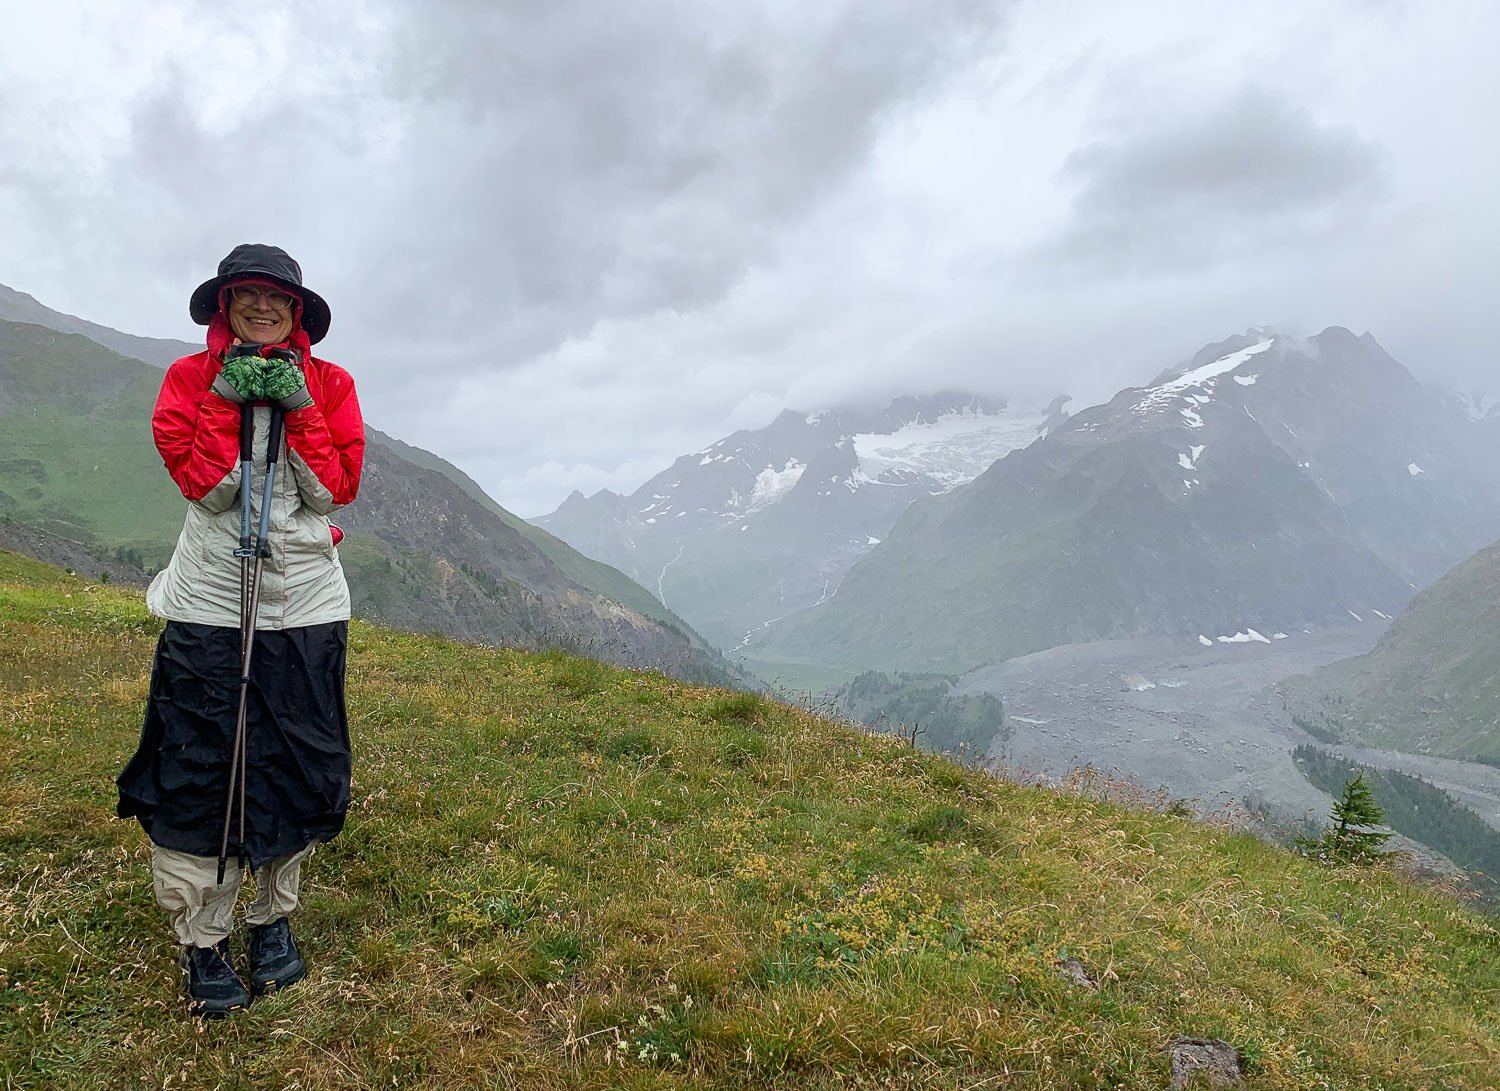
Annette enjoying the Tour Mont Blanc in summer. At this time of year, Northern Hemisphere mountains often experience drenching afternoon thunderstorms, but you’re rarely remote, and you won’t encounter blizzards as you might in Tasmanian summers. (Image Credit Annette F).
This article aims to provide the knowledge you need to identify the shell that best suits your specific backpacking parameters: pack weight, hiking style, weather/climate and terrain, plus the all-important safety considerations. But price is also important! Sea to Summit, FrogToggs and countless other companies offer cheap shells and they are perfectly fine if potential consequences don’t include hypothermia. Otherwise, choose the best match to conditions that you can afford.
This depends on where you plan to hike, so YMMV but, in our opinion, if you want only one shell for Australia, ideally choose something mid-weight and up, of good durability with a HH of at least 20,000MM that covers everything you might encounter. If we regularly hiked in Tasmania or the Australian Alps, in New Zealand, off-trail with scrub bashing, and/or were carrying particularly heavy packs, we would choose closer to 30,000MM, ie heavier shells. Then, as time and budget allow, consider adding a lighter shell for more benign hikes.

A traditional thigh length 3L shell like this Odyssey weighs 658g/23oz in a women’s 12 (more than many ultralight tents and triple the weight of ultralight shells), but it also has a HH of 35,000MM and an MVTR of >22,000g/m2/24hr. A shorter shell jacket with the same specs weighs significantly less. (Image Credit: Mont).
You’d think most staff at outdoor shops can recommend the appropriate shell but, unfortunately, this isn’t always the case. Weekend warrior shops cater mostly to people day hiking in benign weather; we’ve seen countless examples of hikers in online backpacking groups, the Overland Track in particular, being sold inadequate shells for conditions and pack weight.
Some shells are available only online — think specialized ultralight cottage brands such as Zpacks, Gossamer Gear, Enlightened Equipment etc — but, if you’re considering these expensive and delicate options, you likely already know whether they will work for you.
However, mainstream shells can also be bought in bricks and mortar stores. We recommend that you first research online, then take your shortlist into shops that stock them to try them on. Do the right thing. Upon request, many shops will discount to near the [online price+postage] in your country, so please don’t be that shitty person who tries instore and then buys elsewhere.
Below are a few Australian shell examples. Using what you’ve learned so far, find and analyse the important information in the features/specifications. Is all the information you need supplied and, if not, why might that be? Will the shell work for your multiday hikes? Why? Why not?
Peruse also MacPac’s offerings in NZ.
A good shell is a big ticket item, so trying them on may save a lot of hip pocket pain. Test all the afore-mentioned features: good fit is essential. For example, some hoods just don’t fit me right, certain women’s models are too short in the torso on me and men’s models fit better and, when I was fatter, some men’s models were too narrow in the hips.
Bring your pack to see whether you can reach the shell’s pockets. Is the length sufficient or will it come untucked? Conversely, short people might find thigh-length shells too long. Ensure insulation layer(s) fit comfortably underneath. Cinch down everything and imagine hiking into driving rain. Do the cuffs and hood seal well?
Other Shells
Non-breathable Shells
Although we’ve placed this at the end of the article, many hikers around the world prefer non-breathable shells. Rather counterintuitively, they are often hikers who hike in particularly wet environments… wet and humid, when breathable shells struggle.
Because non-breathable shells must still allow vapour to escape, they rely on venting and/or air circulation. Often, design means that they vent very well indeed.
Hiking Ponchos and Capes
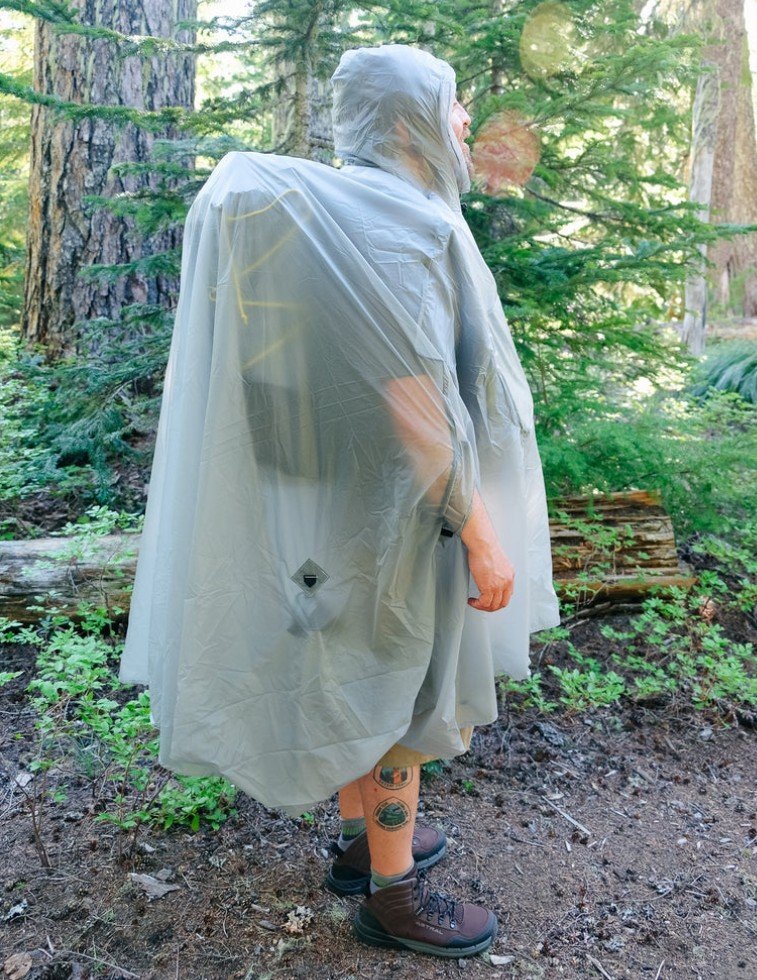
Ponchos may be of breathable or non-breathable material, but many are the latter, or at least leaning towards low breathability, but it doesn’t matter. Ponchos from Sea To Summit (poncho, or their tarp/poncho), the Gatewood Cape (tent or poncho), XTM, Forclaz and many others are fantastic for hiking in rain, as long as it’s not windy or cold, or on tight, scrubby tracks where they catch on branches and spiky foliage. Many people like them for caminos where you hike between towns on roads.
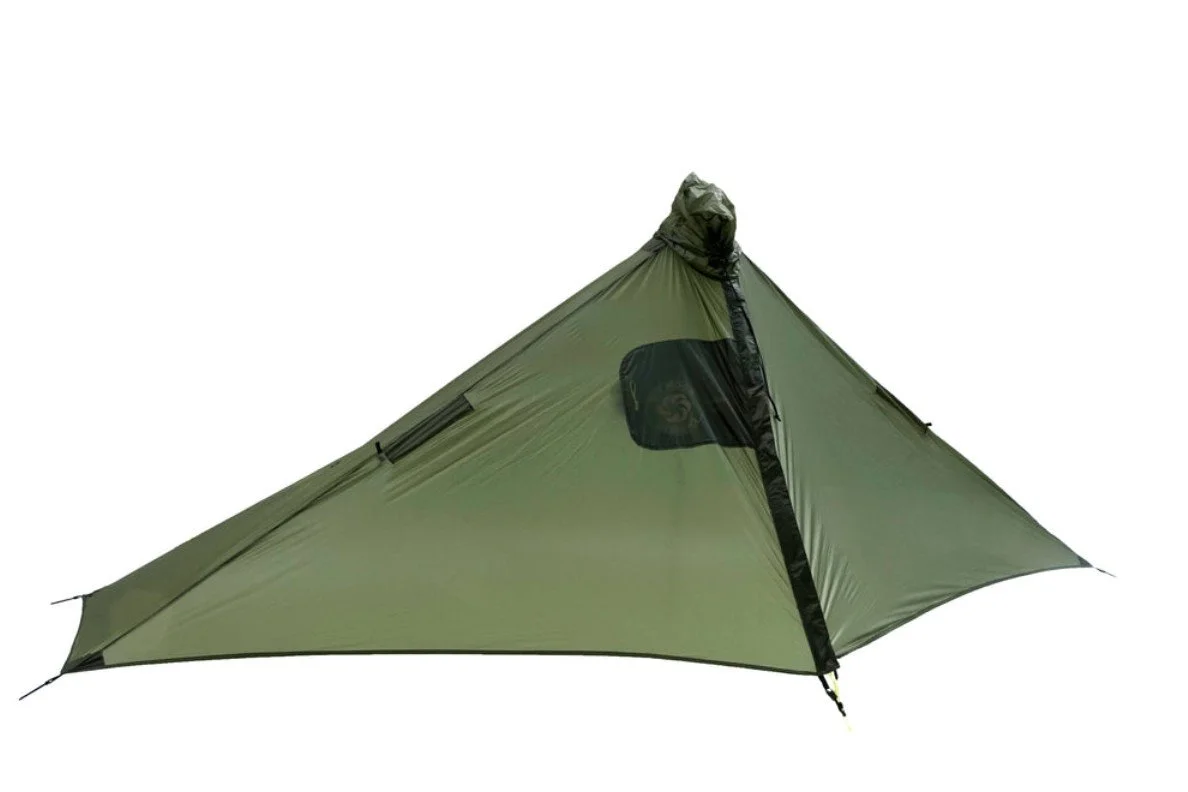
Hiking ponchos cover you and your pack, so no water funnels from the hood down your back. They are airy: vapour escapes easily, and many incorporate studs to close sides, or a belt to prevent wild flapping. Others such as the Gatewood, above, have hoods that cinch closed, so the poncho doubles as a tarp or tent… but what, enquiring minds want to know, do you wear while you’re setting up in rain?
Although the Paramo poncho, promoted for tropical weather, is breathable, ponchos and capes are where non-breathable materials excel. They are relatively cheap, vent more than can any WBM in shell jacket configuration, and are a great choice for northern Australia with its humid tropical and subtropical climates. Some hikers use them with umbrellas to shield their arms, or wear waterproof sleeves. People who hike primarily in benign terrain and weather (wet but not cold) often prefer hiking ponchos.
Rain Pants aka Overpants
Ultralight rain shell and pants (255g/9oz total, over 1kg/35oz lighter than our bomber set). Note the little Gear Aid patch on the knee where I fell and immediately tore the material. Ultralight gaiters tile-style UNDER rain pants rather than over the top often work better unless in brushy scrub.
Rain pants are essential with standard length shell jackets because water running off the shell first saturates your hiking pants, then wicks upward under the jacket to saturate everything around your nether regions, hips and even shirt.
With a sit pad to avoid wet ground, hiking pants with a slightly lower HH – say, 15,000MM – are often fine because they don’t need to bear the weight of a pack, straps or belt. However, for hiking in cold conditions in Australia, we personally would not go below 20,000MM HH because keeping your torso dry is crucial. YMMV.
You may get some condensation on the part of a jacket that is covering the pants but, in our experience, it’s not enough to worry about.
Also in our experience, rain pants seep first at the front of the thighs and knees; articulation (darts at the knees) minimises stretching and seepage.
The zips of some rain pants extend all the way up the sides, excellent for quick venting in showery weather (eg our older Outdoor Research Forays 20,000HH; there have been many iterations of these pants, all with differing WBM and HH). At the very least, choose a brand with sufficient leg width and zip length that allows you to pull them on without removing your boots, even when you have Size 42-43 clodhoppers like us!
Midweight OR Foray rain pants worked well on the South Coast Track, but we were careful with them. They are, in our opinion, a little too light for rockier scrambles. And we teamed them with a more robust shell jacket.
For scrambling in challenging alpine terrain such as the Western Arthurs, sliding over rocks or pushing through thick, pokey scrub in New Zealand, heavier overpants such as Mont’s Austral or Supersonic are more durable and protective, especially if you’re moving slowly.
On the Bibbulmun Track on cool, showery days through the Pingerup Plains, we wore only merino briefs under ultralight (sub 200g/7oz) original Visp overpants, which breathed so well that they didn’t become clammy against bare skin; we rolled them up whilst wading. Similar weight pants include Zpacks Vertice, Mont Lightspeed, Montbell Super Dry-Tec and the Rab Phantom.
We wore midweight OR Foray pants (now with different specifications) teamed with heavier 3L jackets on the South Coast Track: ultralight shells were too delicate. Other midweight rain pants in the 200-350g range include Patagonia’s Torrentshell and Montbell’s Gore-Tex 3L; in our opinion this weight is the most versatile and, unless you expect to hike in extremes of benign or challenging terrain, a good all-rounder.
Most rain pants have elasticised waists; drawstring ones can be fiddly for cold fingers. Non-breathable rain pants exist, but we wouldn’t recommend them for Aussie conditions: they are too sweaty.
Rain Kilts
A combination of shell wear including a rain kilt. Macpac make a waterproof hat with a brim similar to the one Annette is wearing. (Image Credit: Annette F.)
Rain kilts, aka rain skirts/wraps, are about knee length with a semi- wrap or split on the side; stretch or a flare allows bigger strides or climbing steep slopes. They’re generally light — sometimes just 50-80g (2-3oz) — and ideal for hiking in shorts in mild, non-windy weather, rather than above the tree line. The design is perfect for non-breathable materials, though you may get a little damp around the hip and waist.
Materials include ultralight 3L WB material such as Zpack’s Vertice kilt (not durable, but best for warm climates), but also non-breathable silnylon, silpoly and DCF. Most non-breathable options are light, cheap and packable; fastenings include zips, Velcro, snaps or elasticized waists.
Cottage companies that make kilts include ULA Equipment, Enlightened Equipment, LightHeart Gear, Dutchware, Zpacks, 3F UL Gear, Naturehike, Liteway, plus many on Amazon, eBay and AliExpress.
Pair kilts with long, lightweight gaiters, and the legs are mostly protected. Some people also use their cheap kilts as mats in vestibules.
Emergency Shells
Many older folk remember the emergency plastic garbage bag. It has many emergency uses, one of which is as a rain kilt. Simply slit open the bottom and pull over hips to waist, then cinch and tie handles at the waist. Or, less effectively, slit the bottom, make two holes either side for the arms, pop over the head. Cinch handles around the face and use as a poncho.
Hiring Shells
In Tasmania, several suppliers hire out shells. They include Overland Track Transport (Wilderness Equipment shell), Wild Island Adventures (Mont shell), Aspire adventure (Mont and Wilderness Equipment shells) and, for Australia more widely, Bogong Equipment (Melbourne based), Vast Outdoors (One Planet shell), Back Country Essentials for Kosciusko and others. Compare HH, MVTR and price.
Umbrellas

Michael and Anna of Our Wanderlust on the Camino de Santiago (Image Credit: Michael Fogarty)
Hiking umbrellas are light (under 200g/7oz), relatively compact, and attach to backpacking shoulder straps with a handsfree kit so that you can still use trekking poles or take photos. Many are rebranded Euroschirm umbrellas; in Australia you can find Gossamer Gear, Six Moon Designs, Hyperlight Mountain Gear, Helinox and Sea to Summit umbrellas. They’re useless in scrubby terrain.
Those with a dual overlapping canopy – a slit partway up – perform better in gusts but, really, none are comfortable to use in even moderate winds of say, >10-12 knots. They excel when teamed with ultralight rain shells in consistent rain that would otherwise overwhelm material at upper back and chest. They’re also useful when you’re already carrying them for sun protection, as we do.
Gloves
Gloves are essential in cold climates because cold fingers function poorly or not at all: you may not be able to operate zips, or set up a tent or bivvy. We’ve covered gloves in Part One of this series.
To Conclude
Weather changes quickly in the mountains. On this spur trail day hike, we left big packs in the hut but carried essentials, including shells, in day packs. We needed those shells on top! Brrr! Later that afternoon, the peak was engulfed in icy mist and rain.
In many environments, the shell is an essential safety component of kit. If potential conditions are cold enough to cause hypothermia on your multiday hike (and it doesn’t need to be super cold for this!), treat rain shell choice as seriously as tent choice, or even the first aid kit you pack.
An appropriate shell reduces stress: morning cold rain outside the tent is a non-issue when you trust your shell and layers to keep you sufficiently warm, if not perfectly dry. Conversely, although dampness and some discomfort is to be expected after days of rain, that’s not the same as hours of shivering.
Saving weight is important when backpacking but, in our opinion, should never be at the expense of safety. If you need a heavy bomber jacket, accept the fact. Save weight elsewhere.