
South Coast Track Planning and Tips
Nearly all the tips and principles in this blog are transferable to other remote multiday hikes. Learn how to plan conservatively and tailor a walk to your ability and preferences!
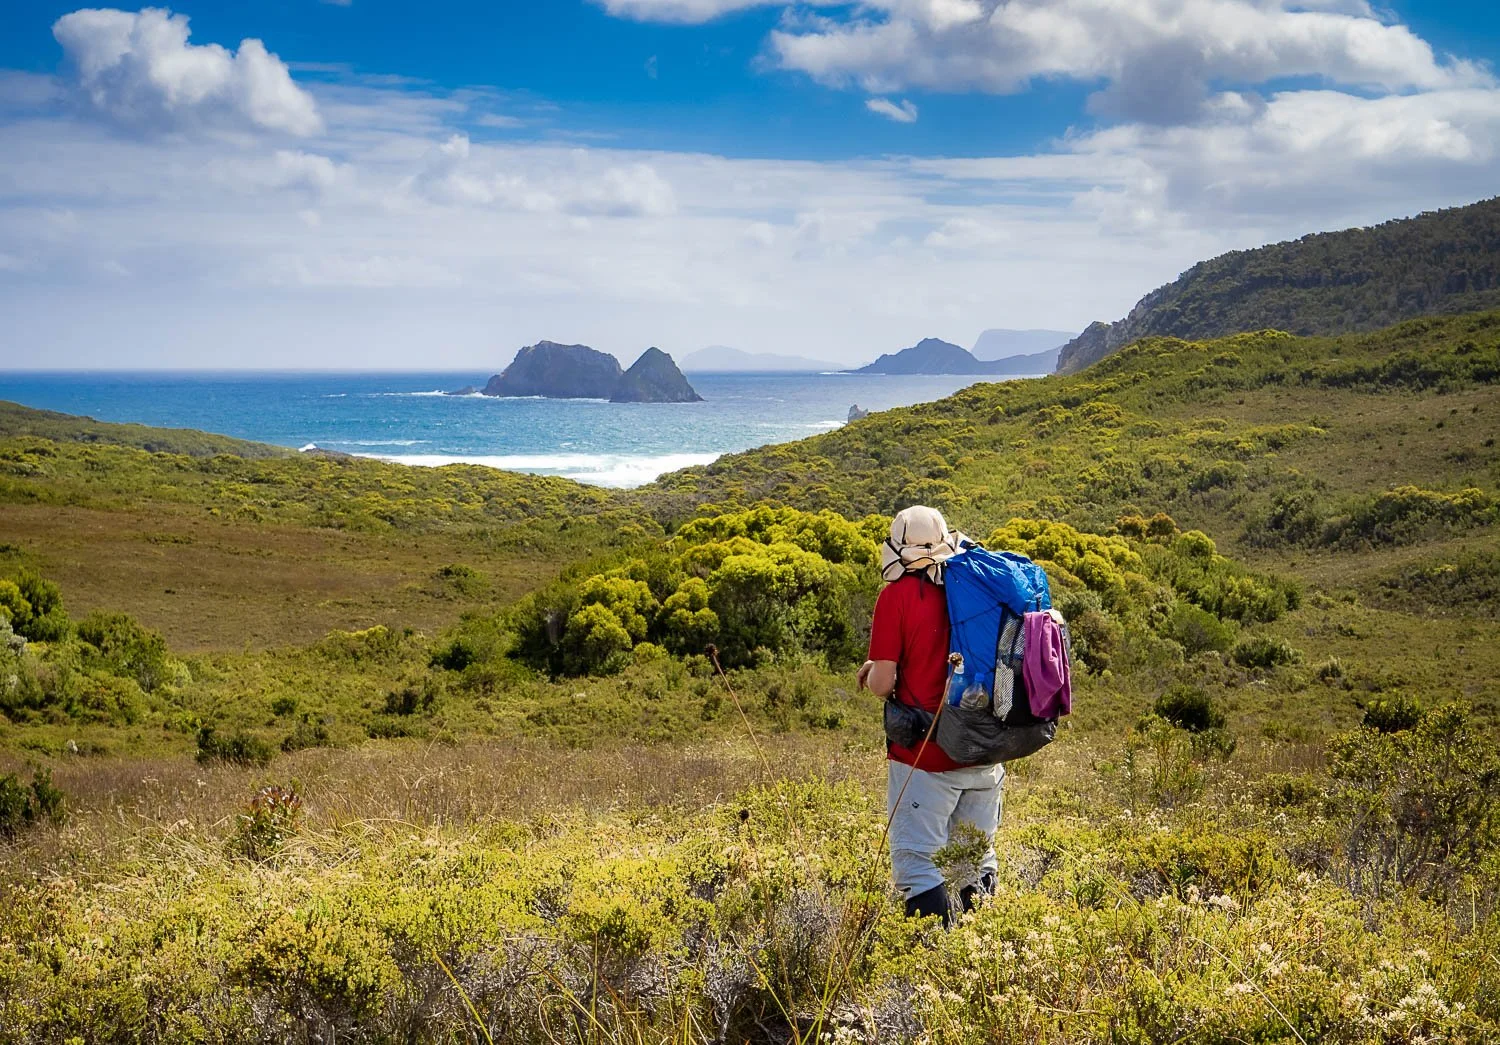
Grand sea views enroute to Osmiridium Beach.

Location Map and Elevation Profile
The Grade 4 South Coast Track (SCT) is a spectacular and remote 85km/53mi hike between Melaleuca and Cockle Creek in the southwest wilderness of southern Tasmania. For overseas readers, the Australian island state of Tasmania is accessible by ferry from Geelong (near Melbourne on the mainland) or by plane from any capital city on mainland Australia. Access to track trail heads is normally via light aircraft and/or bus transfer from Hobart, the capital city of Tasmania.
The SCT is demanding by mainland standards, but easy by Southwest Tasmanian standards (that’s in good weather; it can be literally impassable in bad). It is a quiet walk with relatively few people compared to more manicured trails such as the Overland Track, and your daily traverse through forest, plains, beaches, and mountains makes for a hike with stunning landscapes and plenty of variety. You have creek and estuary crossings, including in a rowboat. You have vast views from the Ironbound Range inland to the Arthurs and beyond; on a smaller scale, botanists, geologists and twitchers will love the walk. It is a fantastic hike.

New Lagoon boat crossing - great fun in benign conditions!
Click here to start walking with us or read on for whole of track hike planning information and advice.
Is the Track for Slower Hikers?
Answer: (A qualified) YES!
Distances and elevation gain alone are misleading. It is remote so you must be completely self-sufficient. Other than at Melaleuca, you have no huts. Weather is often cold and wet, even in midsummer when snow can fall on the highest ranges. Two days include very steep, long, rough, muddy, rooty demanding descents/climbs, and short sections elsewhere can be steep or boggy too. But much of the track is well maintained. Navigation is generally straightforward, but you need to be observant, especially on beaches, or you’ll miss campsites and exits. Two of the most demanding days have no or poor intermediate campsites for some distance.

On the Ironbounds descent

South Cape Range Traverse. Some of these peaty bogs look innocuous, but step in them and you sink to your knees or deeper!
Slower hikers may be on the track for about ten hours some days, even with our conservative itinerary. Terrain on these days is extremely steep, overgrown and/or boggy: you have no choice but to keep going. Many people push themselves to achieve a faster itinerary and injure themselves on the notoriously steep and muddy Ironbound descent/climb: be patient and accept the conditions. All you need is moderate agility and flexibility to duck under, over and between logs and branches, and traverse often wet and slippery tree roots and rocks. Please look at the galleries below and consider whether you are up for the challenge. You shouldn’t need to hurry following our itinerary, but slower hikers will have 4-6 hours of this terrain on two days. We did, so you probably can to!
Click here for a gallery of the Ironbounds climb/descent
Beaches can be difficult or slow at high tide. Waiting for tides, flooded creeks or estuaries and storms potentially adds hours or days to your itinerary, and slower hikers won’t be able to make up the time or distance as easily or comfortably as can faster hikers. Faster hikers with a tight itinerary can also be caught out without any play to absorb delays, whereas a conservative itinerary gives you time to wait out tides or flooded creeks.
If you have considered this walk and been daunted by what you've read online, remember that most hikers do this in fewer days: daily distances alone make the track more demanding, particularly in terrain like that of the Ironbounds or between Granite Beach and Surprise Bay.

Challenging terrain on the South Cape Range crossing.
Our itinerary shortens these days or ensures you’re well rested before them, but you must have a moderate level of fitness or you will be either miserable or night-hiking, which adds new risks. Because the SCT is remote, you need to know your gear well: you cross no vehicular access tracks, so you have no intermediate pickup points such as on the Larapinta or any other long hike on the mainland. Mistakes are costly in such an environment. If your tent or rain gear fails, hypothermia is possible even in summer. Your only way out is an emergency evacuation (because of course you’re carrying a PLB and/or Inreach). In our opinion the SCT is not suitable as anyone’s first multiday hike, or for inexperienced hikers of any stripe.
Is the SCT for Slower Hikers? The answer is a qualified YES: our relaxed itinerary brings this walk into reach for experienced, well-prepared slower hikers with a reasonable level of fitness. Start planning for next summer!
When to Hike
Although the hike is usually walked from spring to autumn, peak summer months with long daylight hours and drier (but often still wet) conditions are best for slower hikers.
Parks Pass
At time of writing, the SCT is easy to book, not competitive like the Overland Track, because you only need buy a parks pass rather than booking the track. This will almost certainly change when/if private huts are built along the trail: you can bet prices will skyrocket even for those not using the huts, or it may become mandatory to use them and pay an even more exorbitant fee (privatisation of public parks is one of slowerhiking’s pet peeves).
Maps and Resources
Tasmap 1:100,000 South Coast Walks ; there’s also a digital version. We found this map more than enough for navigation, but you can also buy a series of 1:25,000 Tasmaps (Melaleuca, Cox, Louisa, DeWitt etc) and 1:50,000 Bathurst, South Coast maps.
Digital maps include Avenza, which also includes all the other hikes in the southwest, from the Western Arthurs, Mt Anne, Federation Peak, Port Davey etc, Alltrails and Farout.
Tide times: print them for your dates or store an image on your phone.
Facebook South Coast Track Tasmania group
John Chapman’s excellent South West Tasmania is invaluable for planning and we highly recommend you buy it (it also includes every other walk you might like to do in southwest Tassie, from the Arthurs to Mt Anne, Federation Peak or Frenchman’s Cap). John’s books are famous, but he definitely wears seven-league boots: slower hikers should disregard his time estimates! You will take much, much longer. Even average hikers often take longer as this sign at the Cockle Creek End advises!

Tassie Parks Service sign in the registration hut at the Cockle Creek end. In faint biro underneath the quote, some weary wit has written, "You can say that again!"
West to East or East to West?
West to East is the more popular of the two directions but either way is fine. We went west to east but met many people going the other way. The wetter and most demanding sections of the track are on the eastern side of the two main ranges, so if you have a strong preference for either climbing or descending steep, muddy terrain then choose a direction to suit. We chose west to east so that:
we walked towards our car at Cockle Creek, with no time pressure to arrive at a set time (or day, food permitting) for a connecting bus. Even if you don’t have a car, the implications of missing your connection with a bus are less significant than missing a flight.
we descended the toughest sections rather than climbing them (this is a highly personal decision, but we are faster as a couple going downhill than up)
the prevailing winds would more likely be crossing from behind
the afternoon sun was behind us
we could definitely leave on the day we finished the hike at Cockle Creek. In bad weather, both flights and boats to Melaleuca can be delayed for days, so you can be stuck there with no food left in your pack.
How to get there: Melaleuca (west to east)

Geoff with the little twin-engine plane at Cambridge airport.
If you’re only hiking the South Coast Track and no other tracks in the SW Wilderness, the most practical way to or from Melaleuca is by light plane. Regular charter flights leave daily both ways between Melaleuca and Cambridge Airport which is a 20-minute taxi ride from the centre of Hobart. The flight takes 30-45 minutes.
Flights often change due to weather, leaving earlier or later on the same day, but are sometimes delayed for a full day or longer, so it's definitely worth adding a few contingency days to the start and end of your trip. When you include contingency days in your itinerary, you can potentially also leave earlier than scheduled to beat a deteriorating forecast: tell them your availability when booking, and they'll ring if your flight needs to change. Adding days to the end means that in the event of a delayed start, you won’t have to cancel your hike altogether for fear of missing your flight back to the mainland. Logistics, the nature of the track and notoriously fickle weather mean delays and changes are as likely to happen as not. Whatever your hiking speed, plan for them.

With low cloud, flights into Melaleuca would not have happened today.
If your start date changes and you've booked a track transfer bus from Cockle Creek to Hobart, you'll need to change that too, but they are amenable with plenty of notice. Last minute changes are understandably unwelcome and you may not have a seat in the bus. We booked accommodation in Geeveston but weren’t sure which day we were arriving. Using our Inreach on the track, we texted our daughter the revised date and asked her to confirm the accommodation for us. You could do the same with a friend or relative and your track transfer company.
The Melaleuca trail head is also accessible from the Port Davey track – a challenging 70km/44mi trek with 1700m/5577ft elevation gain between the Huon River Campground at Lake Pedder to Melaleuca. The Huon River Campground, like the one at Cockle Creek, is accessible by road. Track transfer companies support pickups and drop offs at Huon River Campground. If that is your preferred approach then you will probably require a food resupply at Melaleuca, which will need to be flown in for you. But don’t be fooled by the small elevation gain of the Port Davey Track: it’s an extremely challenging 5-day wilderness hike for experienced hikers only, along a poorly maintained, overgrown track through at times deep bog with limited facilities. Anyone doing this route should not need our advice.
Less well-known and utilised boat transfers are also possible to and from Melaleuca, but they are similarly weather-dependent.

You pay for your fuel at the airport, and then collect your canisters or decant liquid or alcohol fuel when you reach Melaleuca.

In clear weather, the flight to Melaleuca is seriously scenic.
How to get There: Cockle Creek
If you have your own car and are hiking west to east, you may wish to leave it at Cockle Creek so you have no track transfer deadline to meet. Cockle Creek is a 2.5 hour drive from Hobart via Geeveston on the A6. Take C635 past the Hastings Cave turn off and then C636 to Cockle Creek. After dropping off your car, you’ll need a transfer back to Hobart and a taxi to the airport.
Choose from two popular track transfer companies: Tasmanian Wilderness Experiences and Huon Valley Escapes. They both pick up west to east hikers who are finishing or dropping off their car, or drop off east to west hikers provided you’ve booked well in advance.

Cockle Creek Visitor Shelter. Nearby are campsites and toilets. (Image Credit: BPSM Architects).
How Many Days?
Parks Tasmania suggest this is a six to eight day hike. We (as is our way) took ten, and came across many others who did it in nine days. Many people, like us, also included a rest day in their itinerary.
When planning a hike, we aim to keep the daily hiking time (total elapsed time including breaks and photos) to between six and eight hours. The hike is then subdivided into blocks of 6-8 hours, though of course this isn’t always possible. Next, we assess available camping and water locations and adjust as necessary. Planning by time rather than distance allows for elevation gain (and loss) as well as track condition. Consider whether you will be held up due to high tides or slow estuary crossings. Planning conservatively gives you flexibility should the day be tougher than you expect, so you’re not hiking into the night. See How to Plan a Slower Hike for general principles.
A Slower Hiking SCT Itinerary and Rationale

Overview of the hike
The South Coast Track has many beautiful campsites and water collection options. The blue and yellow dots on the map illustrate main camp sites (not all have fresh water); we stayed at the yellow ones. Some of those locations differed from our original plan, because we stayed flexible to accommodate changing needs. Here are the daily statistics for the hike we did. Click on the table to toggle between metric and imperial units.


And here is a link to a spreadsheet lookup table of distances and elevation gains for all the main campsites to help with your planning.

Last beaut campsite on the track for us at South Cape Rivulet
It pays to know your options because the weather turns quickly, and you may need to stop short or push on further to beat potential complications. Bad weather slows you down significantly: storms at elevation on the Ironbound Range, high tides, flooded creeks or windy estuary crossings may require delays of hours or even days.
Flexibility is key, and that means understanding options and the trail ahead. To that end we carried two extra days of food and fuel to allow for bad weather and we recommend that slower hikers do the same ie 11-12 days, remembering that your first day is just 400m (440yd) from the airstrip to Melaleuca huts. It also gave us an option for rest day should we want one.

Louisa River East Campsite
Two main camp sites we considered “non-negotiable” were Louisa River (closest camp to the Ironbound Range traverse) and Granite Beach (closest camp to the South Cape Range traverse). These comprised the start of the two most demanding and longest days — in time rather than distance — and for that reason we recommend that slower west to east hikers do the same. We then shuffled our campsites around those two locations to spread the effort across the other days as evenly as possible.
Below is our West to East Itinerary. Although things like contingency days and spare food benefit all SCT hikers, the details below are specifically for slower hikers. Faster hikers may roll their eyes at this level of planning, but this is only because they can easily make up any extra distances and times, or because they thrive on going as fast as possible. Slower hikers may be able to speed up too, but in the process ruin their enjoyment; it becomes a race against time for someone who is not motivated by speed. No fun at all.

A relaxing 'rest' day spent at Granite Beach.
The following slow itinerary is best read with a map in front of you.
Click on the links in the heading for each day for our detailed daily blogs and pictures.
Day -2: Drop Own Car at Cockle Creek
We drop off our car at Cockle Creek, explore the area and get a track transfer bus back to Hobart
Day -1: Contingency Day
Sightseeing around Hobart, or an early start should tomorrow’s flight be cancelled due to bad weather
Day 1: Flight from Cambridge Airport to Melaleuca, day hike around Melaleuca
Collect fuel, clean boots, day walk and sightsee around Melaleuca.

Cosy hut at Melaleuca.
Day 2: Melaleuca to Buoy Creek 16.4km (10.2mi)
Many hikers who start the track on the same day that they arrive at Melaleuca stop at Point Eric 3km (1.9mi) before Buoy Creek, but they have less time than we do. Buoy Creek is a lovely campsite. Slower hikers have all day, fresh legs and the terrain is relatively benign. More importantly, tomorrow otherwise becomes a longer day with more elevation gain. This camp makes today a little harder and tomorrow a lot easier, and this is a useful principle to even out demand on any challenging hike.
If you decide to stop at Point Eric you’ll have an extra 500m to go along the beach to collect water from a small but reliable creek outlet.

Delightful Buoy Creek Campsite with Boy.
Day 3: Buoy Creek to Louisa River East 13.8km (8.6mi)
A tougher day with a climb. You have Louisa Creek (with campsites) and Louisa River to cross; the latter has campsites on both banks. If the river is fordable when you arrive, do so and camp on the eastern bank so you’re not stranded on the wrong side should rain arrive overnight. Both Louisa Creek and River can cause significant delays.

Crossing Louisa River
Day 4: Louisa River East to Ironbounds Low Camp 9.1km (5.7mi) or Little Deadman’s Bay 12.7km (7.9mi)
The standard itinerary is 12.7km (7.9mi) to Little Deadman’s Bay, but we planned for Lower Ironbounds Camp (9.1km/5.7mi), with Little Deadman’s an option should we arrive early. We didn’t and were glad to stop because, as we discovered the next day, the first kilometre or so out of Lower Ironbounds is still demanding terrain, not dissimilar to today’s descent. In Little Deadman’s we met two twenty-something hikers who had arrived in Little Deadman’s at 10pm. They were having a rest day due to exhaustion and injury.
The exposed crest of the Ironbounds can be extremely dangerous in storms, with winds strong enough to knock you off your feet, poor visibility, and windchill driving apparent temperatures well below zero. If storms or high winds are forecast, DELAY your ascent.

Increasing exposure as you near the top of the Ironbounds
You have two additional intermediate campsites today: Ironbounds High Camp at the start of the descent, extremely muddy and uninviting: it is definitely an emergency camp. The second is about 1km before Ironbounds Low Camp, with one small site each side of the track. Whenever stopping short, consider the knock-on effect: will it make the next day too difficult? How can you tweak your remaining itinerary? How many spare days (food, time) do you have remaining?

Ironbounds Low Camp
Day 5: Ironbounds Low Camp to Turua Beach 4.9km (3.1mi)
Today is a short day, welcome after yesterday’s descent. An alternative is to make it even shorter and stop at Little Deadman’s (you should use the toilet in any case if you can, as Turua has none). Little Deadman’s is popular and many people choose to have a rest day here because of the pebbly beach, safe swimming bay, rock shelves and birds.
If you as a slower hiker stop at Little Deadman’s for the night, you would likely stay at Prion (9.4km/5.8mi) the following night rather than Turua. However, this would mean arriving at the estuary crossing at Prion late the following day with more chance of stronger winds, and no sheltered campsites along Prion Beach to stop short. There’s also Grotto Creek at the western end of Prion Beach, which may be impassable at high tides or during storms.
Our itinerary allows a leisurely long lunch at Little Deadman’s to explore and paddle, before continuing on the short 1.6km/1mi to pretty Turua Campsite. You’ll arrive mid-afternoon and have plenty of time for a(nother) swim in Deadmans Creek and to sit on the sun-warmed stones if the weather is nice.

Geoff takes a dip in Deadmans Creek at Turua Campsite.
Day 6: Turua Beach to Osmiridium Beach 12.2km (7.6mi)
Many people skip Osmiridium Beach because it is off a spur trail but we found it delightful, and geologists should not miss it. You might plan to go to Granite Beach from Turua (19.9km/12.4mi), but the estuary crossing will be an extra hour or more even in good conditions, and you could be held up with tides at Grotto Creek. So instead plan for Osmiridium and see how you feel when you get to the turnoff: you have another 400m through boggy terrain to get to Osmiridium camp. If you’re making good time, and don’t want to go into Osmiridium Beach, then Surprise Bay is another option. That’s a further 4.6km (2.9mi) past the junction making it a 16.8km (10.4mi) day from Turua Beach, and you’ll have a much shorter 3.1km (1.9mi) day the following day to Granite Beach (remembering that rocky Granite Beach can be slow at high tide).

The outlet of Grotto Creek at the western end of Prion Beach at low tide. At high tide or in stormy southerlies, you will not be able to cross.
Day 7 & 8: Osmiridium Bay to Granite Beach and Rest Day 7.8km (4.9mi)
Today’s hike is another short one, but we recommend you stop at Granite Beach
1. because it’s delightful and
2. because the next section from Granite Beach to South Cape Rivulet is one of the most demanding days with no intermediate campsites other than Track Cutters, which is a bit ordinary and still a good climb in. Together with Louisa River before the Ironbounds traverse, Granite Beach was one of two campsites we considered non-negotiable logistically for us as slower hikers.
With a short day like this, you can spend an hour or two enjoying Surprise Rivulet, and still easily make Granite Beach. We liked Granite Beach so much that, with a great forecast, we elected to have a rest day there, though neither of us were especially tired. Don’t be afraid to do this when you’re carrying extra food. In poor weather, you might just want to finish but, if you’re a leisurely hiker, why not enjoy these beautiful places for as long as you can? When will you ever have another opportunity? Towards the end of the trip, check the forecast and, if you haven’t yet done so, use one of your two spare food days at a favourite spot if there’s little chance of being held up by storms.

Enjoying the sun and the scenery at Surprise Rivulet
Day 9: Granite Beach to South Cape Rivulet 9.1km (5.7mi)
This spectacular but demanding day is a long climb followed by a series of multiple small climbs and descents through dense forest under, over and between logs. These would all be easy but for the deep mud on much of the trail; the Ironbounds descent which, although also muddy, rooty and steep, has less bog. Like many hikers, we found it more demanding than the Ironbounds descent.
Starting early is helpful for slower hikers. Many hikers who stop at Surprise Rivulet apparently stop at Track Cutters. Hiking to Track Cutter’s instead of Granite Beach would have meant you had a big, demanding climb at the end of a long day, rather than at the start of the day.
Day 10: South Cape Rivulet to Cockle Creek 11.4km (7.1mi)

Spectacular terrain near Coal Blufff
The last day of your hike is on well-maintained track (think: bridges, steps, duckboard etc) with only a little climbing at the start of the day, followed by a walk through Blowhole Valley and then along Cockle Creek to finish at the Visitor Shelter.
For more detail on each day and your options, see the daily blogs.
Leave No Trace

Choose the silver impregnated kula pee cloth rather than budget rags that get stinkier faster. I carry two Kula cloths, with the clean one open and drying on one side, and the one to be used for the day clipped closed on the other.
People who squat to pee, please shake dry, carry a Kula cloth, or use a travel bidet and towel instead of paper. A bidet is good for poo, too!
Please buy and carry a toilet trowel or equivalent. In some rooty areas a stake, stick or trekking pole will not make a dent.
Use the camp toilets wherever possible as you pass them but, if caught short, bury poo at least 15cm deep, well away from water courses.
Use no soaps or detergents in or near watercourses. Wash dishes well away from streams.
Stick to established campsites, don’t make new ones.
Walk straight through boggy sections rather than skirting and widening them.

The Very Fancy New Toilet at Osmiridium. Most are not like this and are considerably more grungy and aromatic!
More Tips, Tricks and Safety for SCT Slower Hikers

Carry a PLB and/or Inreach. Be aware that an Inreach is unlikely to penetrate dense tree canopy.

Hang your food. It's not an issue all years or all seasons, but you will not be a happy camper if a quoll snatches your food for the week. Animals quickly learn to steal when there is lots on offer.
Plan conservatively to allow for delays due to storms at altitude, for estuary and creek crossings, and for high tides.
Add contingency days to the end of your trip if hiking east to west to allow for delays on track and for the flight out, and add contingency days to both ends of your trip if you are hiking west to east.
Utilise the weather forecast on your Inreach
Take a Tide Timetable (you won’t have internet access)
Be familiar with your gear, use quality raingear
Carry a First Aid Kit
Carry at least one, preferably two, spare days of food
Ford creeks at campsites when you arrive in case they flood overnight
Watch waves at water crossings for fifteen minutes to check for sneaker waves
Start early to maximise daylight hours.
In bad weather — snow can fall on the top of the range even in midsummer, and it is extremely exposed in strong winds — delay. This has less to do with making the day easier, than making it safer.
Utilise intermediate campsites
Don’t hurry in tough terrain. This sounds counterintuitive but the roughness and slipperiness of the track claims many victims who fall or wrench joints. Slow and steady wins!
Keep your trekking poles handy, but don’t be afraid to stash them either: in some sections, your hands will be of more use grabbing onto holds.
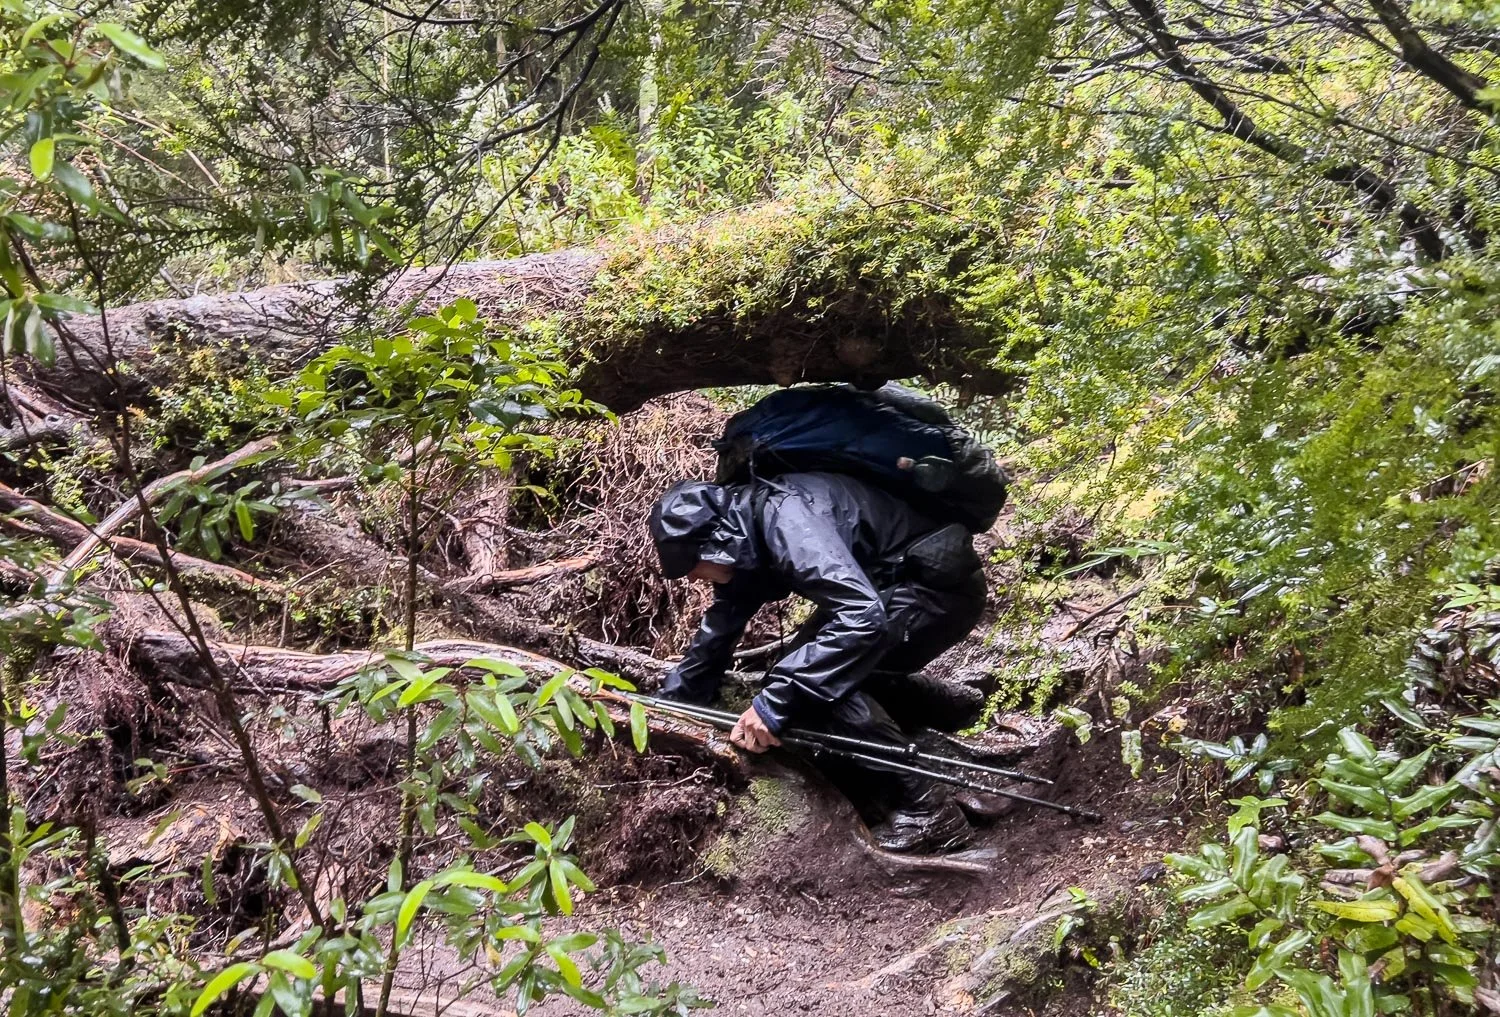
Squeezing under deadfall: a small pack is a huge advantage.
Minimise your pack size and avoid having things hanging off the outside: they will likely be lost. On some days, you are squeezing under and between numerous branches and logs, not now and then but for hours.
If you find rough descents signficantly more difficult than rough ascents, consider hiking this trail east to west.
Ensure you are moderately fit.
Wear footwear with grippy soles.
The South Coast Track is an extraordinary hike along some of Australia’s most magnificent and remote coastline. Its vast buttongrass plains, mountain vistas, lush rainforest and pristine beaches will gift you with banner memories for a lifetime. Start Planning!
We acknowledge the Tasmanian Aboriginal people and their enduring custodianship of lutruwita (Tasmania).