Electronics for Multiday Hiking: What You Need to Know
Part One: Safety, Navigation and Communication
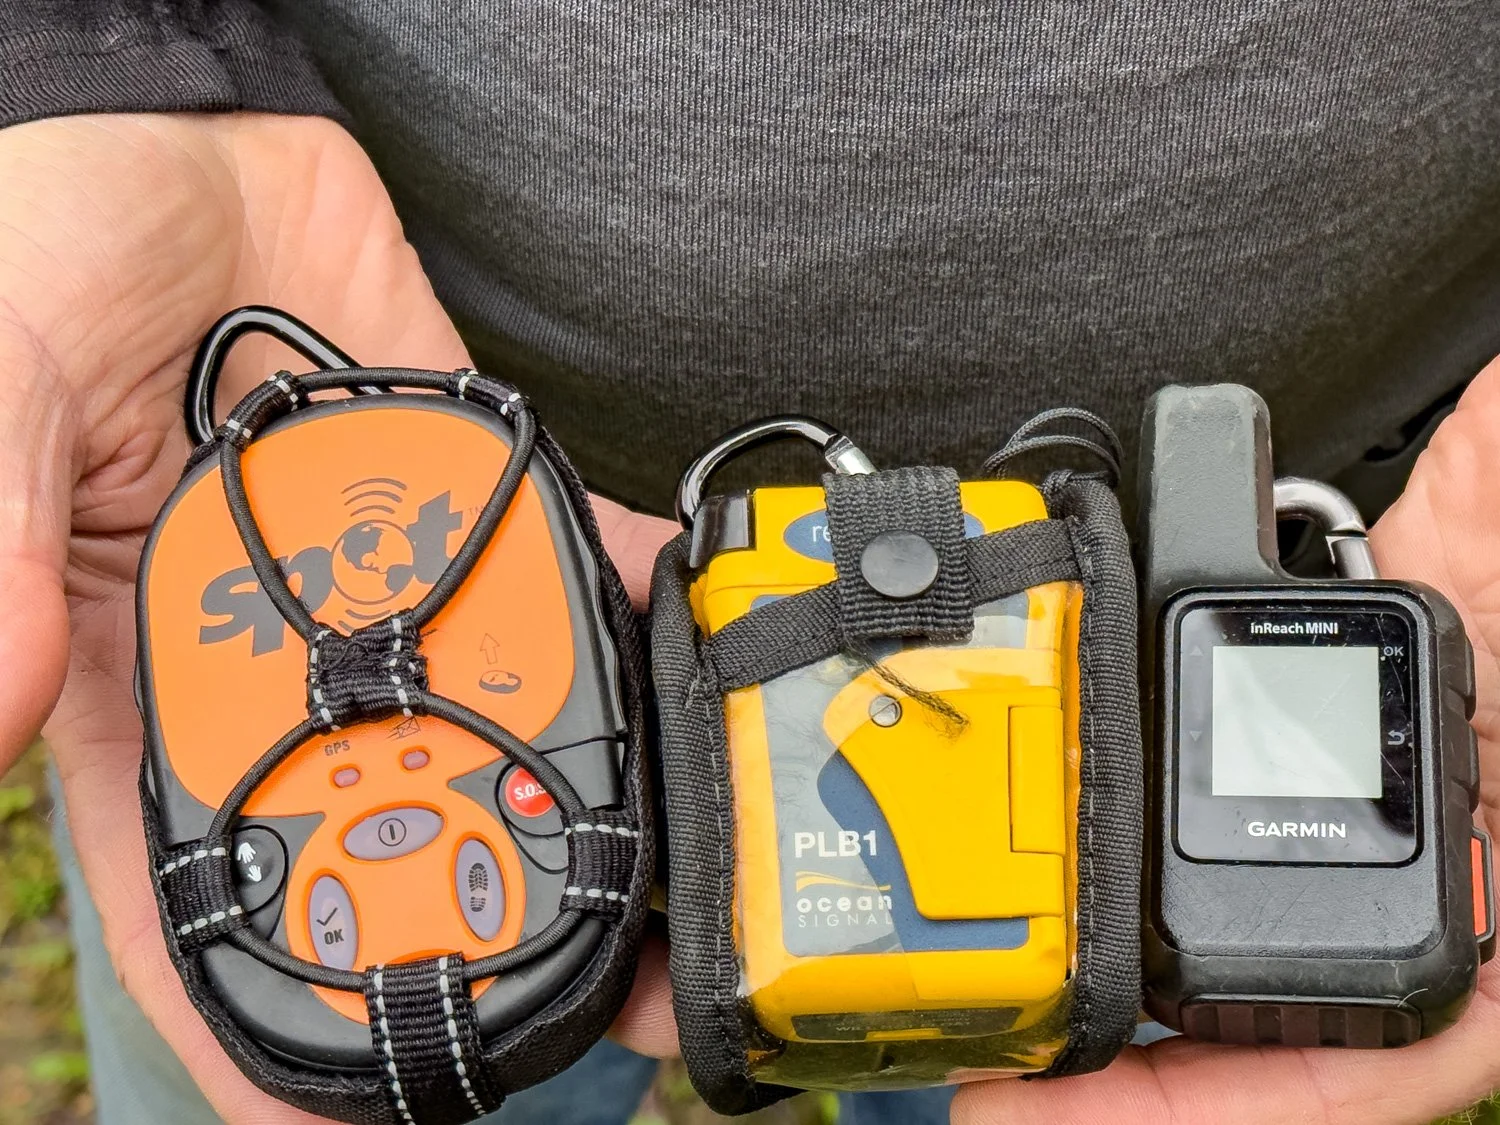
One of these things is not like the others! Do you know why, and why it is important?
There’s no doubt that today’s lightweight, robust and portable electronic devices have completely transformed backpacking, making it so much more accessible and convenient. Bring your favourite music, or an entire library of books! Use a watch, GPS or apps on your phone to navigate. Plan routes at home, then upload to a portable device. On remote hikes, tell family and friends where you are and how you’re doing. Check weather forecasts to avoid dangerous storms while on trail. Navigate more safely in white-outs. Paper maps are updated less frequently nowadays, but some apps provide real-time updates and notations by other hikers on trail.
Should you need rescue, smoky fires and mirrors have been replaced by Personal Locator Beacons (PLBs) and Satellite Emergency Messaging Devices (S.E.N.Ds, aka satellite messengers) such as Zoleo, Inreach and SPOT that send automated SOSes at the press of a button, with two-way communication with Search and Rescue (SAR) or paramedics.
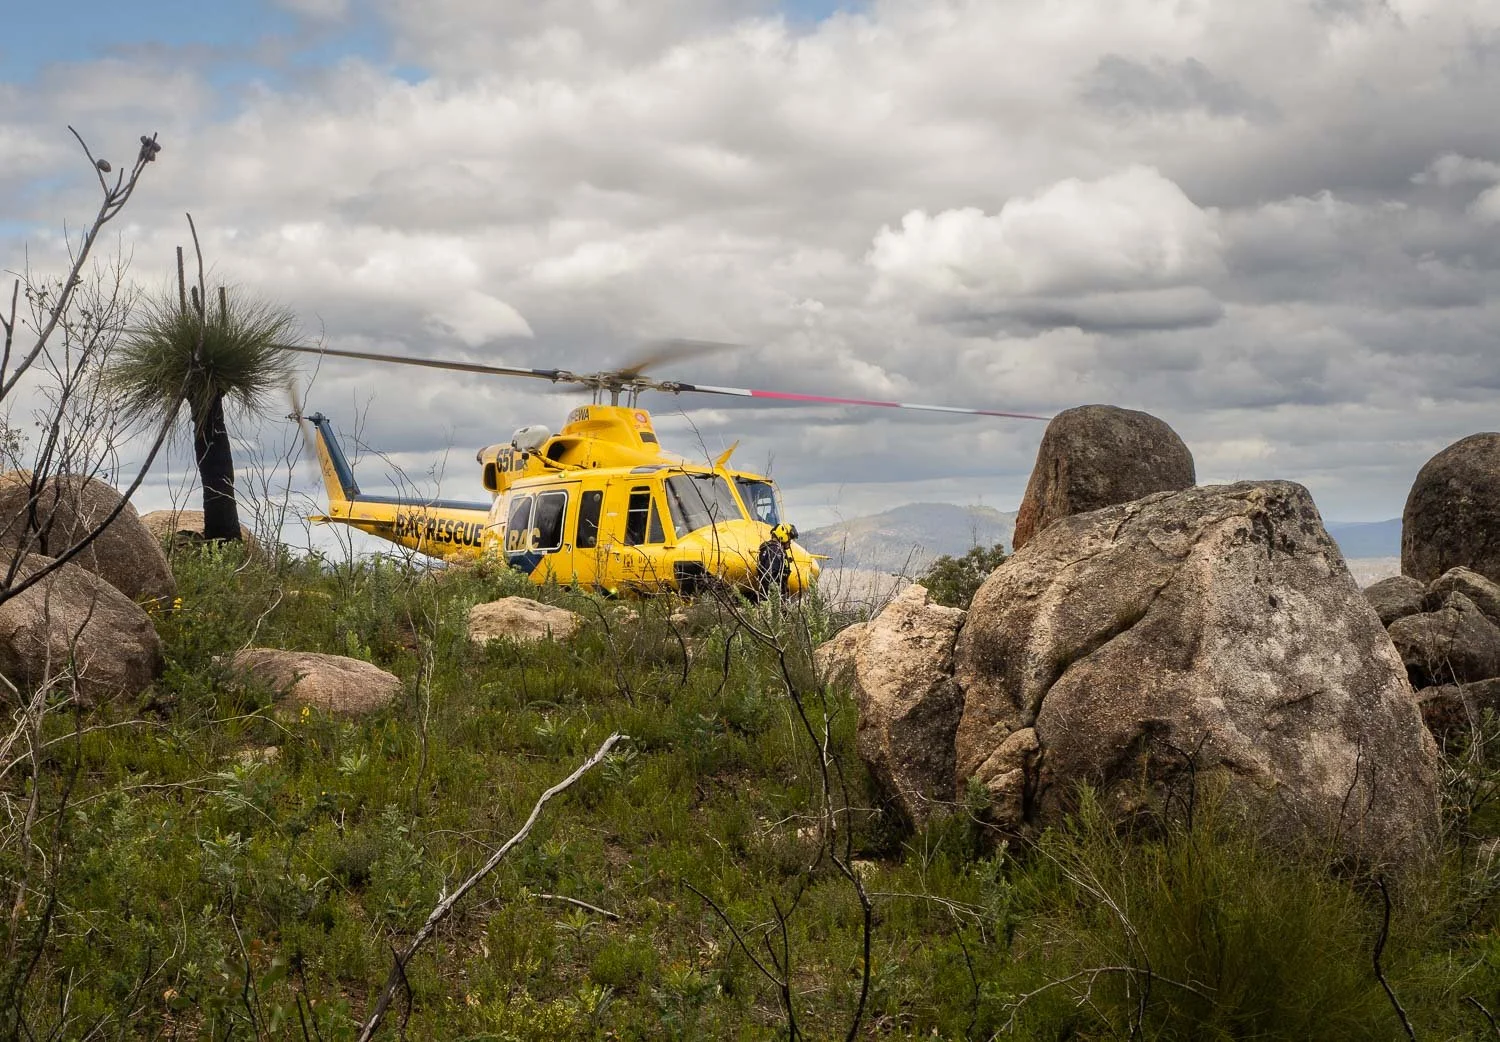
Hiker evacuation, Mt Vincent, Bibbulmun Track
Some mobile phones now have satellite SOS capability too, so that you not only take photos, navigate, shine a light, read and listen to music, but also use them in emergencies to – supposedly! – replace PLBs and subscription service messengers to contact SAR when outside mobile range.
Surely, hikers are now safer than we have ever been! Surely, accidents in remote areas must have become vanishingly rare! Surely, hikers no longer get lost or go missing with such marvels at our fingertips!
Of course, this is not so and, in some places, accidents statistics have increased as more hikers venture onto trails. How can this be, when almost everyone has a mobile phone, when PLBs can be hired for less than AUD10/day (AUD40/week) from most State Parks Services, when we open a screen to see exactly where we are, rather than triangulating with compass, landmarks and paper maps? Why even bother carrying a paper map, let alone a compass?
This 2-part series covers not only the electronics available, their features, use, storage, charging, advantages and pitfalls, but also how to get the most out of them in the context of safety, your gear list, and your specific hike and experience level.
Breaking or flattening a Kindle or camera battery doesn’t matter because disappointment never killed anyone, but what if your navigation or communication device fails? Can you find your way home? If you’re injured, can you summon help?
As always with our emphasis on safety, we describe the how and why, not just the what, so you leave with in-depth knowledge and understanding, as well as the facts.
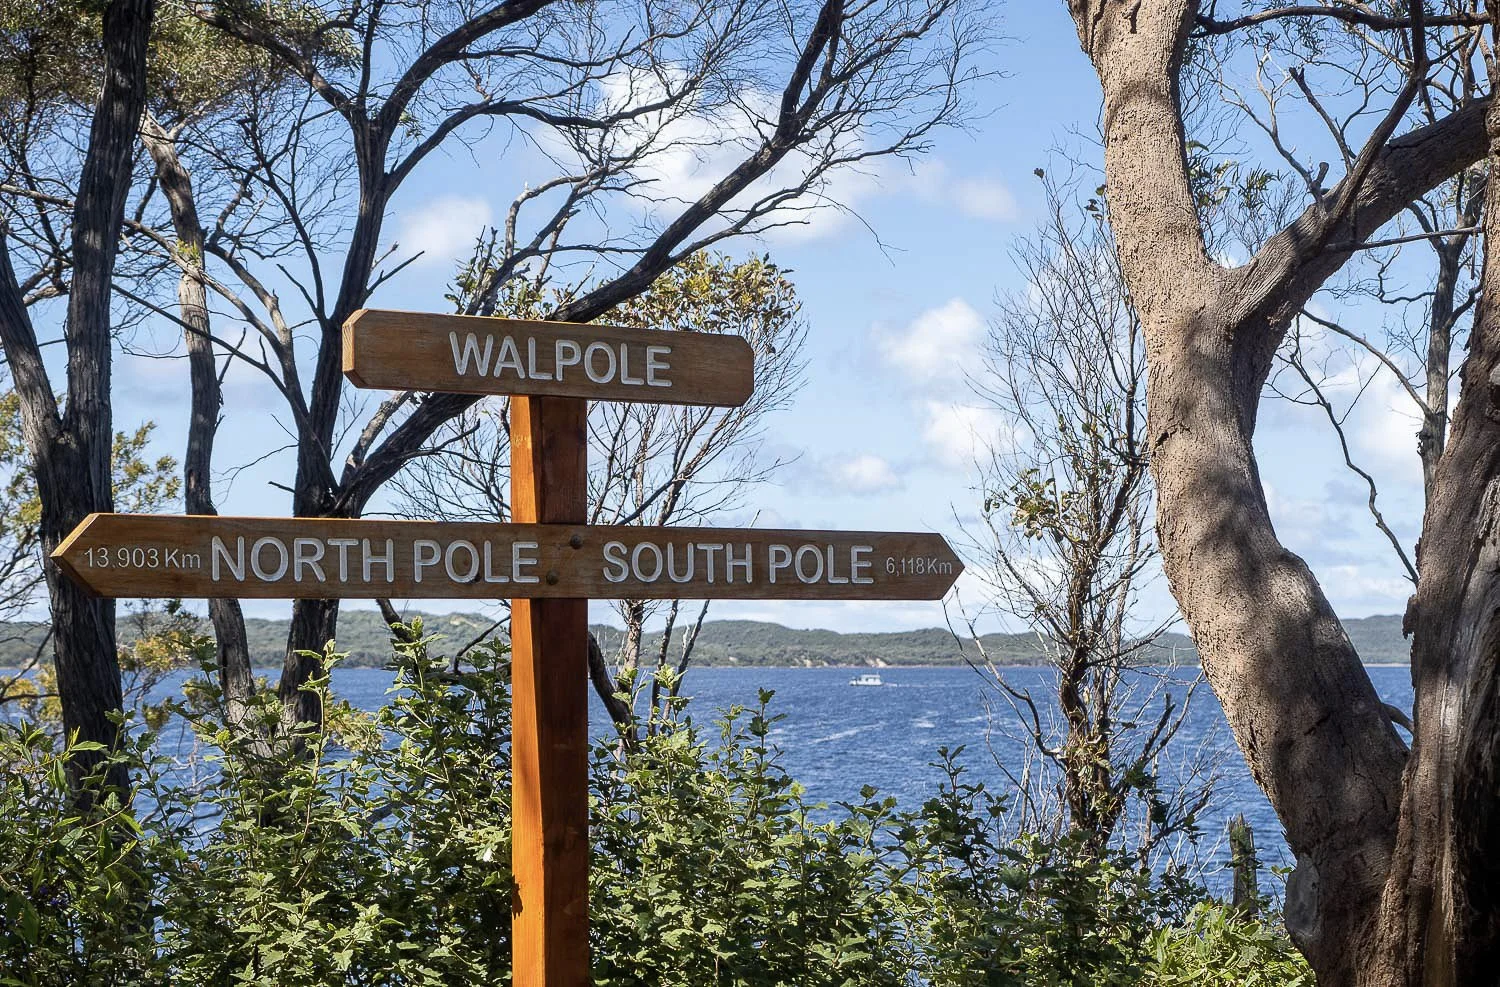
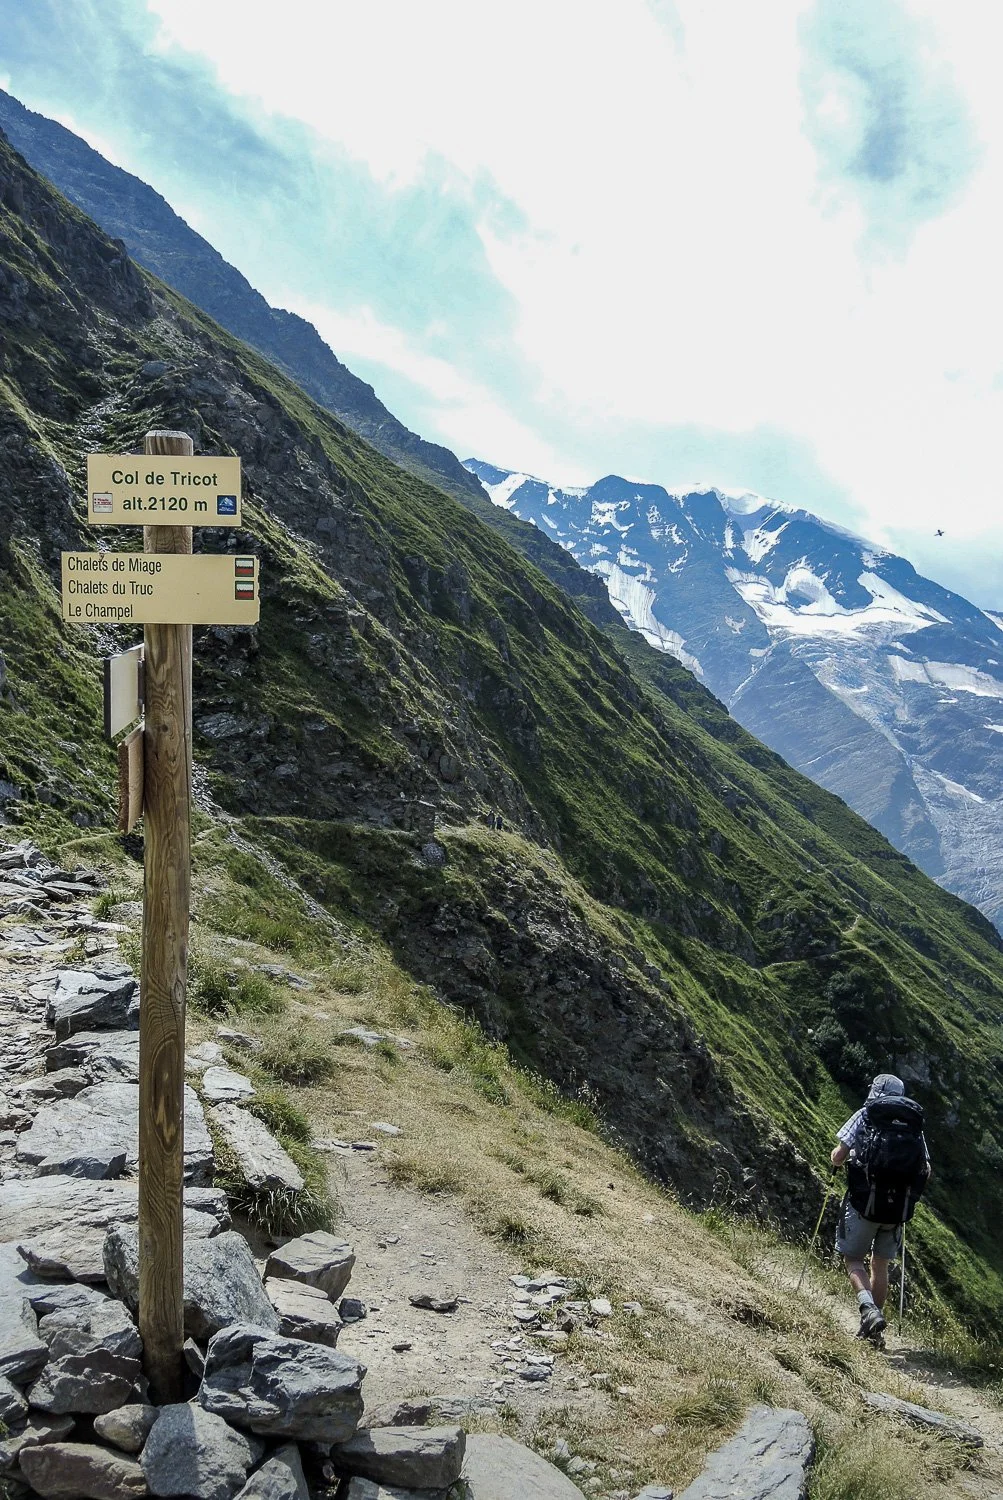
Navigation: Signage is no substitute for a decent map!
Electronic Devices
These articles divide electronic devices into three categories: 1. Essential/Safety Communication and Navigation, 2. Lighting, Entertainment/Convenience and 3. Maintenance (charging, carrying, spare batteries etc). We’ll cover them all in two parts.
Part One, Safety and Essential Items for Communication and Navigation:
Communication: PLB and/or Satellite Messenger (SPOT, Inreach, Zoleo, Bivvy Stick etc.), phone
Navigation tools: GPS/Smartwatch, Phone Apps
Part Two, Lighting, Entertainment/Convenience and Maintenance:
Essential Lighting (torch, head torch, phone torch)
Mattress Pump
Kindle/Phone
Camera and video/phone
Music/phone
Drone
Coffee press (Geoff thinks this should be in Essentials — tragic!)
Maintenance
Power banks
Charging
Spare batteries
Chargers
Cables
Protection (heat, cold, moisture, impact)
Carrying aids (bags, clips, leashes, slings, carabiners) and location.
Now, grab that coffee and dive into Part 1, the other essentials!
Hiking Safety and Electronics
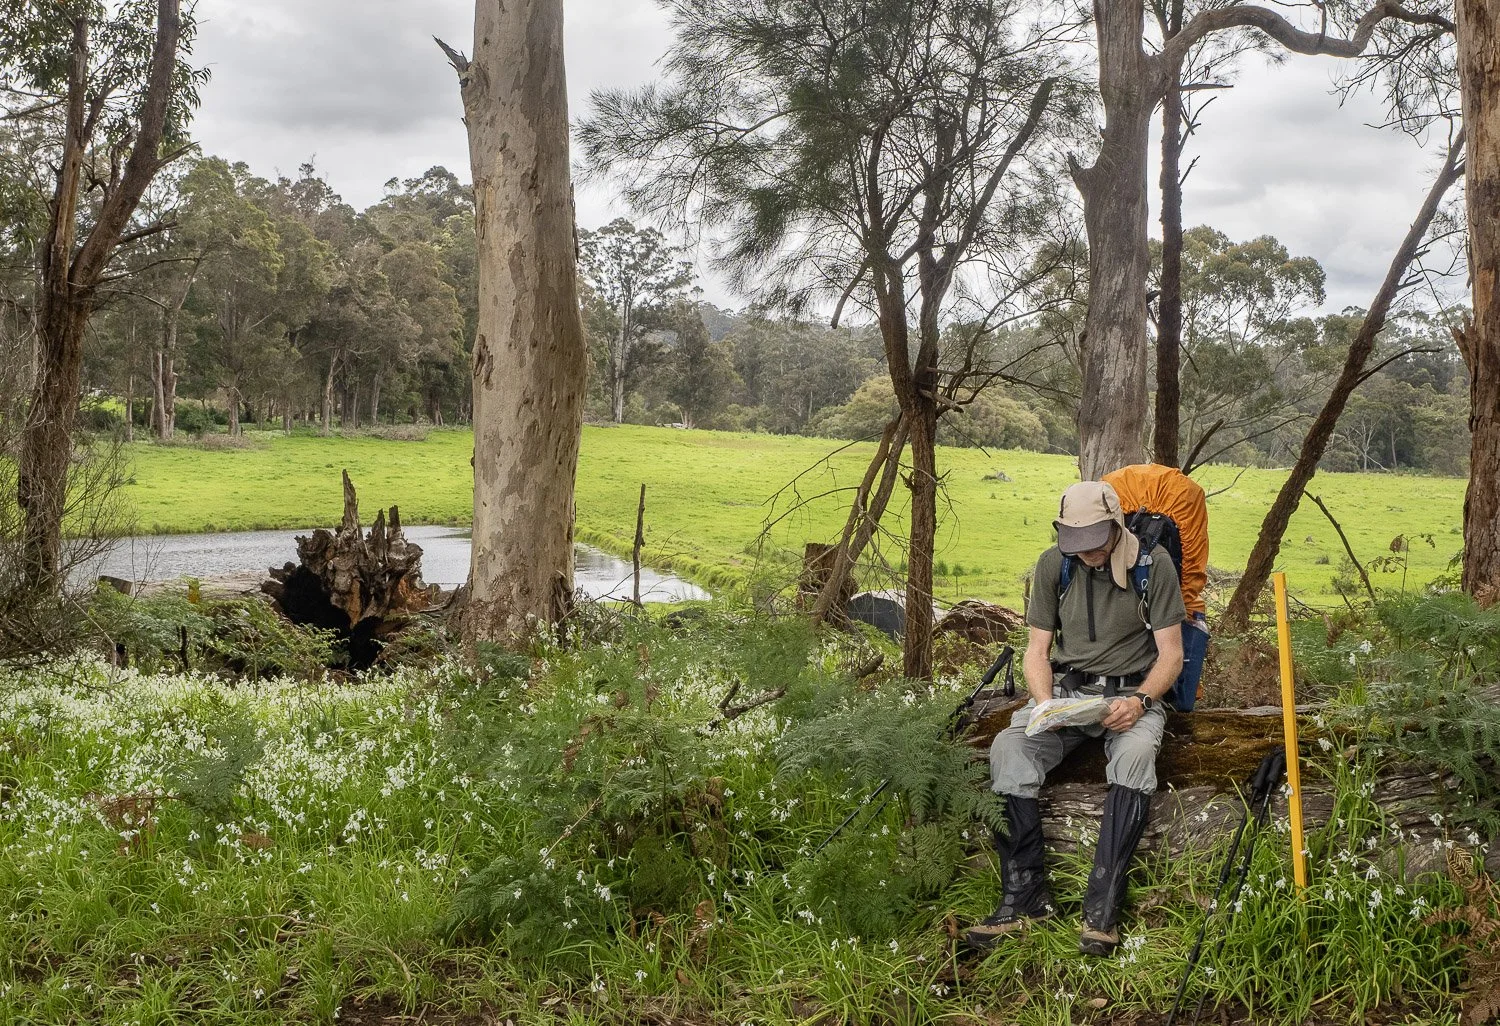
Geoff inspecting the good ol’ paper map during a break on the Bibbulmun Track
Years ago, essential tools comprised map, compass, signaling mirror, fire steel and torch. All were almost 100% reliable: provided maps were in waterproof sleeves, they couldn’t fail, though (ahem) user error has always been an issue!
Before leaving home, you planned hikes using those paper maps, just as we now plan hikes on screens using CalTopo, Alltrails, Gaia and other programs and apps:
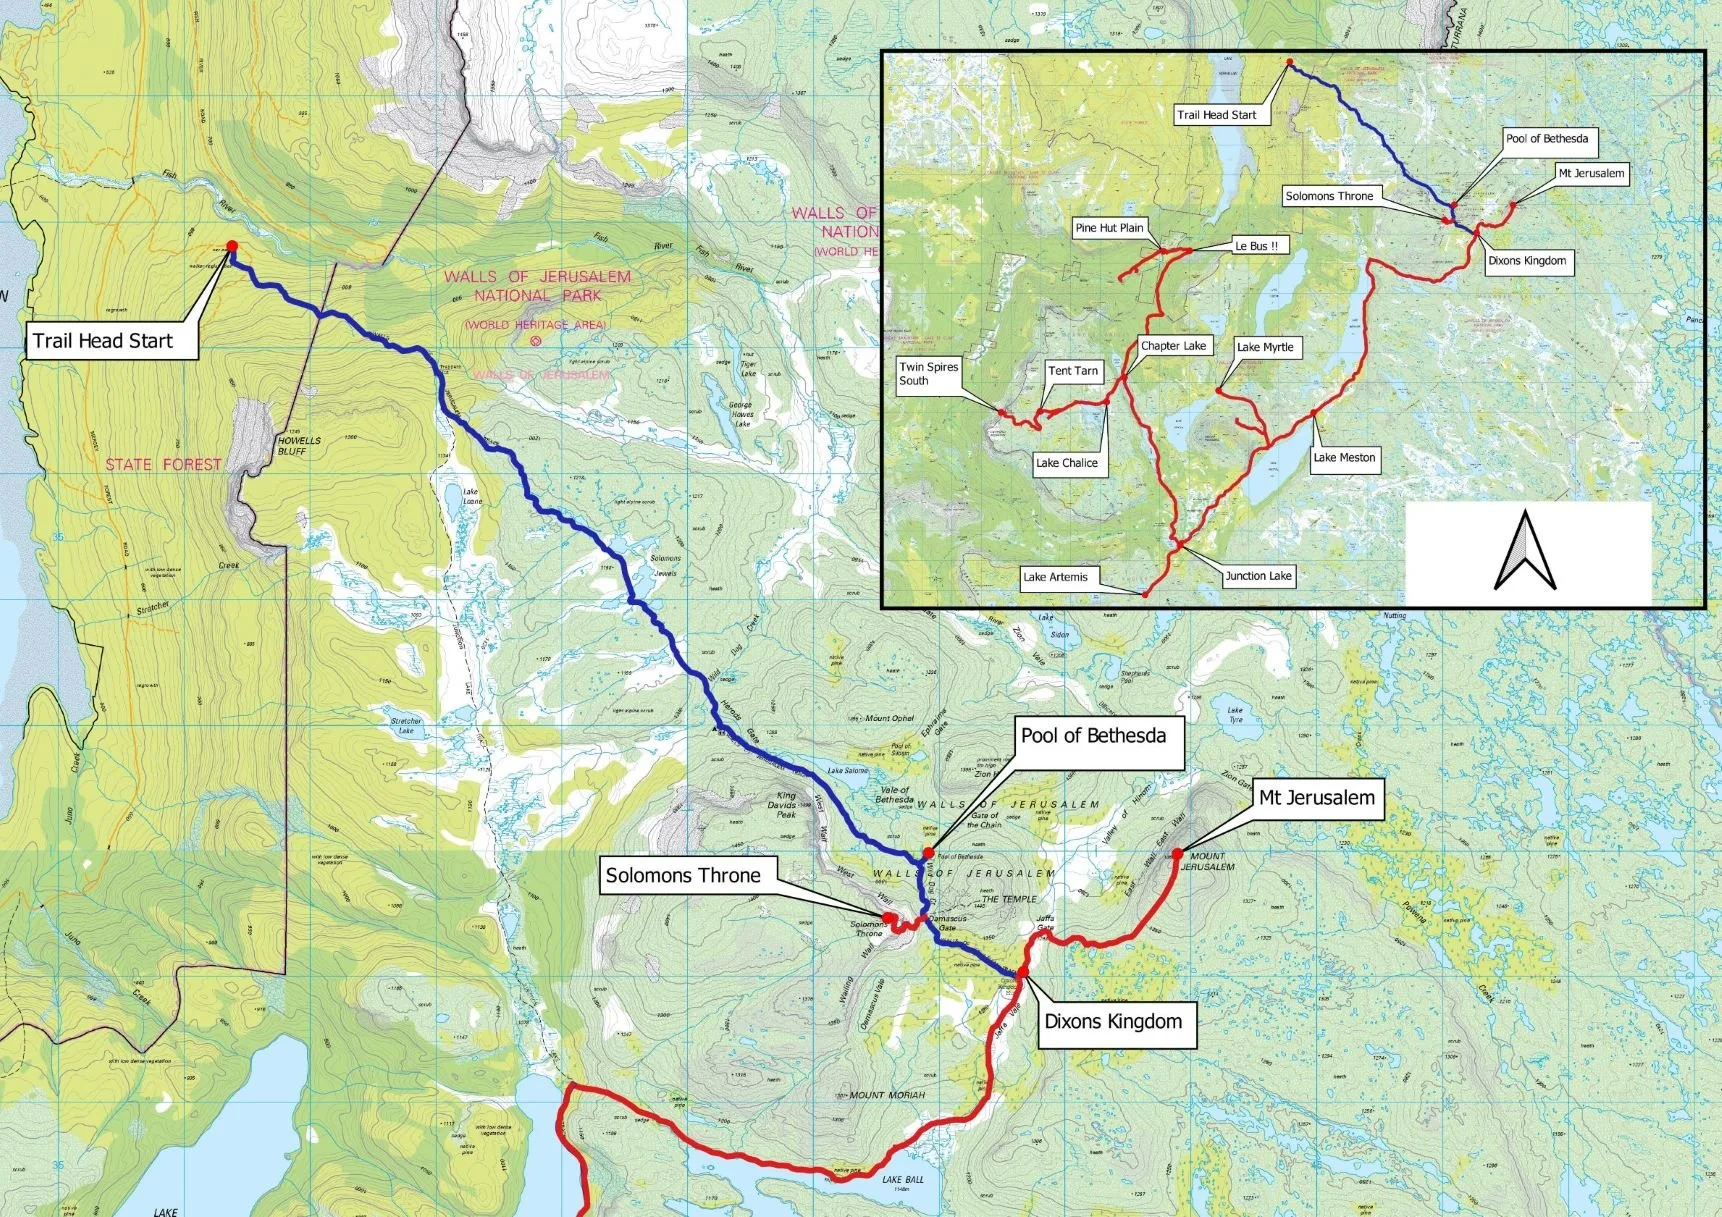
Geoff bought electronic topo maps and then used QGis, with which he was familiar, together with guide books and online reports, to plan our 11-day Walls of Jerusalem Hike. He now uses different apps but paper maps are still part of the planning process, and we printed and laminated the inset final paper map above for the trip.
When planning hikes on paper topographic maps, you must be able to read the map: topography, scale, symbols, terrain, vegetation, cliffs, waterways and swamps. Nowadays, although you should still be able to read all these same features on electronic mapping apps, their ease of use mean that many people now download someone else’s route, without understanding topographical information. So how can these electronic navigation and communication tools actually increase your risk?
The Peltzman Effect aka Risk Compensation
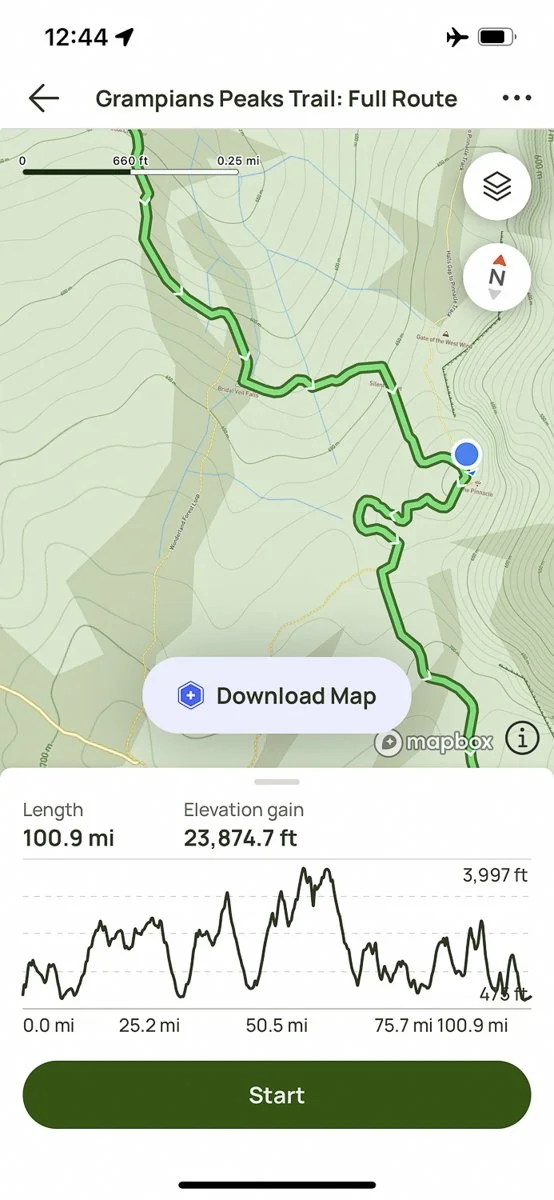
Alltrails’ reassuring green line and blue location dot.
A quick glance at the screen of any mapping app or GPS provides that reassuring highlighted route and relative position. That’s where you must be and, if you stray, you need only check the screen. Even without experience, we confidently follow a line without knowing anything else about navigation. With that line, we head into terrain we would never have considered if we had to navigate using map and compass. But what happens partway through the hike with a flat battery and without a line (or even a map)?
Similarly, satellite communicators (Inreach, SPOT, Zoleo), Personal Locator Beacons and now, for some people, phones with SOS satellite capability, have lulled many into a false sense of security: we now confidently head solo into remote regions and challenging terrain, because we believe a press of a button brings help.
The Peltzman Effect, aka risk compensation, describes how
“… when safety measures are implemented, people actually tend to increase their risky behaviours [because their] perception of risk decreases, and so [they] may feel that they can now afford to make riskier decisions.”
But pressing the SOS button is not like dialling 000 in town, with ambos arriving within minutes or the hour. Instead, if, as often happens, poor weather precludes aerial SAR, you have many hours to wait, sometimes overnight or even days.
Dense tree cover and deep gorges also impact signal strength; once, on a Gammon Ranges hike, we elected to turn back before a short climb in a narrow gorge because our last signal had been more than an hour earlier. With only two people, falling on that climb would mean that the injured one would be left alone for at least two hours while the other signaled for help: clearly unsafe.
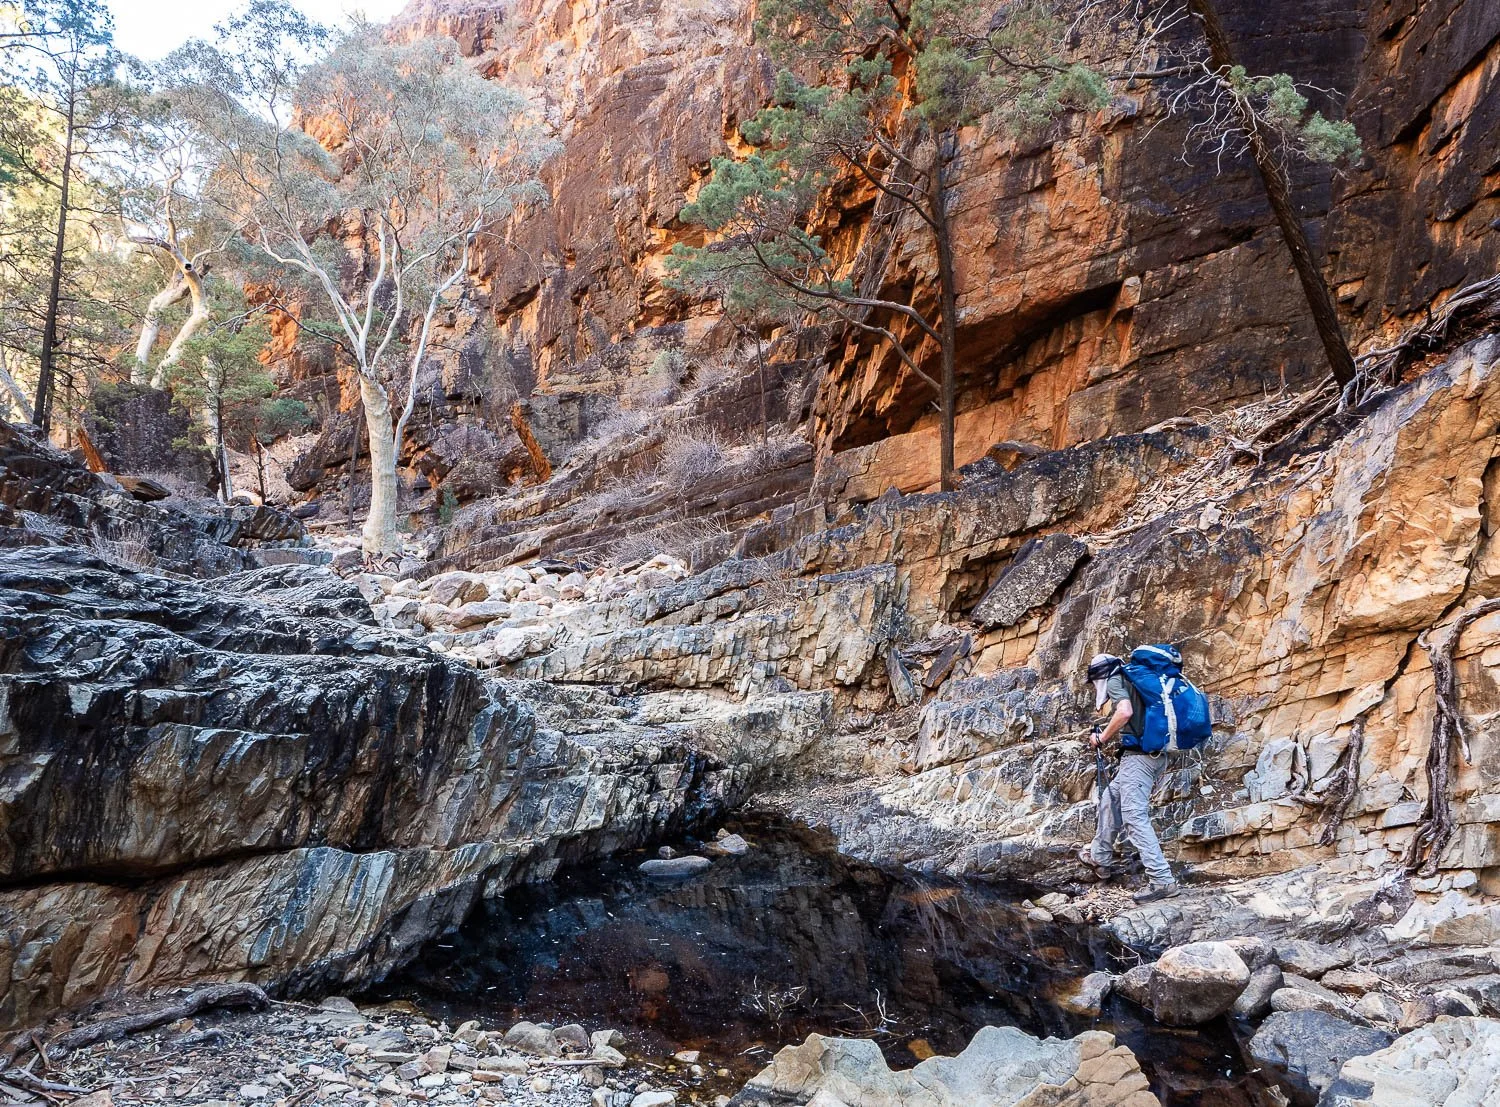
This gorge in the Gammon Ranges narrowed too much for an Inreach signal; a PLB with a stronger signal would almost certainly have worked. We bought our PLB because of this hike.
Hence, although many hikers assume their satellite communicator is effective anywhere, this isn’t the case, although some do have a stronger signal than others. Phones with SOS satellite connectivity are even less reliable in tricky terrain. Just because you feel safer with a satellite communicator, this is not true if you end up making riskier decisions.
As for navigation, countless inexperienced hikers have walked into trouble by slavishly —confidently, unthinkingly, without planning – following ‘the trail’ into terrain that is too challenging, even becoming stranded on cliff faces! [It’s worth reading these example safety/accident-related links throughout].
Clearly, this confidence is false. Paired with a lack of preparation, an inability to read a map makes it impossible to identify challenges beforehand. The mapping app Alltrails is notorious because it includes unvetted trails uploaded by hikers, who themselves make mistakes or omit information, for example that some of the trail is actually a climb.
Apps such as Caltopo and Gaia that require more knowledge, or those such as Avenza and FarOut with vetted routes, are more reliable although, when we hiked the Larapinta Trail, even FarOut showed the main trail passing through a southern camp, rather than the official northern one. And of course there is a more limited range of trails available in FarOut.
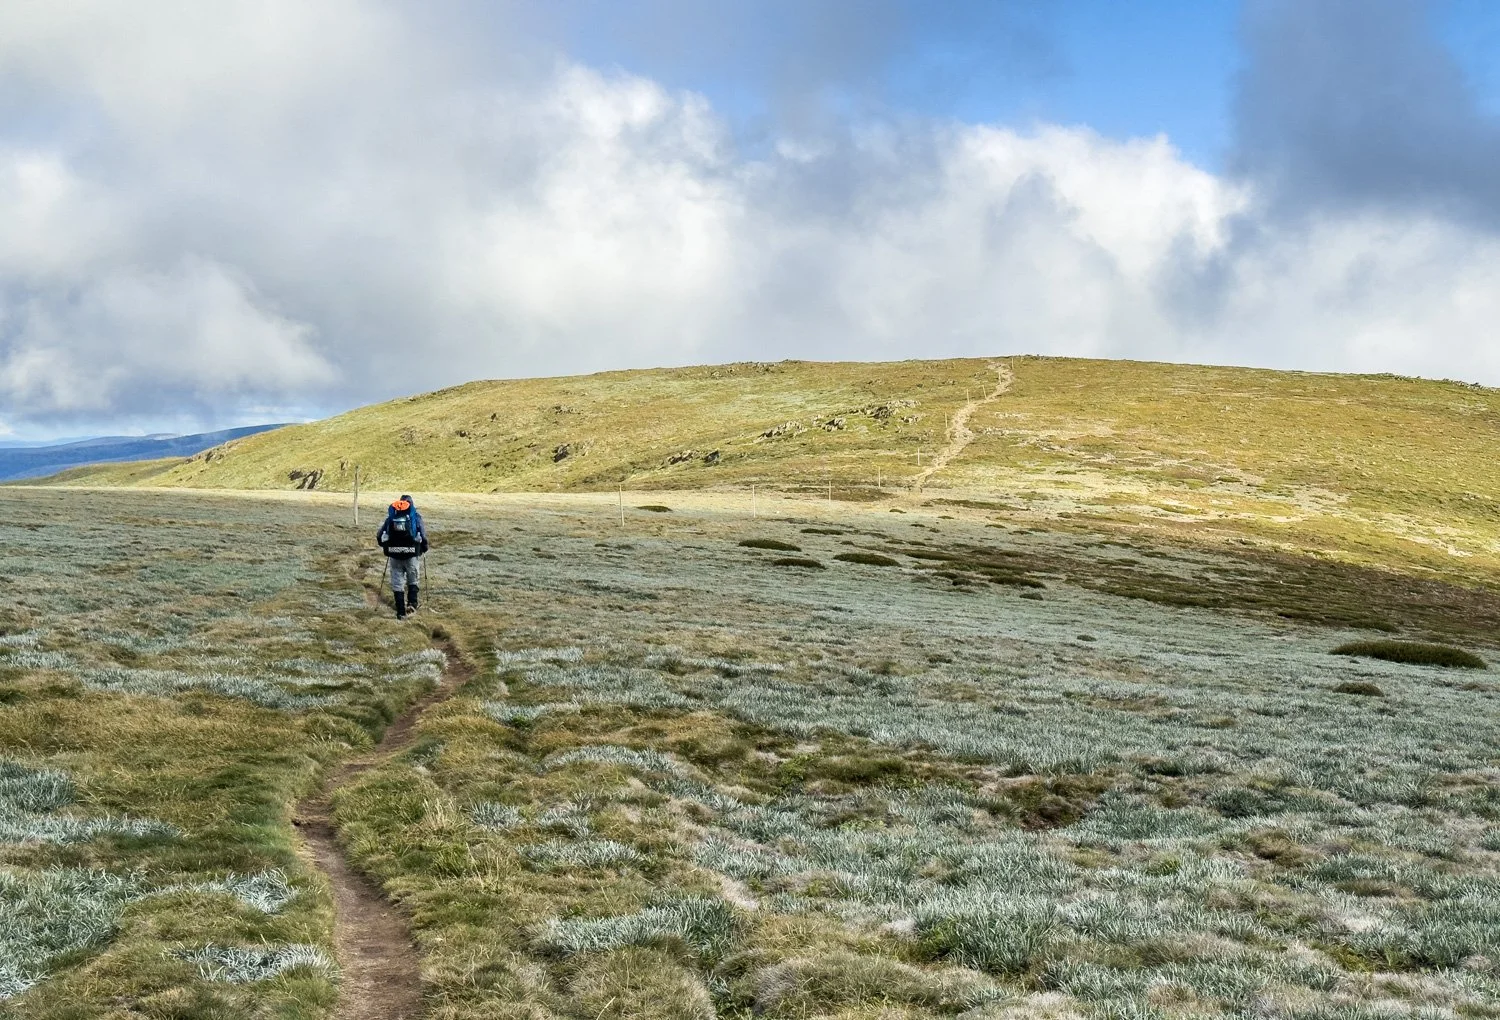
The Alltrails App has been a contributing factor to many hiking incidents in Victoria’s Alpine National Park. Two hikers recently died near the horizon of this image.
When we hiked Mt Bogong in the Victorian Highlands, the local ranger told us that Alltrails was relevant in numerous incidents: hikers with insufficient skill and experience were attempting routes that were too difficult for them or beyond the capability of their gear — two-season tents, rubbish rain shells, insufficient insulation — but which appeared easy because the press of a button had downloaded the trail.
The ranger was noticeably relieved that we already had the best paper maps available for the region: there is always a ‘best’ map for a region of the correct scale and that is the most up to date and/or includes the most important information for hikers. In Australia, this is rarely Alltrails.
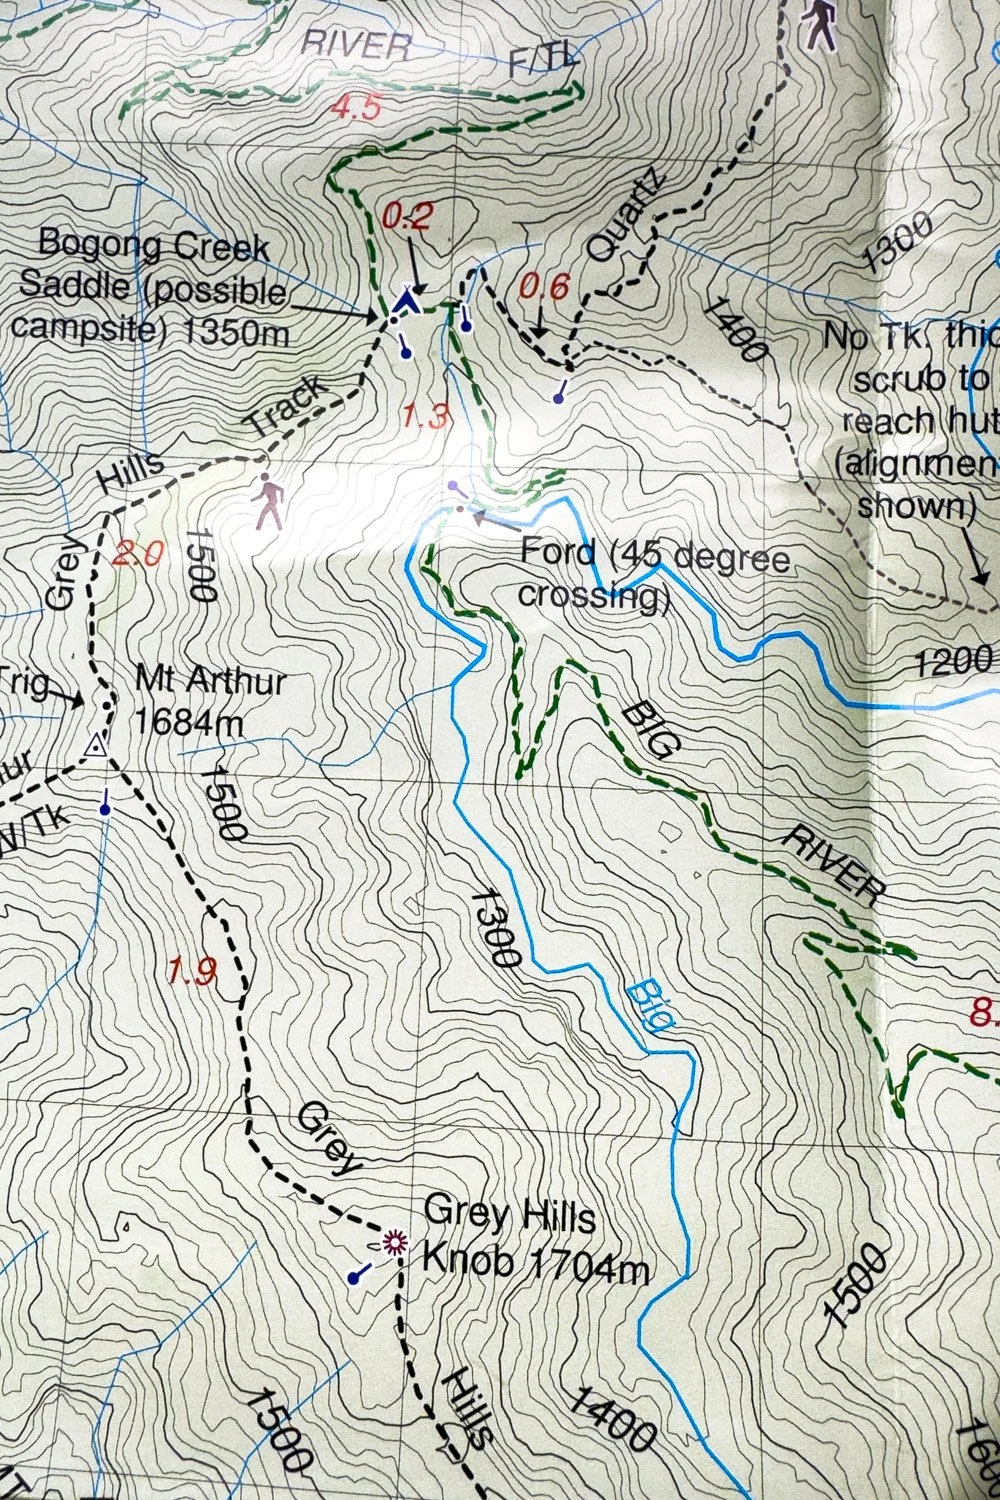
The outstanding Rooftop paper maps cover much of the Australian Alps; they are detailed and annotated with relevant notes such as water sources, trail condition and more.
Even when using electronic maps, we must be able to read them. Following a bold line through a mysterious maze of other lines, squiggles and symbols is a recipe for disaster. Turn by turn navigation is even worse. How far is it? How steep? Are there river crossings? Swamps? Scrambles?
Learn how to read maps from websites, bushwalking clubs, and books such as Cicerone’s excellent Navigation: Techniques and skills for walkers and Map and Compass both by Pete Hawkins, or Caro Ryan’s How to Navigate for an Australian perspective.
For a list of map suppliers/sources in Australia, see Caro Ryan’s list.
Understanding how electronic navigation and communication works and common pitfalls – online? offline? signal strength? downloaded? satellite vs cell tower reception? redundancy? – is essential for using these tools in such a way that enhances rather than compromises your safety.
Essential Electronics for Communication and SOS: Satellite Messengers and PLBs
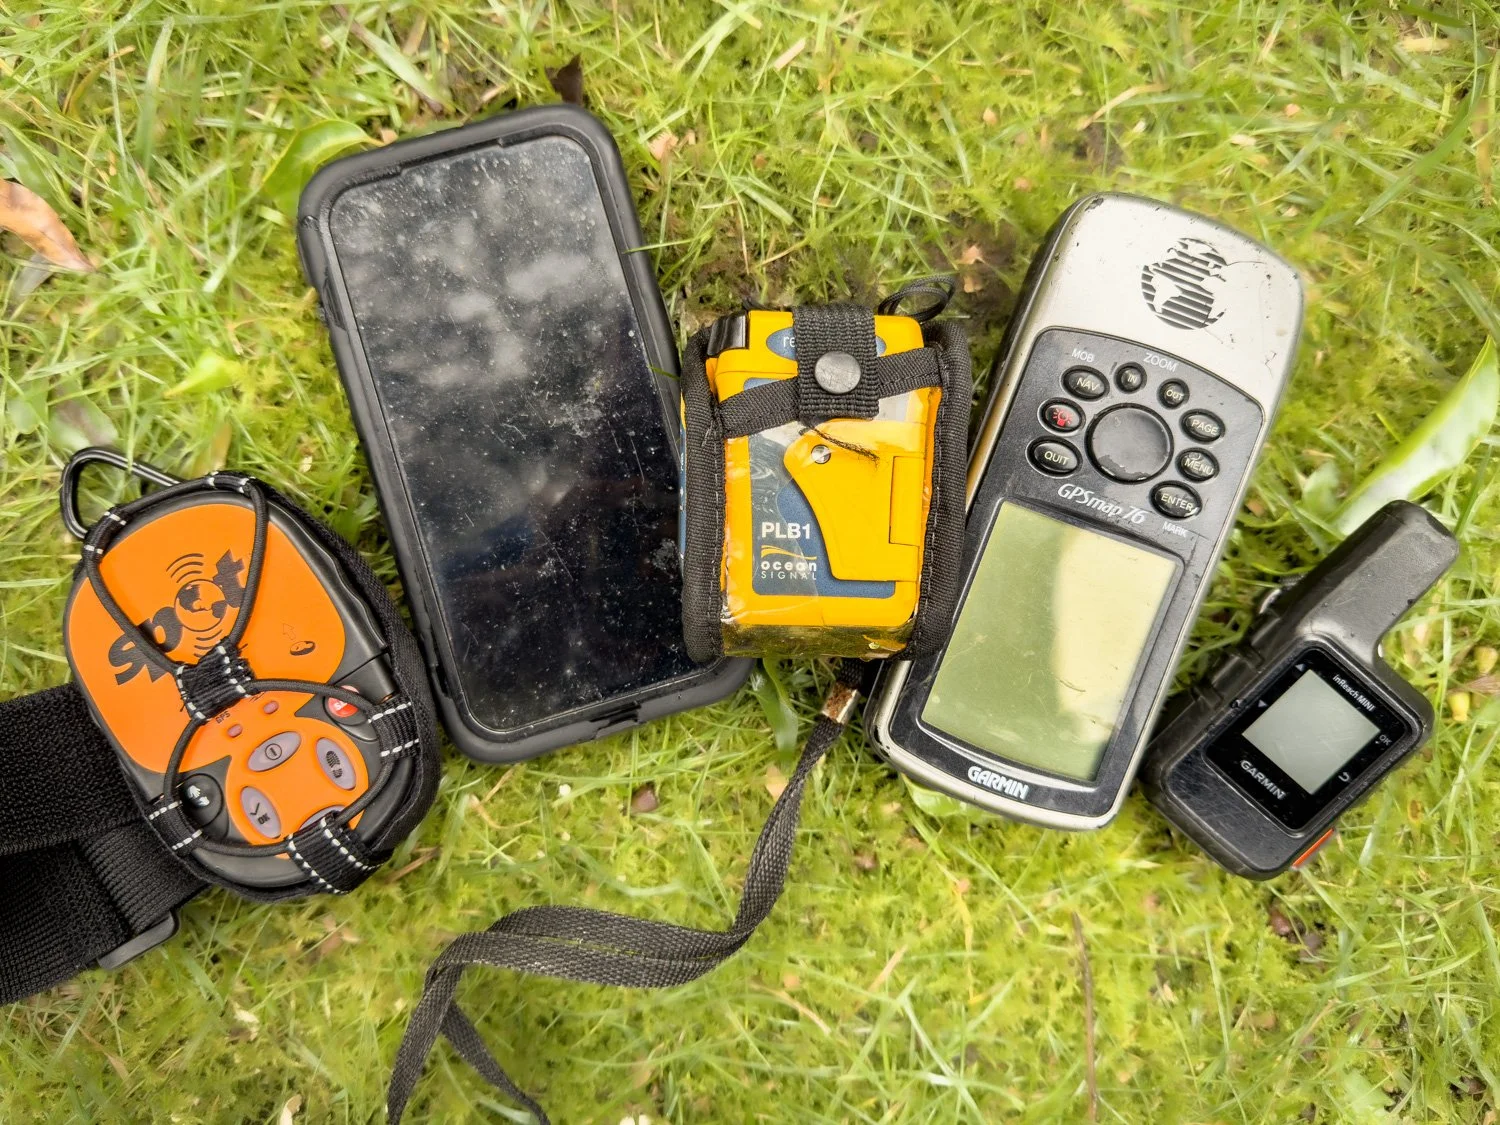
Phone, Messengers, PLB and GPS: do you know the differences and why they are important?
Although old-school trampers may disagree, Satellite Messengers and/or PLBs are nowadays non-negotiable for most hikers heading into remote country without mobile phone coverage. Although we’ll discuss mobile phone options later, we’ll also explain why even those with satellite SOS capability/apps are not yet appropriate or complete substitutes, at least in Australia. But first, let’s consider how satellite messengers and Personal Locator Beacons work, because:
SATELLITE MESSENGERS AND PLBs ARE DIFFERENT TOOLS, WITH DIFFERENT STRENGTHS AND WEAKNESSES.
Satellite Messengers (Inreach, Zoleo, SPOT) allow two-way communication, usually via text, between you, family, friends and rescuers. The SOS button initiates emergency rescue protocols. Similar to phones, after purchase they require registration with the brand, and ongoing subscription.
Personal Locator Beacons (GME’s Accusat, Ocean Signal’s Resqme, ACR’s Resqlink) have the same SOS function but don’t allow two way communication other than, in some cases, acknowledgment of receipt of your distress signal. However, as dedicated SOS devices used ONLY in emergencies, they also have a much stronger signal than do Satellite Messengers, allowing effective function in a wider range of environments. They do not require a subscription after purchase, but do require registration.
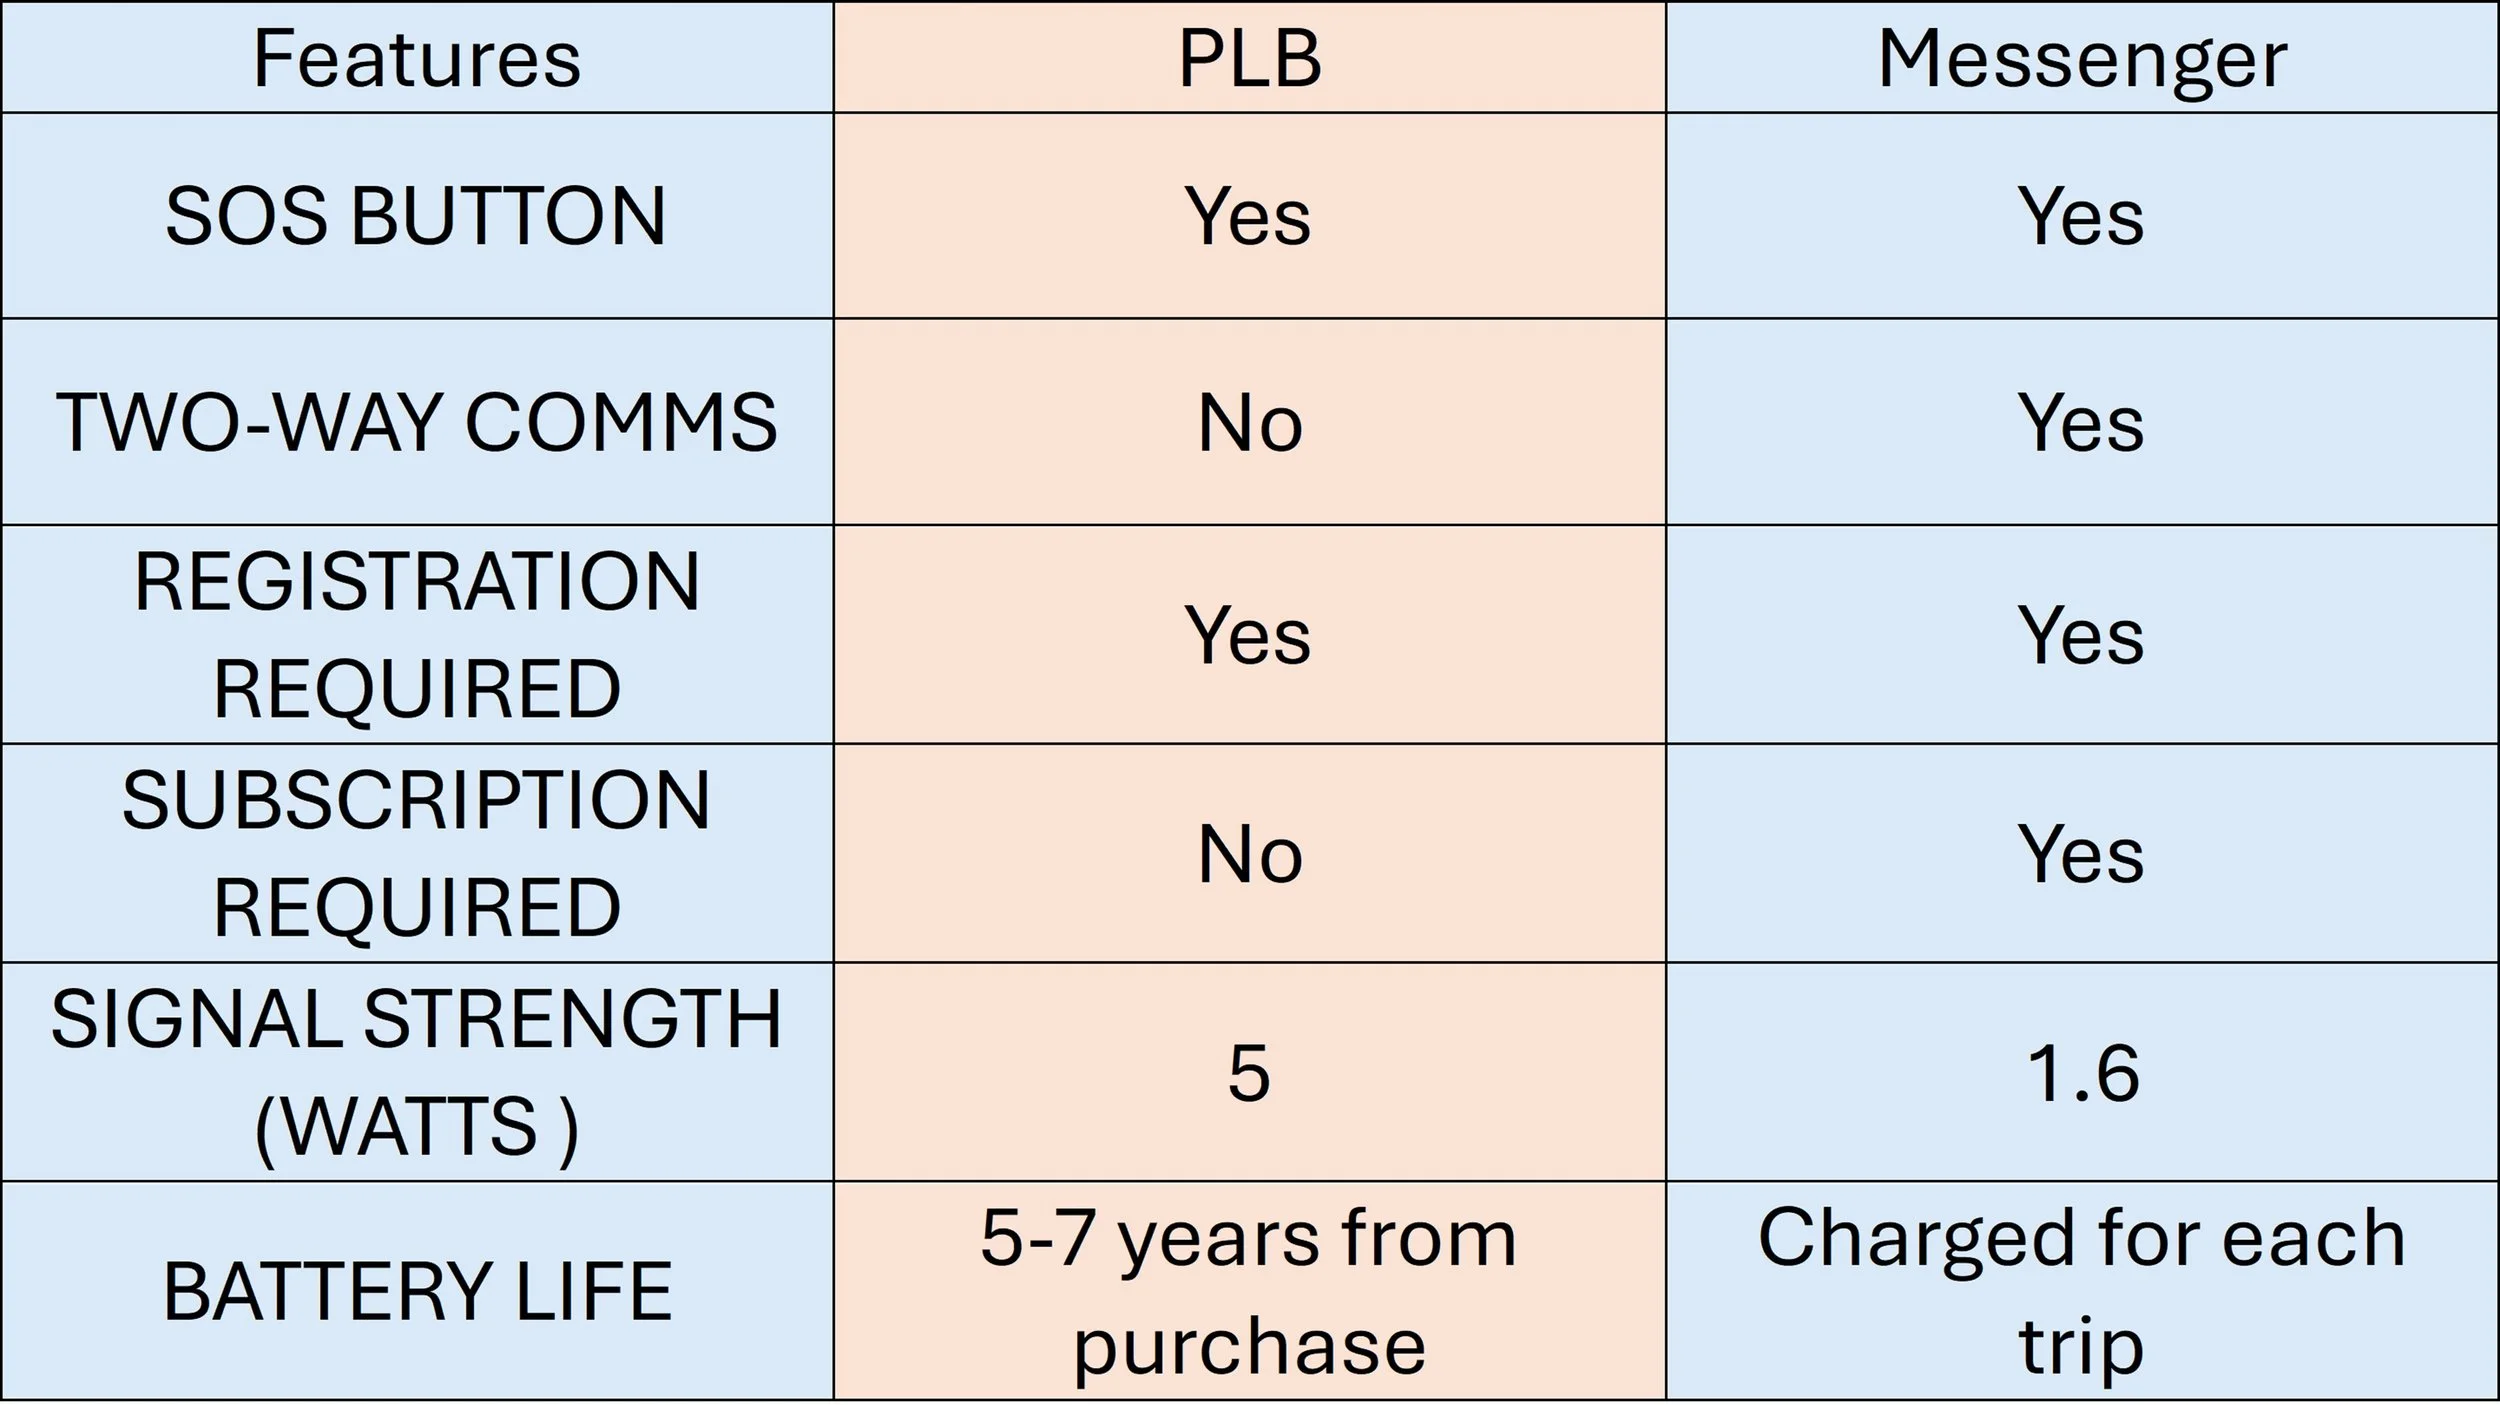
PLB vs Satellite Messenger
Let’s take a closer look at each.
Satellite Messengers
Just as mobile phones use antennae to send and receive information via networks of mobile phone towers on land, satellite messengers use inbuilt antennae/receivers to send and receive… but via systems of satellites in orbit rather than towers on land.
Each system has not one but many satellites so that, depending on your location and the system of satellites, you can send and receive at any time of day, because at least one and usually many are above you, unobscured by the curvature of the earth or terrain. Depending on their orbits, more or fewer satellites may be in the sky, or they may be higher in the sky or lower on the horizon, where mountains may block the signal.
For example, Garmin, Zoleo and ACR’s Bivy Stick use the Iridium network of 66 low-orbit satellites, with truly global coverage:
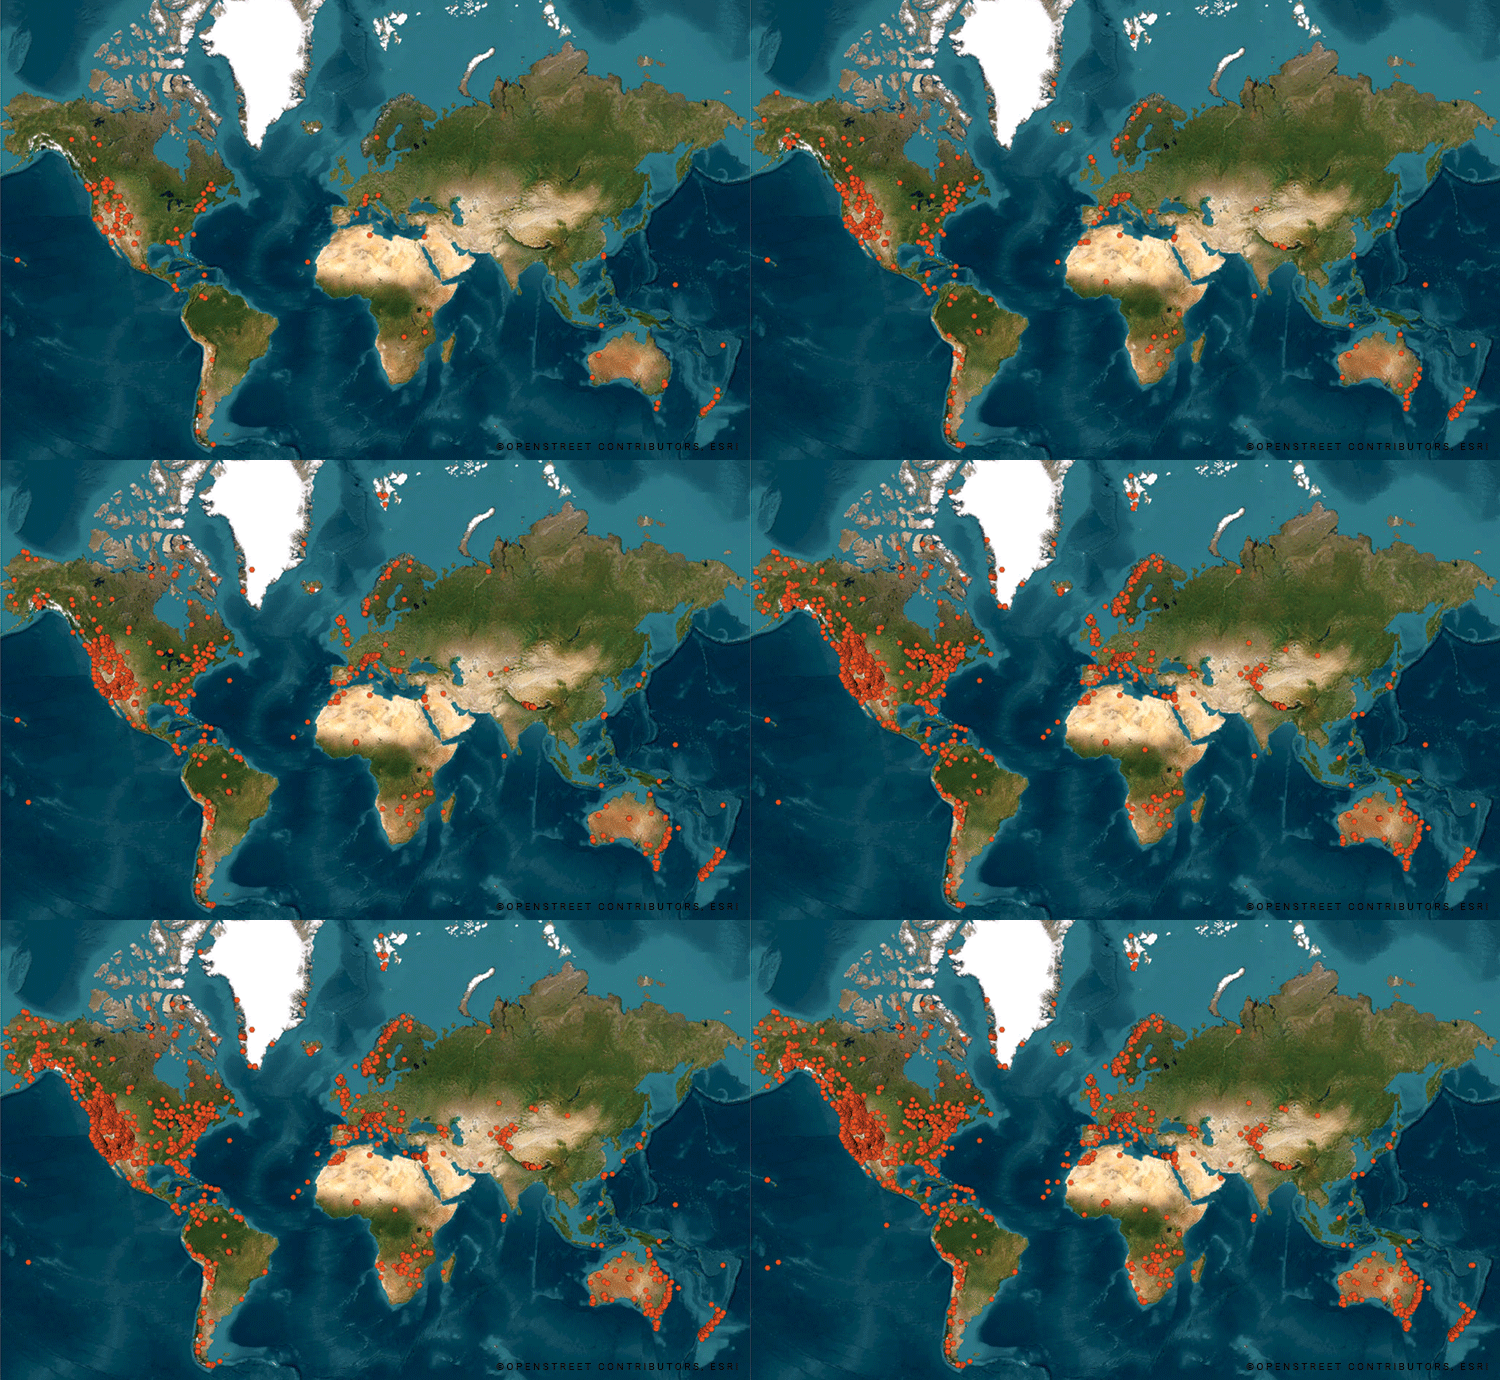
Garmin Inreach rescues in 2025 utilising the Iridium network, Australia and New Zealand punching above our weight! (Image Credit: Garmin)
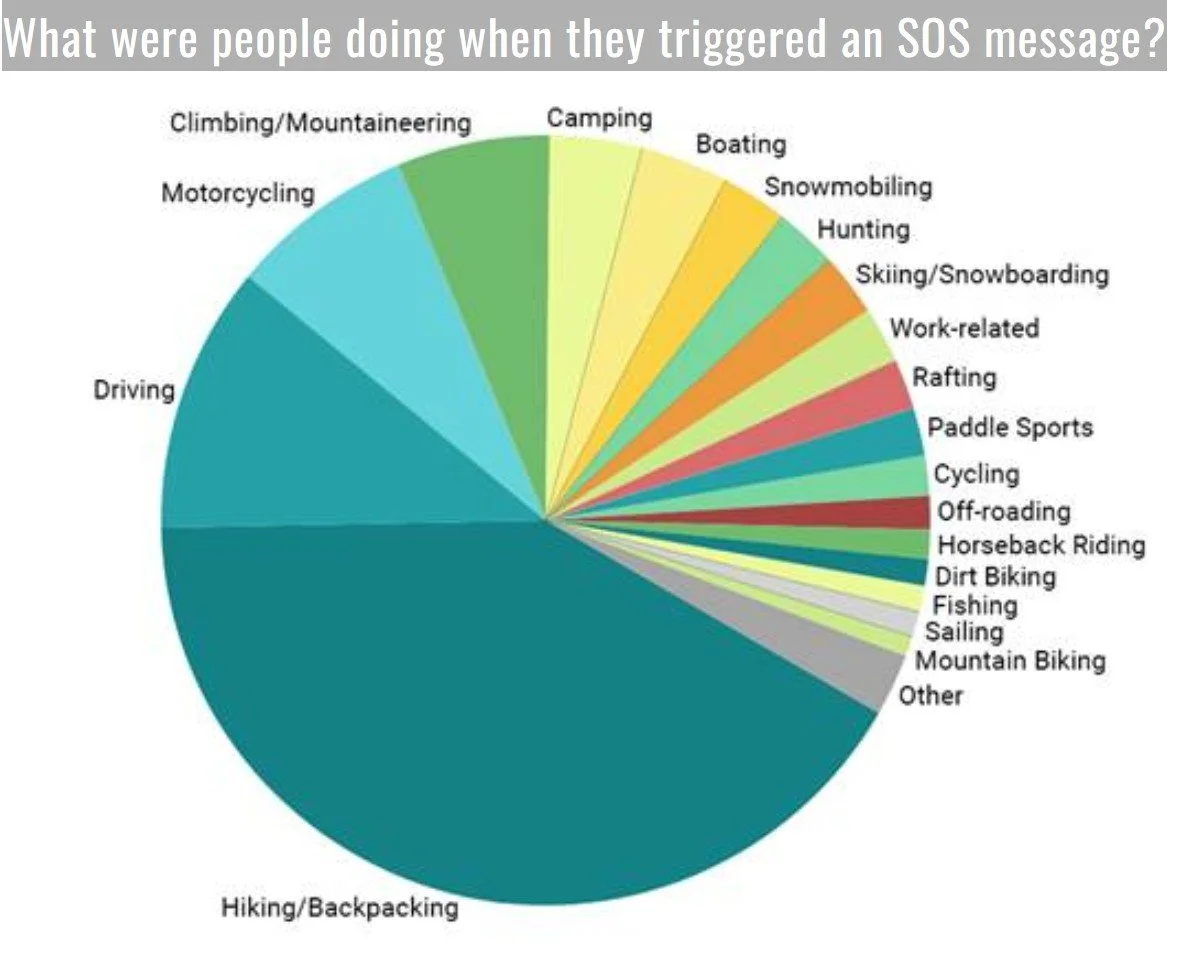
Yes, that’s us hikers comprising almost half the pie, and that’s why it’s worth carrying a S.E.N.D! (Image Credit: Garmin)
SPOT devices and iPhones 14 and later use the Globalstar network of 24 (soon 32) low-orbit satellites, currently covering about 80% of the global landmass, excluding much of the arctic region, including Greenland and the northernmost parts of Canada and Russia. Older SPOT devices did not have two-way messaging capability but newer ones do.
Telstra has just signed on with Musk’s Starlink providing “limited” satellite internet access to certain phones on cetain plans for certain apps ie iMessage, messenger, WhatsApp, certain weather apps, AllTrails etc but, at time of writing, the Telstra website actively discourages use as an emergency communicator:
“Telstra Satellite is not designed to be an emergency service and should not be relied on in an emergency. You cannot call Triple Zero from a Telstra Satellite service [or 112 Emergency services]; nor can you text Triple Zero directly or receive one-way emergency broadcasts.”
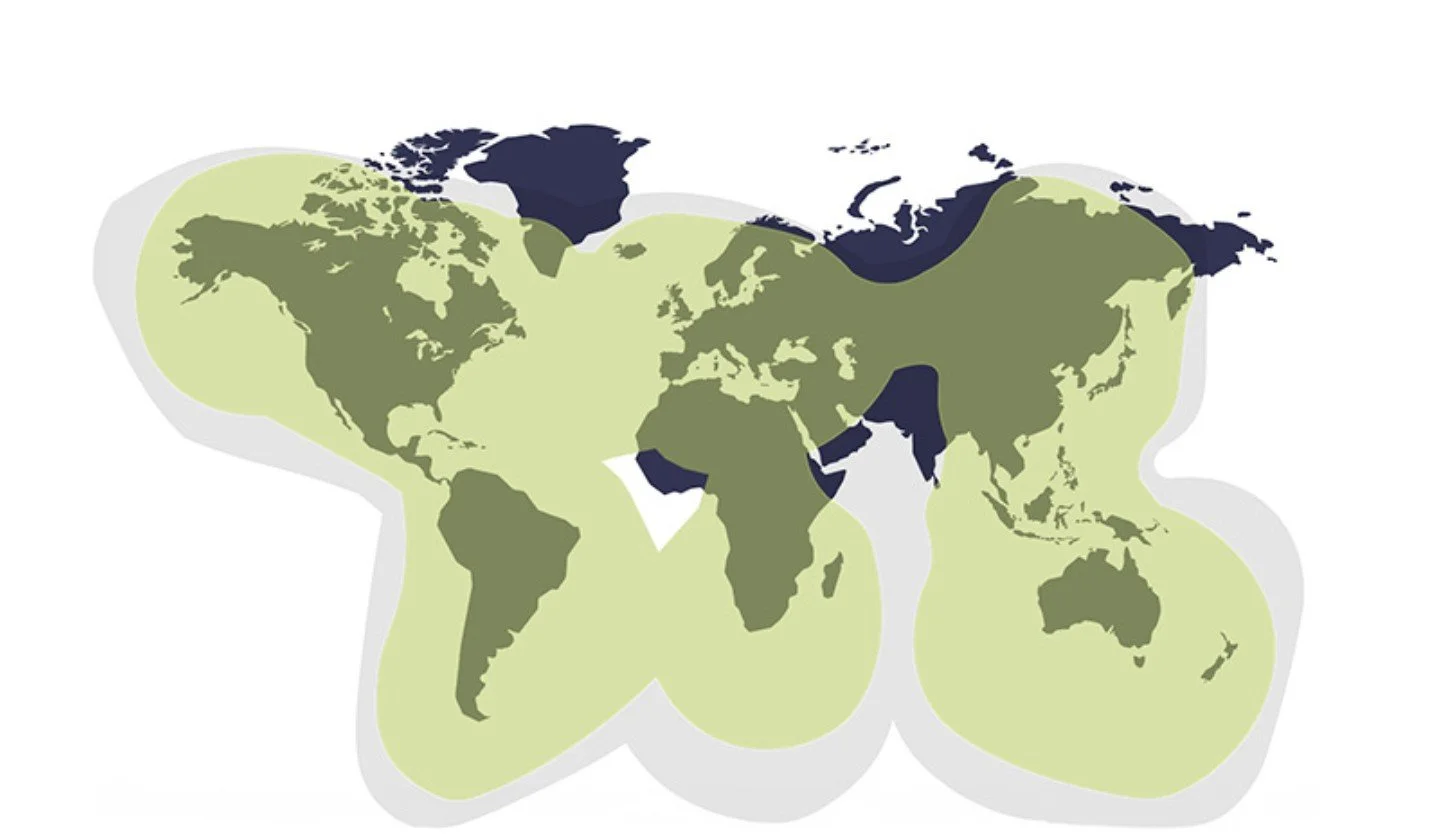
Globalstar Coverage at time of writing (Image Credit: Control Ground).
Skylo, used by Garmin’s Fenix 8 Pro smartwatches, Google Pixel and Samsung Galaxy Phones in some parts of the world, plus other communication technologies, is a service provider that creates software connecting to existing third-party geostationary satellites. Geostationary satellites remain above the same point of land, rotating with the earth, so this system uses different satellites, owned by different companies, for users in the different countries below them.
Telcos sign on to access relevant satellite software and, though this is scheduled to happen soon in Australia, it hasn’t yet at time of writing, at least not comprehensively (Australian readers, see this regularly updated article). Systems that connect to geostationary orbits have more variance in connectivity across their range, so it’s worth checking before investing if you want to use them as messengers in addition to navigation (Australia and New Zealand are well outside the list of supported countries for Garmin’s Fenix 8Pro, but within the area of Garmin’s Iridium-based Inreach messengers). Europe and the Americas are largely covered:
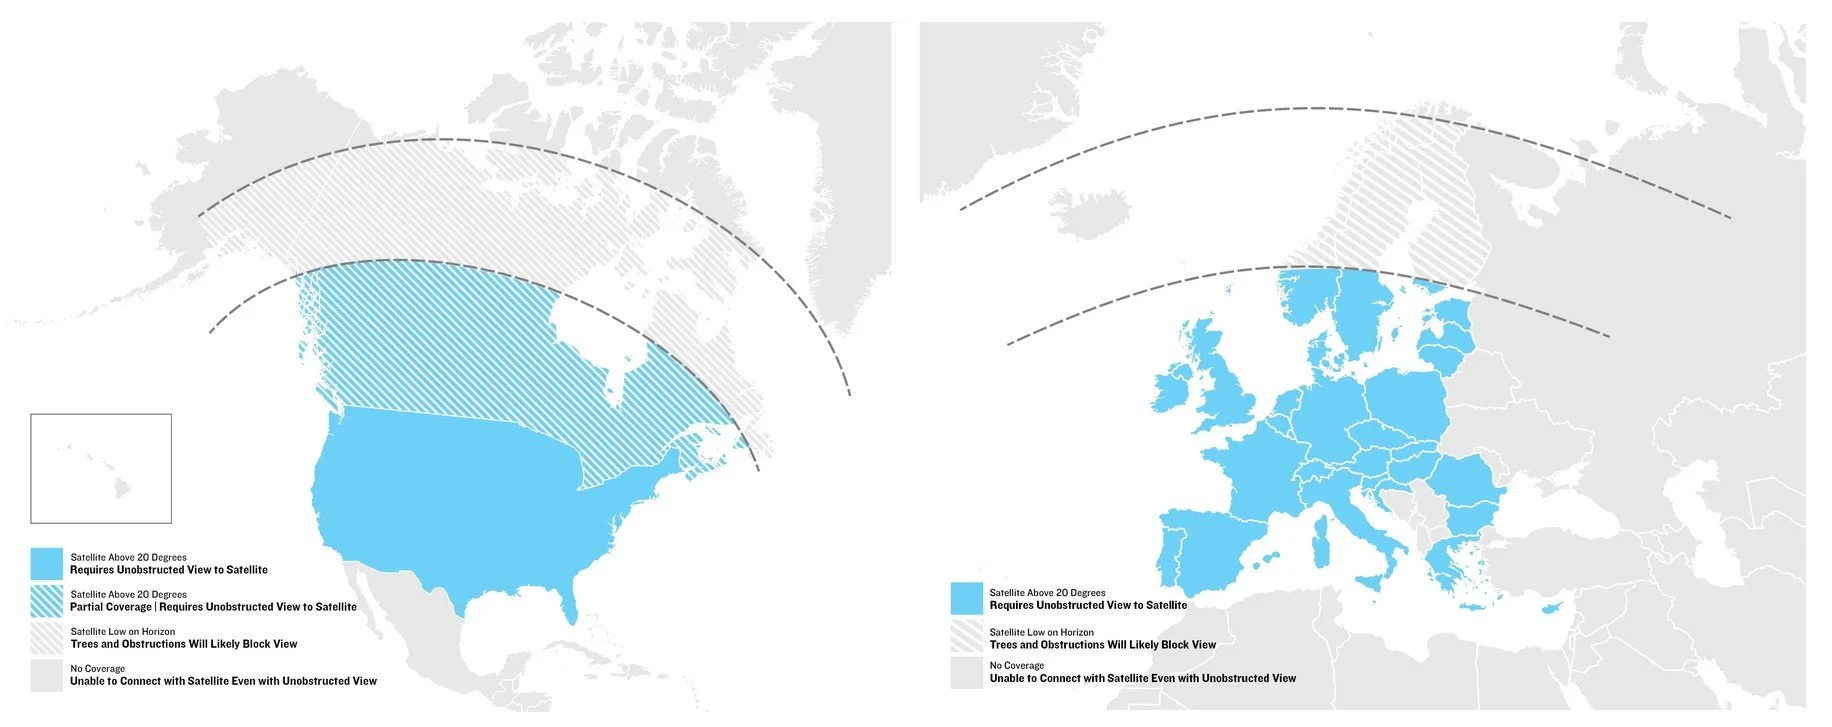
Skylo map illustrating variability in coverage. Skylo is expected to expand to Australian carriers within the next few years. (Image Credit: Garmin).
Satellite messengers also connect to GPS satellites and functionality, so they helpfully append your coordinates when sending messages.
Garmin Smartwatches use 4G LTE when available, satellite connectivity when it’s not. However, for Australian hikers in remote areas, almost none of which have signal of any kind, this is irrelevant. Occasionally, you might get lucky atop high peaks with 360 views, but it is too rare to rely upon:
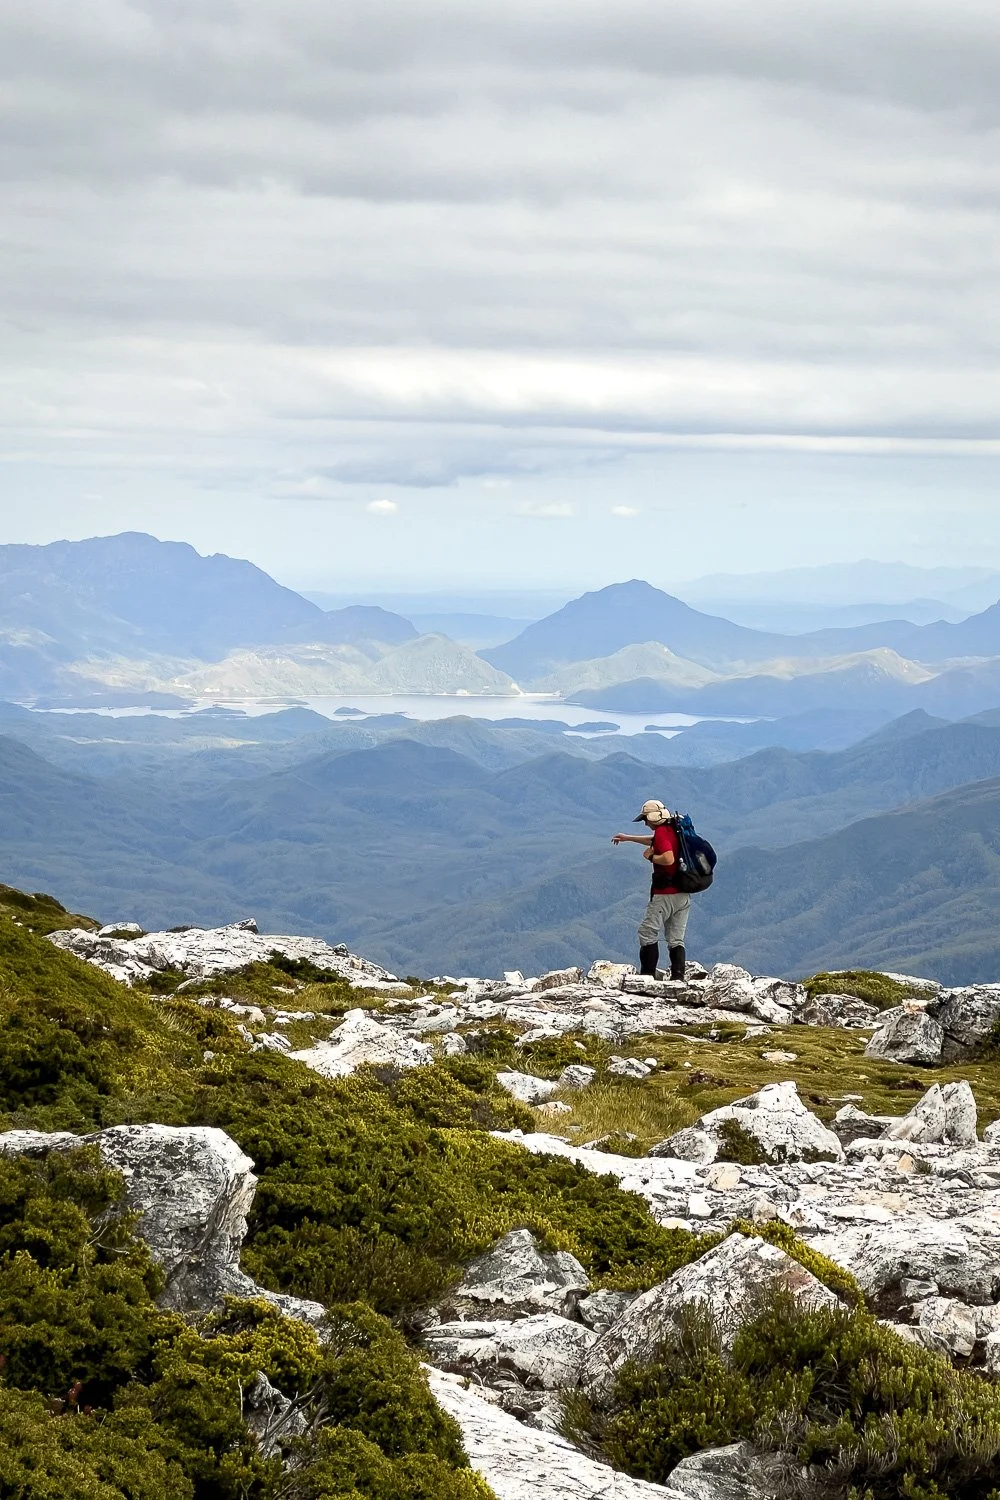
Nearing the top of Tasmania’s Frenchman’s Cap, which had connectivity despite being surrounded by wilderness.
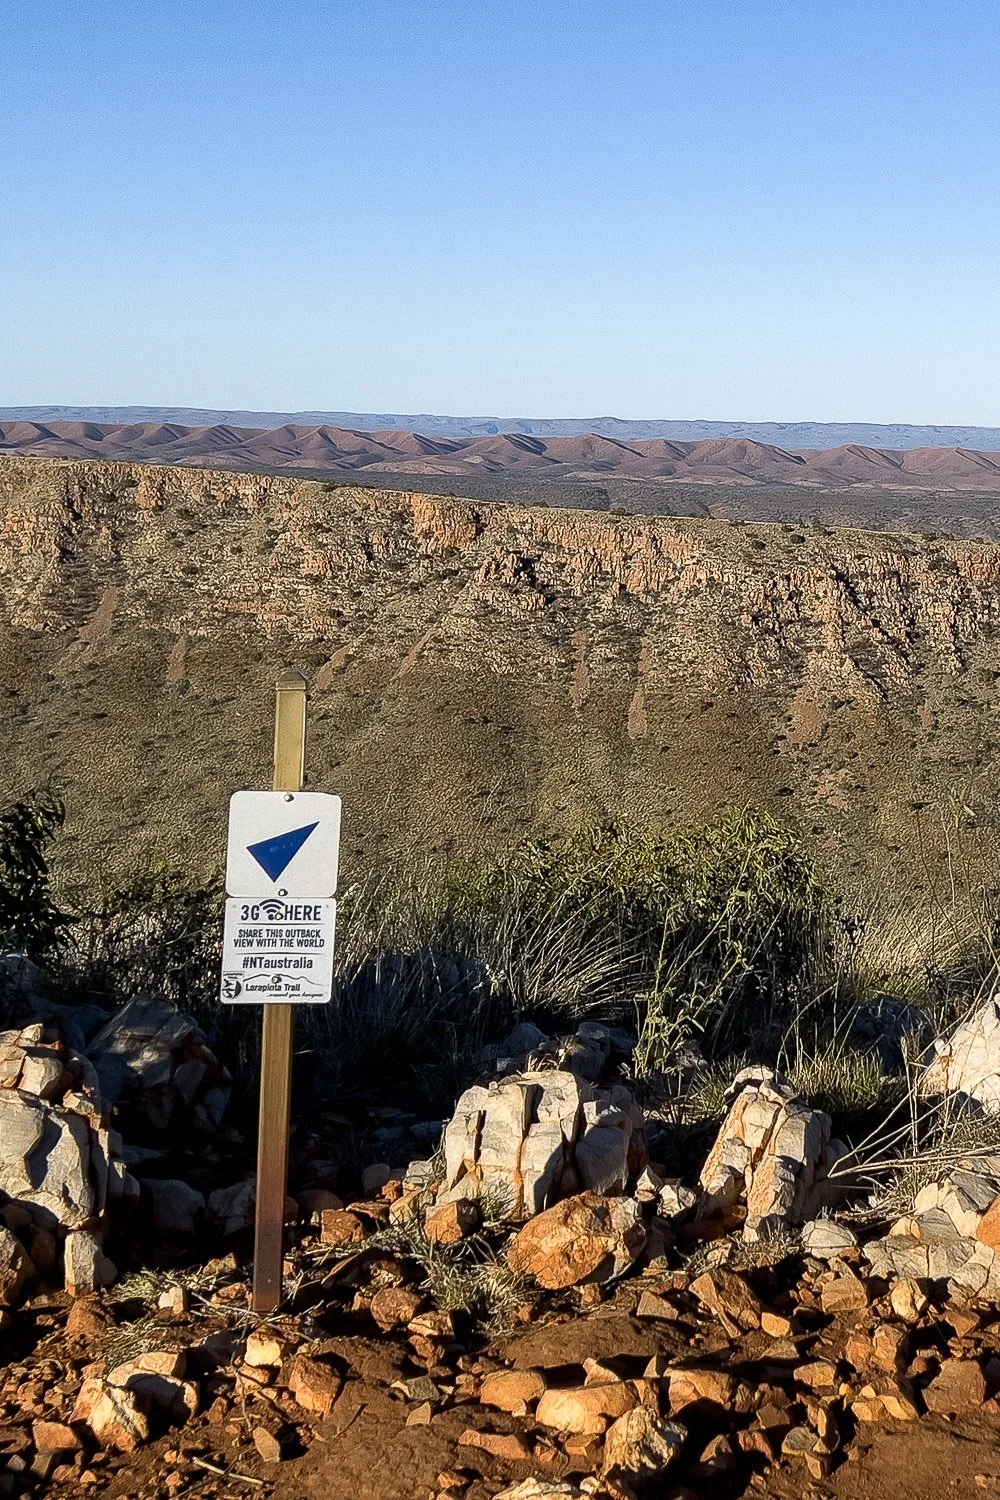
A helpful sign near Giles Lookout, Larapinta Trail in Central Australia. Although the trail traverses many ridges like this, few have coverage.
In addition, although some of the above messengers can be used everywhere, doesn’t mean that they may be used everywhere. Because individual governments can’t control messages sent on US-controlled global systems, certain countries restrict or ban Garmin and other satellite messengers, or are embargoed from using them.
At time of writing, these countries include Afghanistan, Belarus, Cuba, Georgia (SMS), India, Iran, North Korea, Myanmar, Sudan, Syria, Thailand, Vietnam, China, and Russia. War in regions, such as parts of Ukraine, also restricts use.
Zoleo is “prohibited from providing products/service in the following countries: Taliban-controlled Afghanistan, China, Cuba, India, Iran, North Korea, Syria and Sudan.”
You’ll be subject to significant penalties and unpleasantness if you use or even just bring a satellite messenger into any of these countries. Rules change with conflict, governments and time, so check local consulates or the Garmin website for an up-to-date list prior to departure.
Subscriptions
Like mobile phones, satellite messengers require not only registration, but ongoing subscriptions varying with brand, device and plan. Choose a plan that meets your needs re frequency, length and number of messages you expect to send, and the frequency and duration of hikes. Some allow you to suspend your subscription between hikes. Combined GPS+messengers also require a subscription; only GPSes and PLBs do not, though all must be registered.
It is essential that you register your satellite messenger device (Inreach, Zoleo, SPOT etc.) and pay the subscription, because it won’t work without it. A Queensland hiker recently died in Tasmania’s Western Arthurs in part because he failed to register and pay the subscription of his secondhand Garmin Inreach.
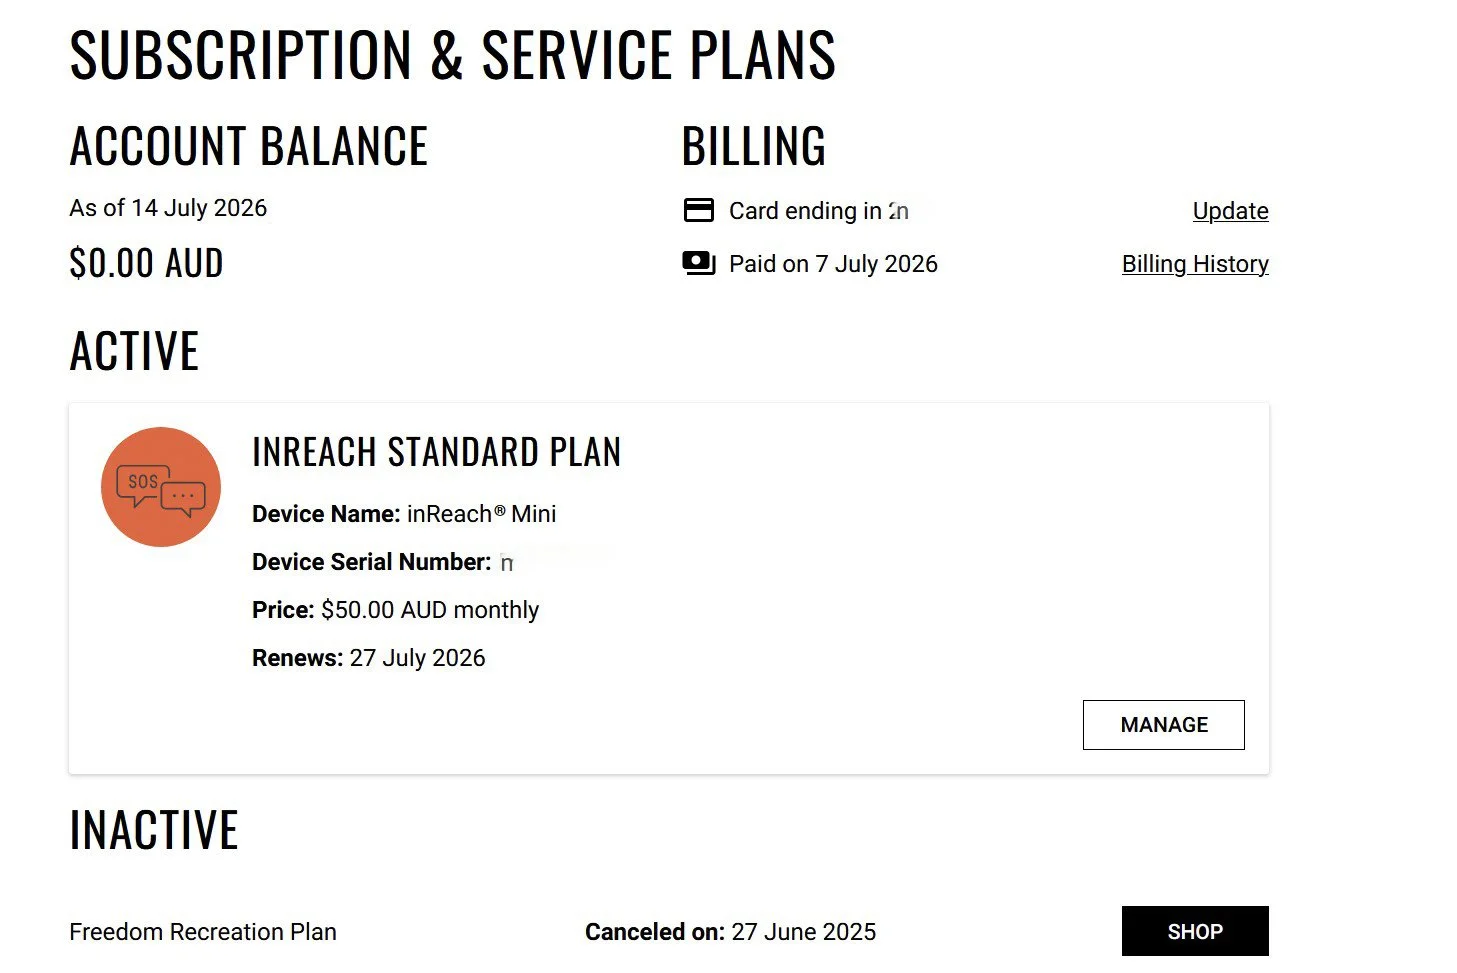
A current active Inreach.
It’s possible to suspend an active Garmin subscription plan, and there has been a lot of confusion around whether Garmin Inreach Devices can send an SOS while suspended — suspended, not unregistered or expired, neither of which will work at all).
The confusion is because certain devices in the lineup will, and others won’t. I eventually found a list of compatible devices deep in a submenu of the Australian website, screenshots below:
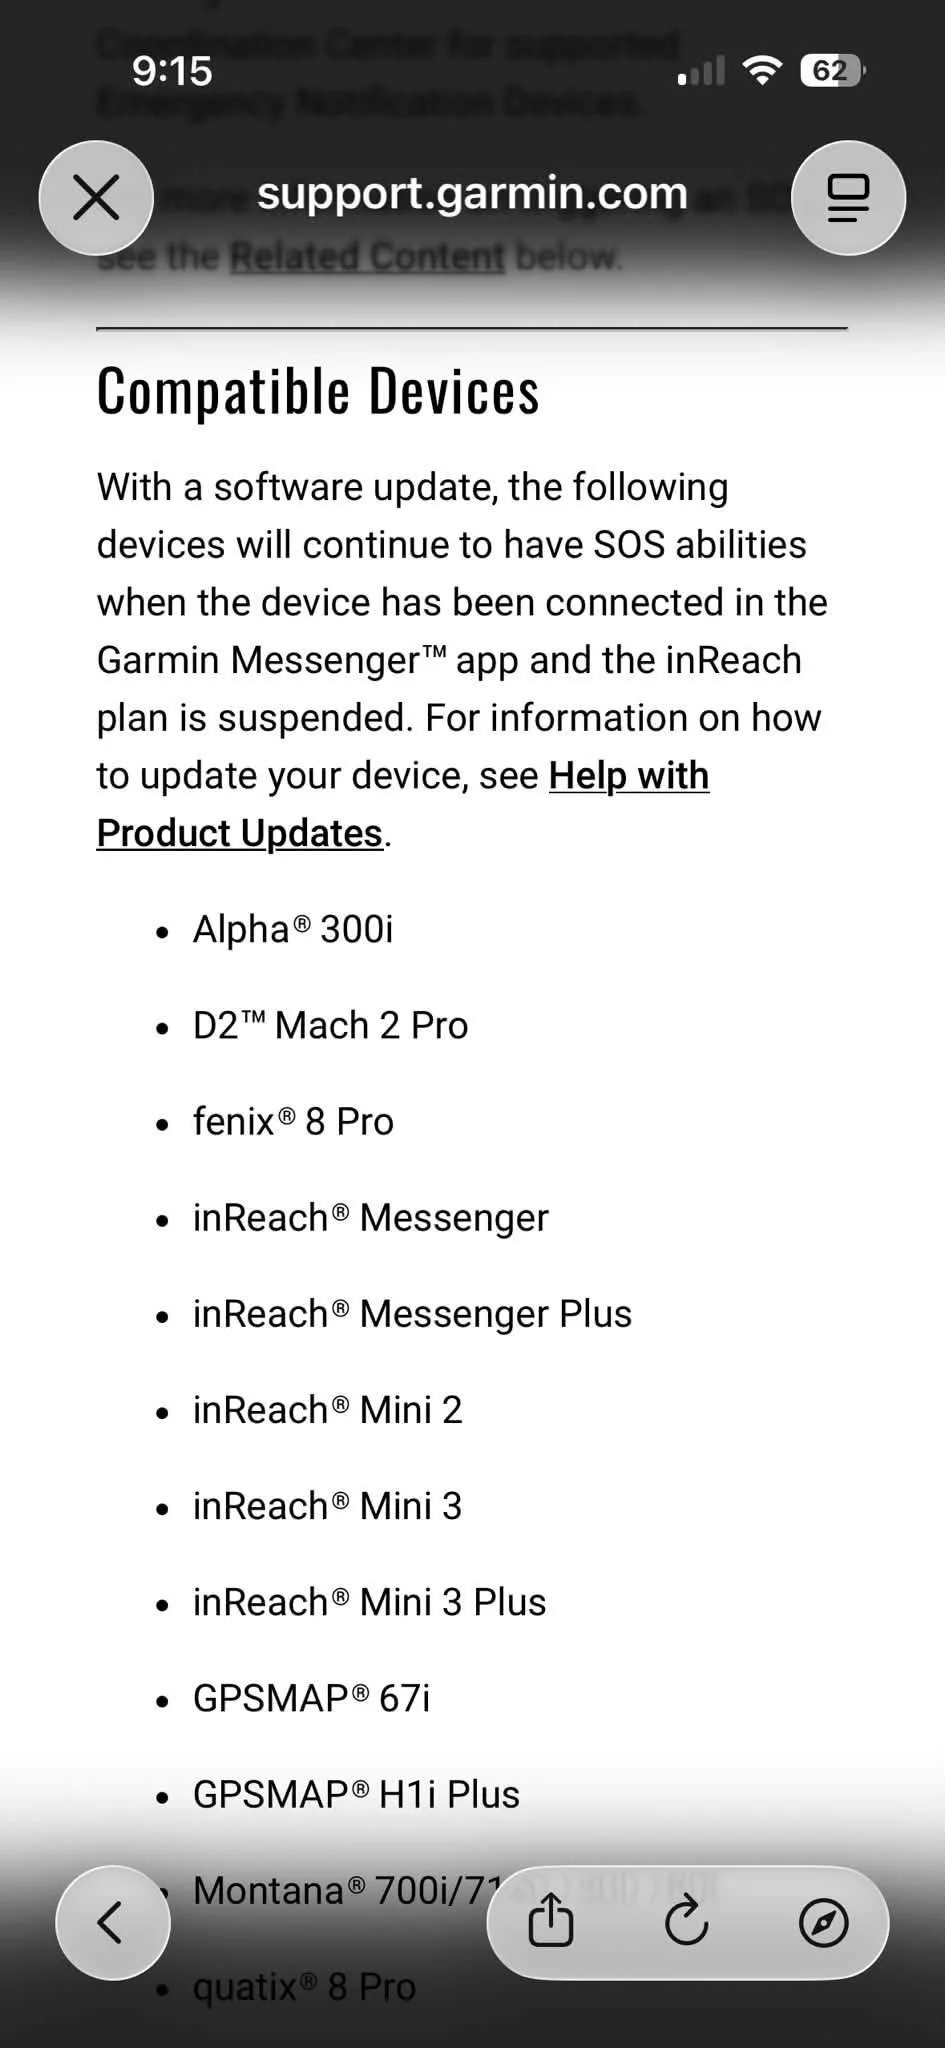
Compatible Garmin models
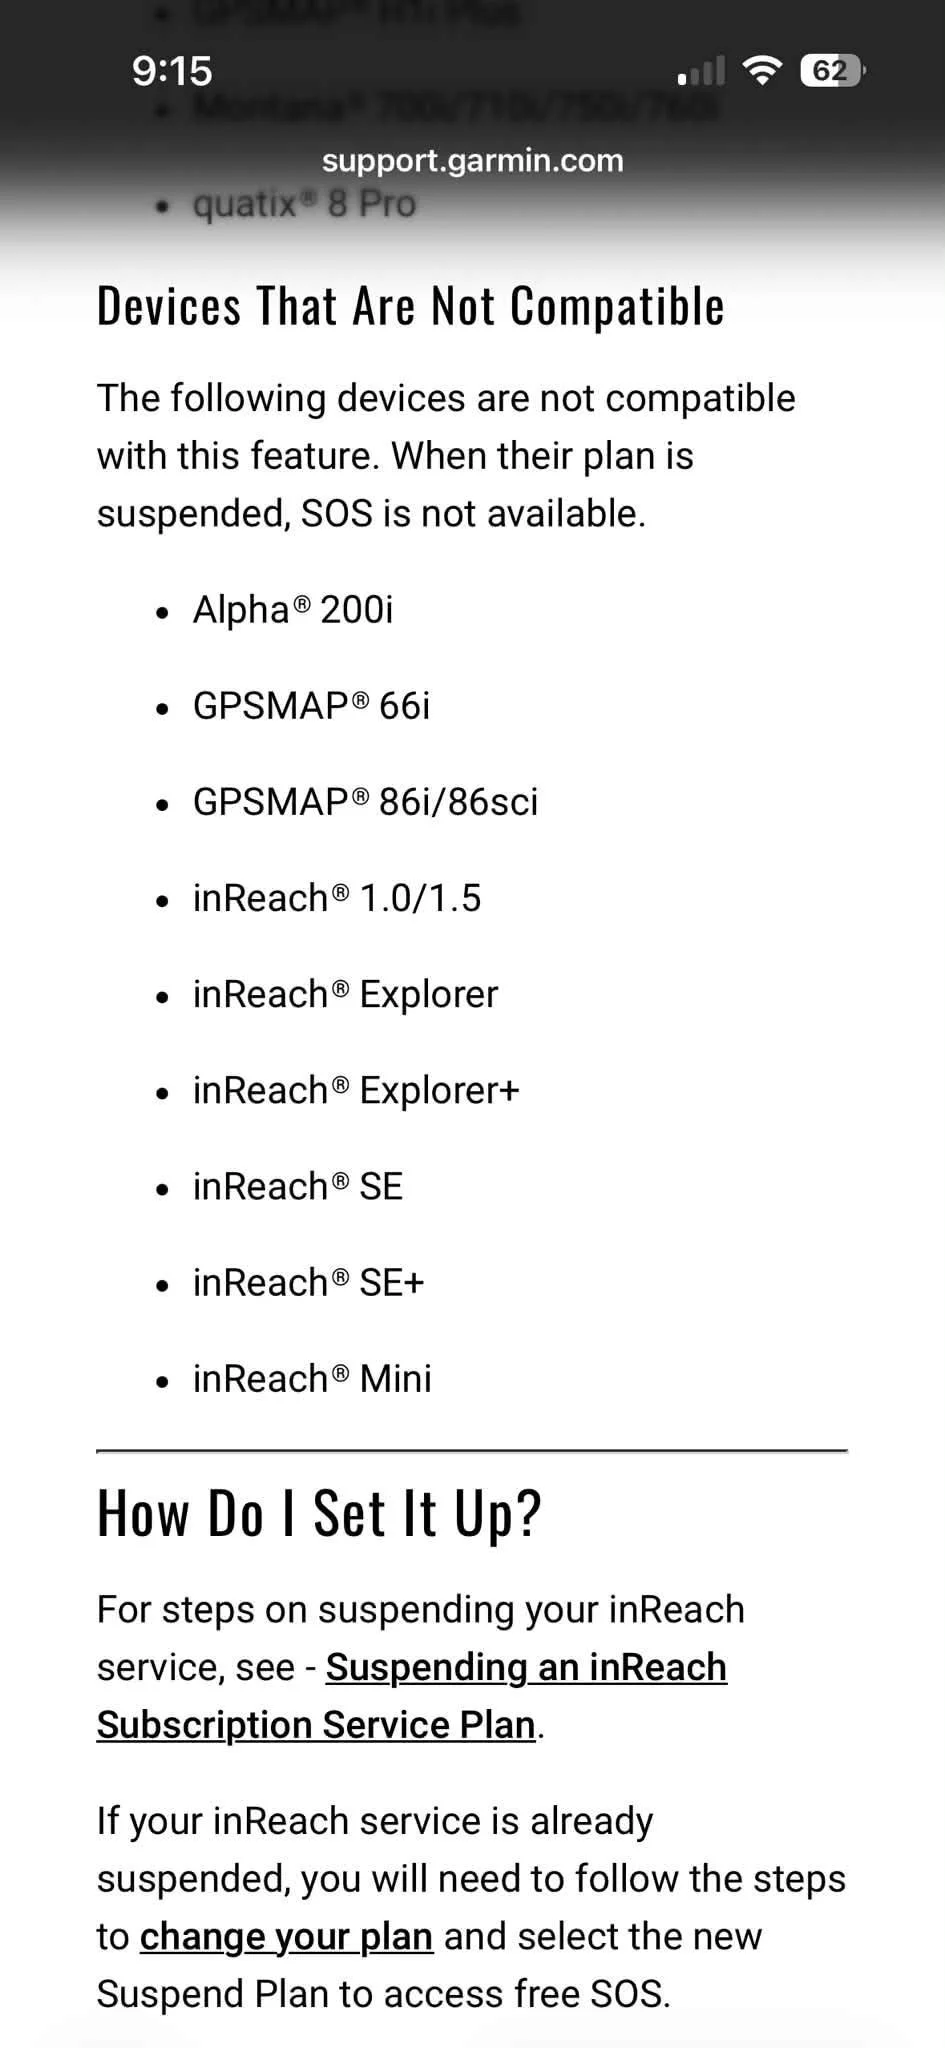
Incompatible Garmin models
It’s essential that users know that using your Inreach while suspended adds many additional levels of complexity, with each level adding risk. If any of those steps are missing, your Inreach might fail to send an SOS. These include:
1. You must check your model is compatible
2. You must check the software is updated
3. You must load an app onto your phone if you haven’t yet done so
4. You must check your Inreach is paired with the app on your phone if you haven’t yet done so.
5. You must have or activate a specific suspend plan.
Basic safety theory strongly suggests that this extra level of complexity is likely to increase the number of failed SOS activations, especially if people decide to preference a suspended subscription over an active one, which doesn’t require as many steps.
For the SOS to activate, the Inreach must have an active subscription that you have suspended. An expired subscription, or no subscription, or an unregistered device, is useless. In any case, the biggest advantage of a recent model messaging device over a PLB is — duh! — its two-way messaging, so why hobble your asset? If you don’t want to message anyone or use your device for navigation, just buy or hire a PLB instead, or a PLB + GPS, neither of which require subscriptions.
Messaging
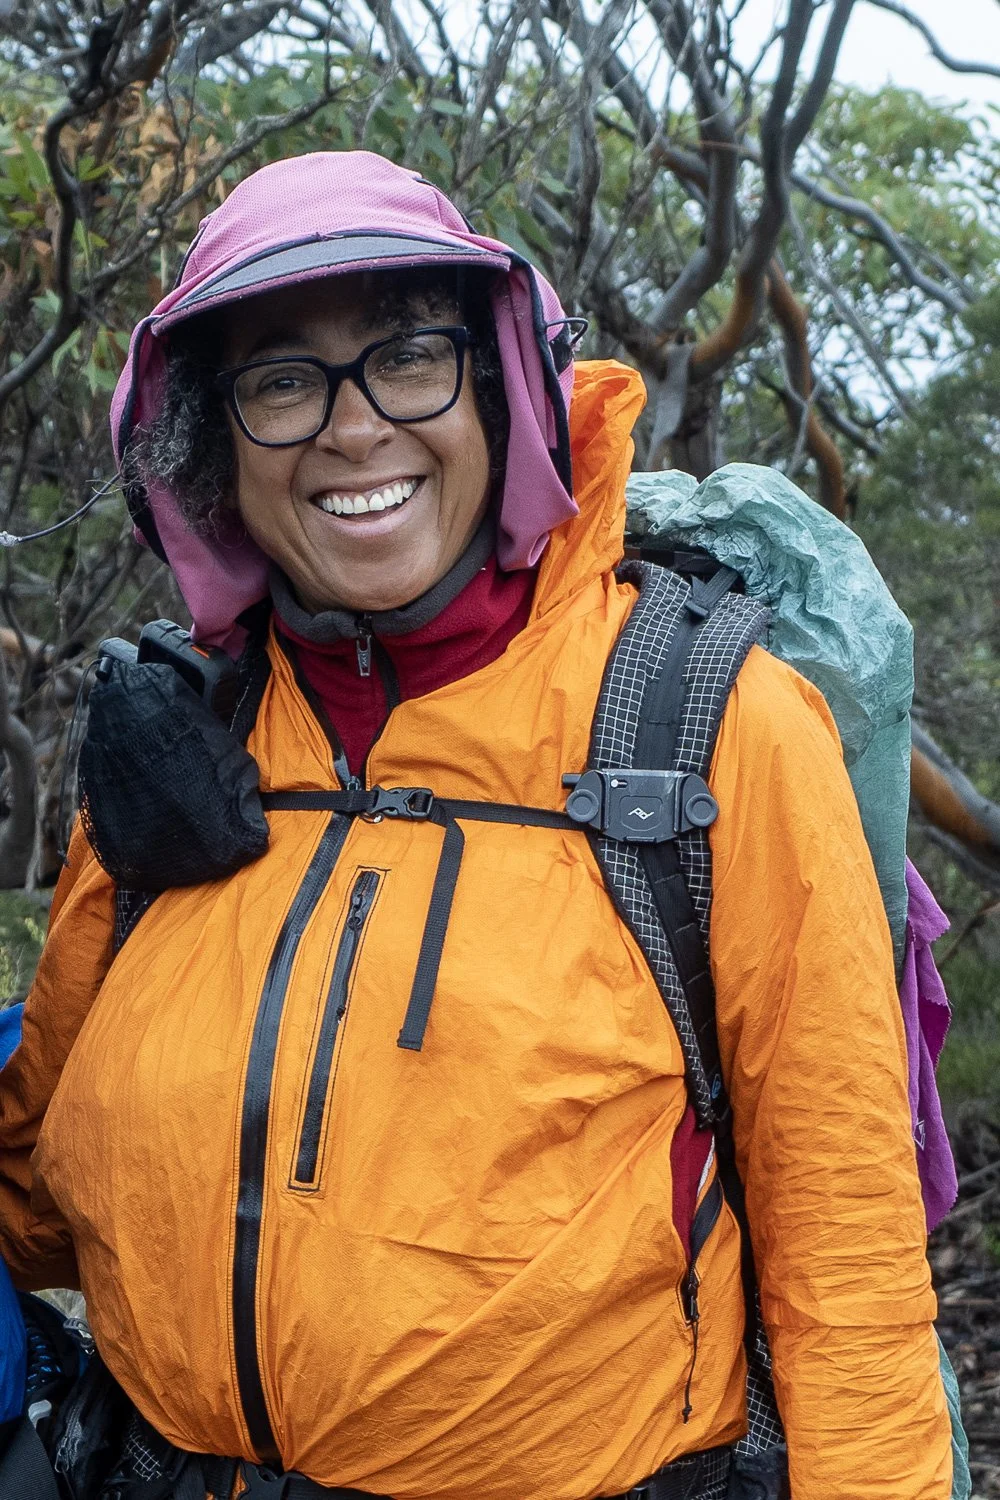
Inreach on my right shoulder, red SOS cover visible.
Newer satellite communicators allow preset, preloaded or typed on trail messages. Preloaded or quick messages are convenient because they’re written at home, uploaded, and sent at the touch of a button. Examples include:
All okay but delayed
Stopping here for the night
Have a medical issue and may need help, stay tuned OR
Minor issue but am safe and don’t need rescue
I have a minor problem and will be late
Just checking in, all okay (sent at pre-arranged set times).
Changing plans, need to alter route
Most satellite messengers now also have Bluetooth connectivity to your phone, making typed messages easier than multi-tap; just text on your phone’s touch screen, and it’s sent via messenger.
However, mobile phones are subject to multiple forms of failure, so learn how to use your messenger as a standalone unit. YMMV, but we would never choose a messaging device whose communication function can only be operated via Bluetooth connectivity to your phone.
Messaging apps also allow you to upload your trail progress, so friends and family can follow you online on their computers or phones at home, but be aware that this chews through your messenger’s battery: use with restraint.
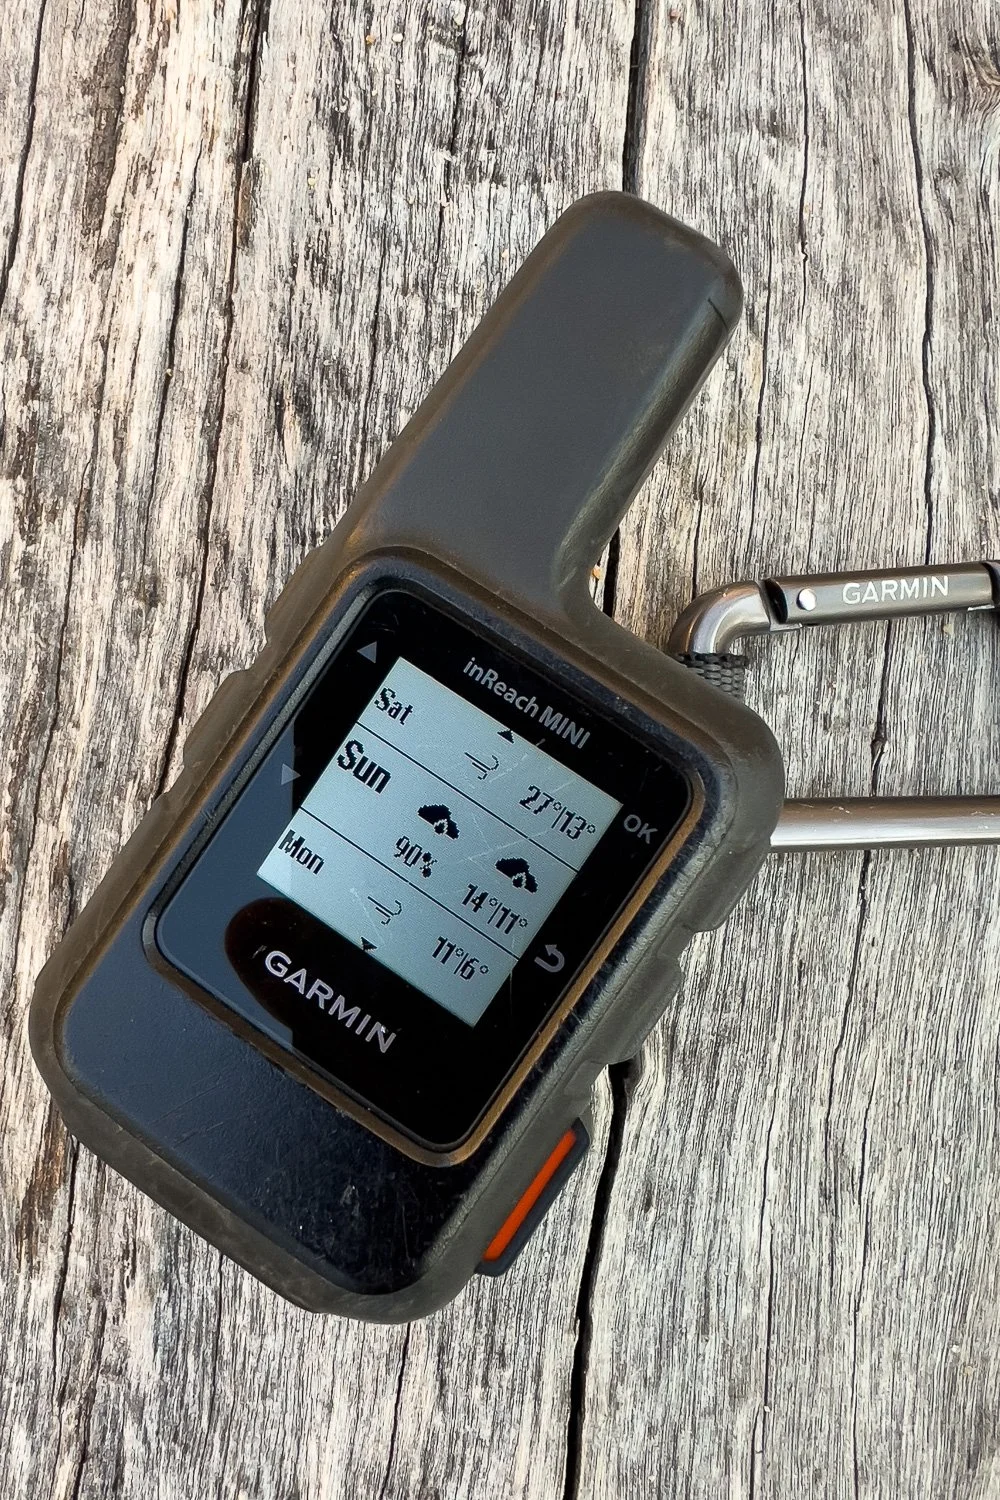
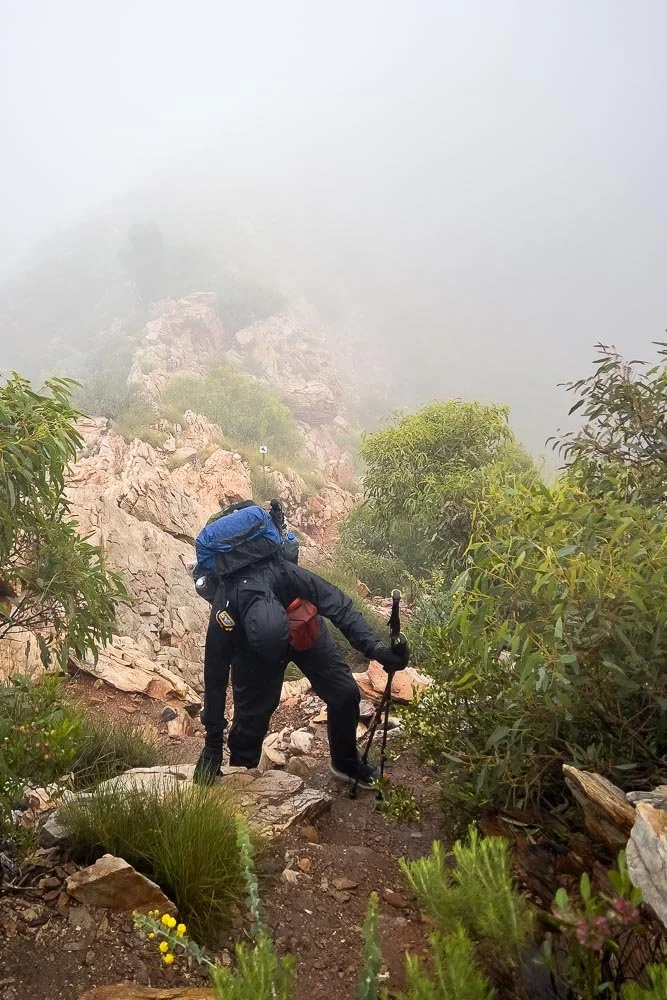
One of the most useful features of some satellite messengers is their ability to download weather forecasts for your location. Forecasts are especially useful on long hikes in the Southern Hemisphere’s high country, where fast-moving fronts bring dangerous conditions even in summer. We’ve used this function more than any other, and it’s saved our bacon where we have pushed ahead or stayed put in extreme weather, even on the relatively benign Larapinta to avoid heat, and another day to prepare for 0C with wind chill on an exposed section:
When you can’t access online information, contacts at home can do so if you pre-warn them that any message from you whilst on trail is likely to be important and/or urgent. On the Bibbulmun Track, we saw extensive smoke ahead. How far away? Should we backtrack? Although our early SPOT models couldn’t do this, current ones and our Inreach Mini can; we messaged family who checked government websites for the fire’s exact location:
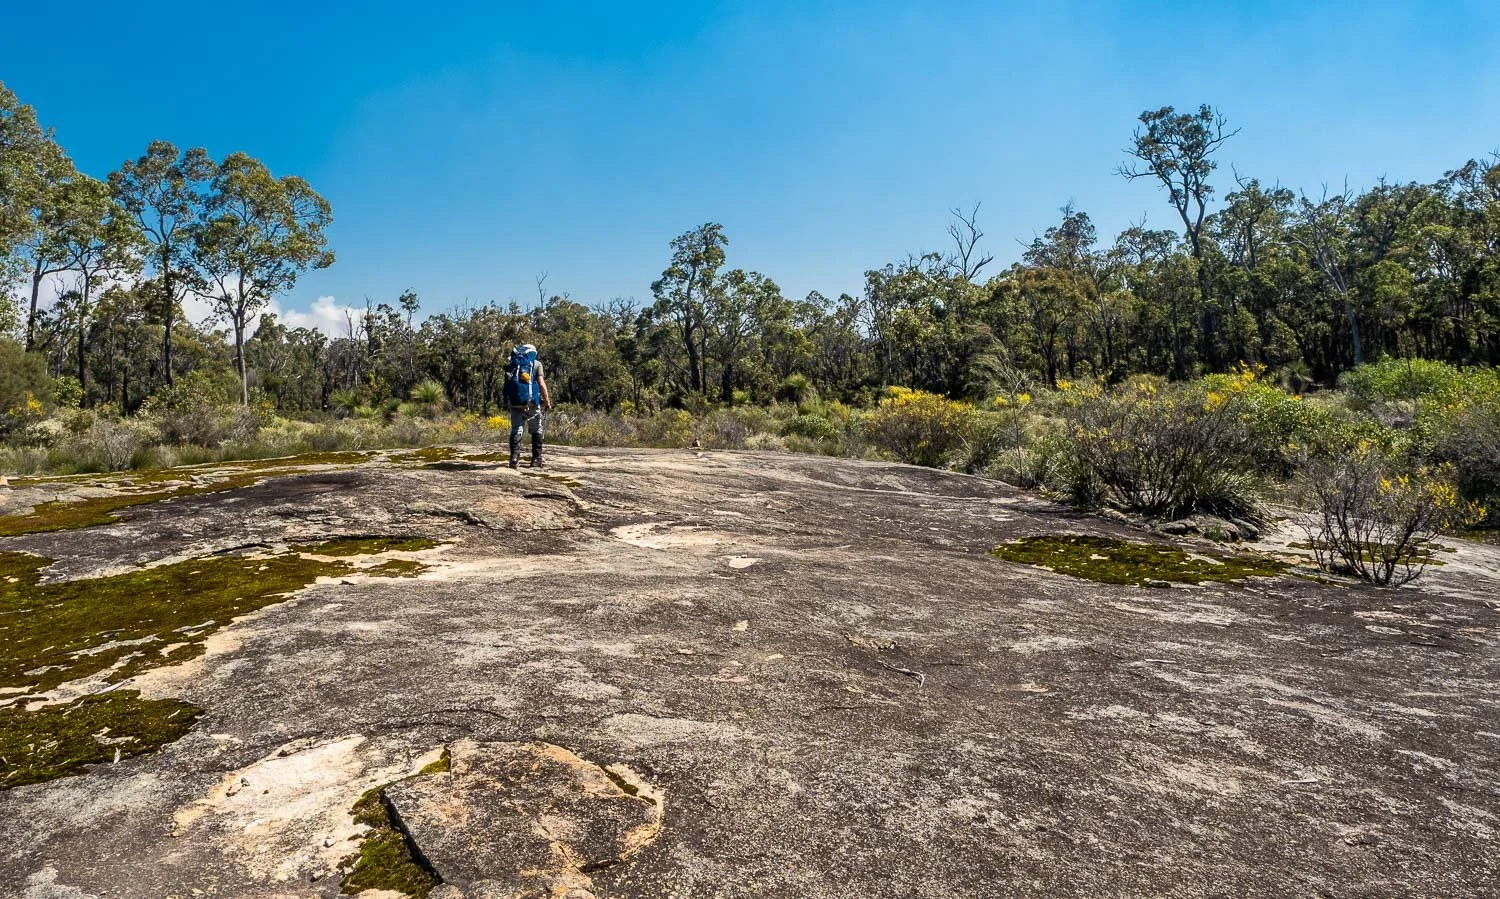
Dense smoke billowing over the treetops at left, directly in our line of travel. What to do? A: Contact family to check online for us.
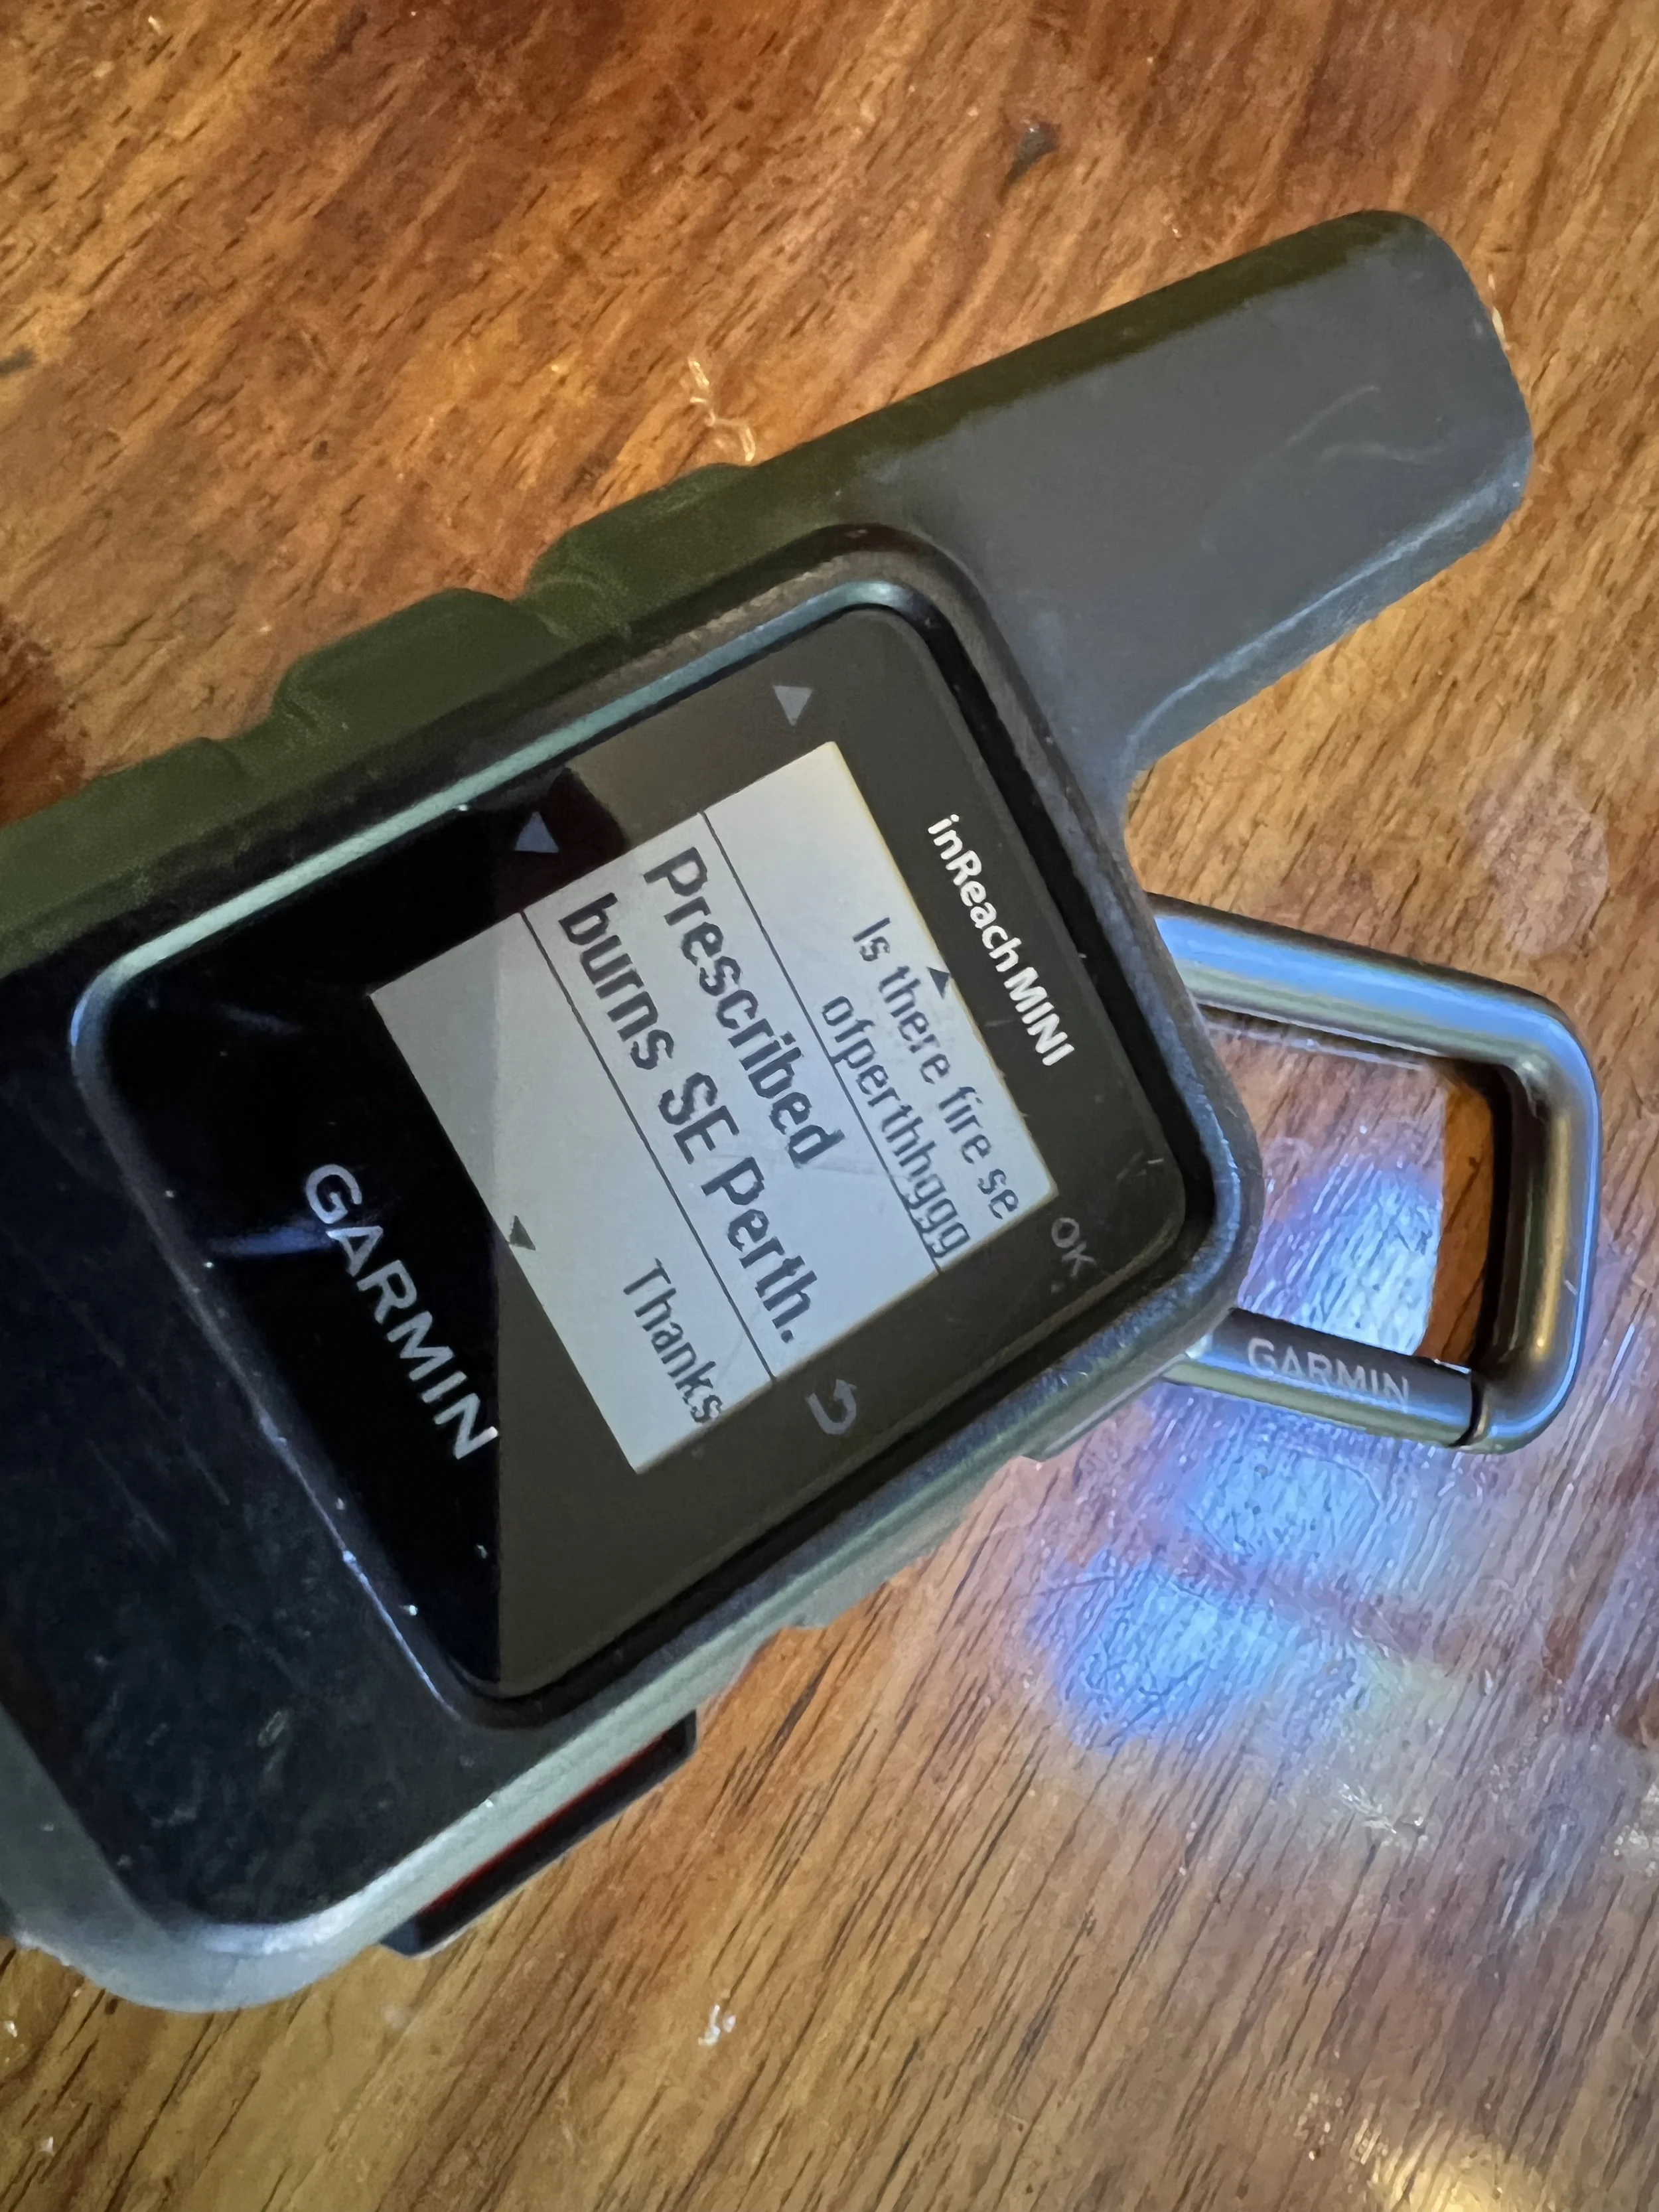
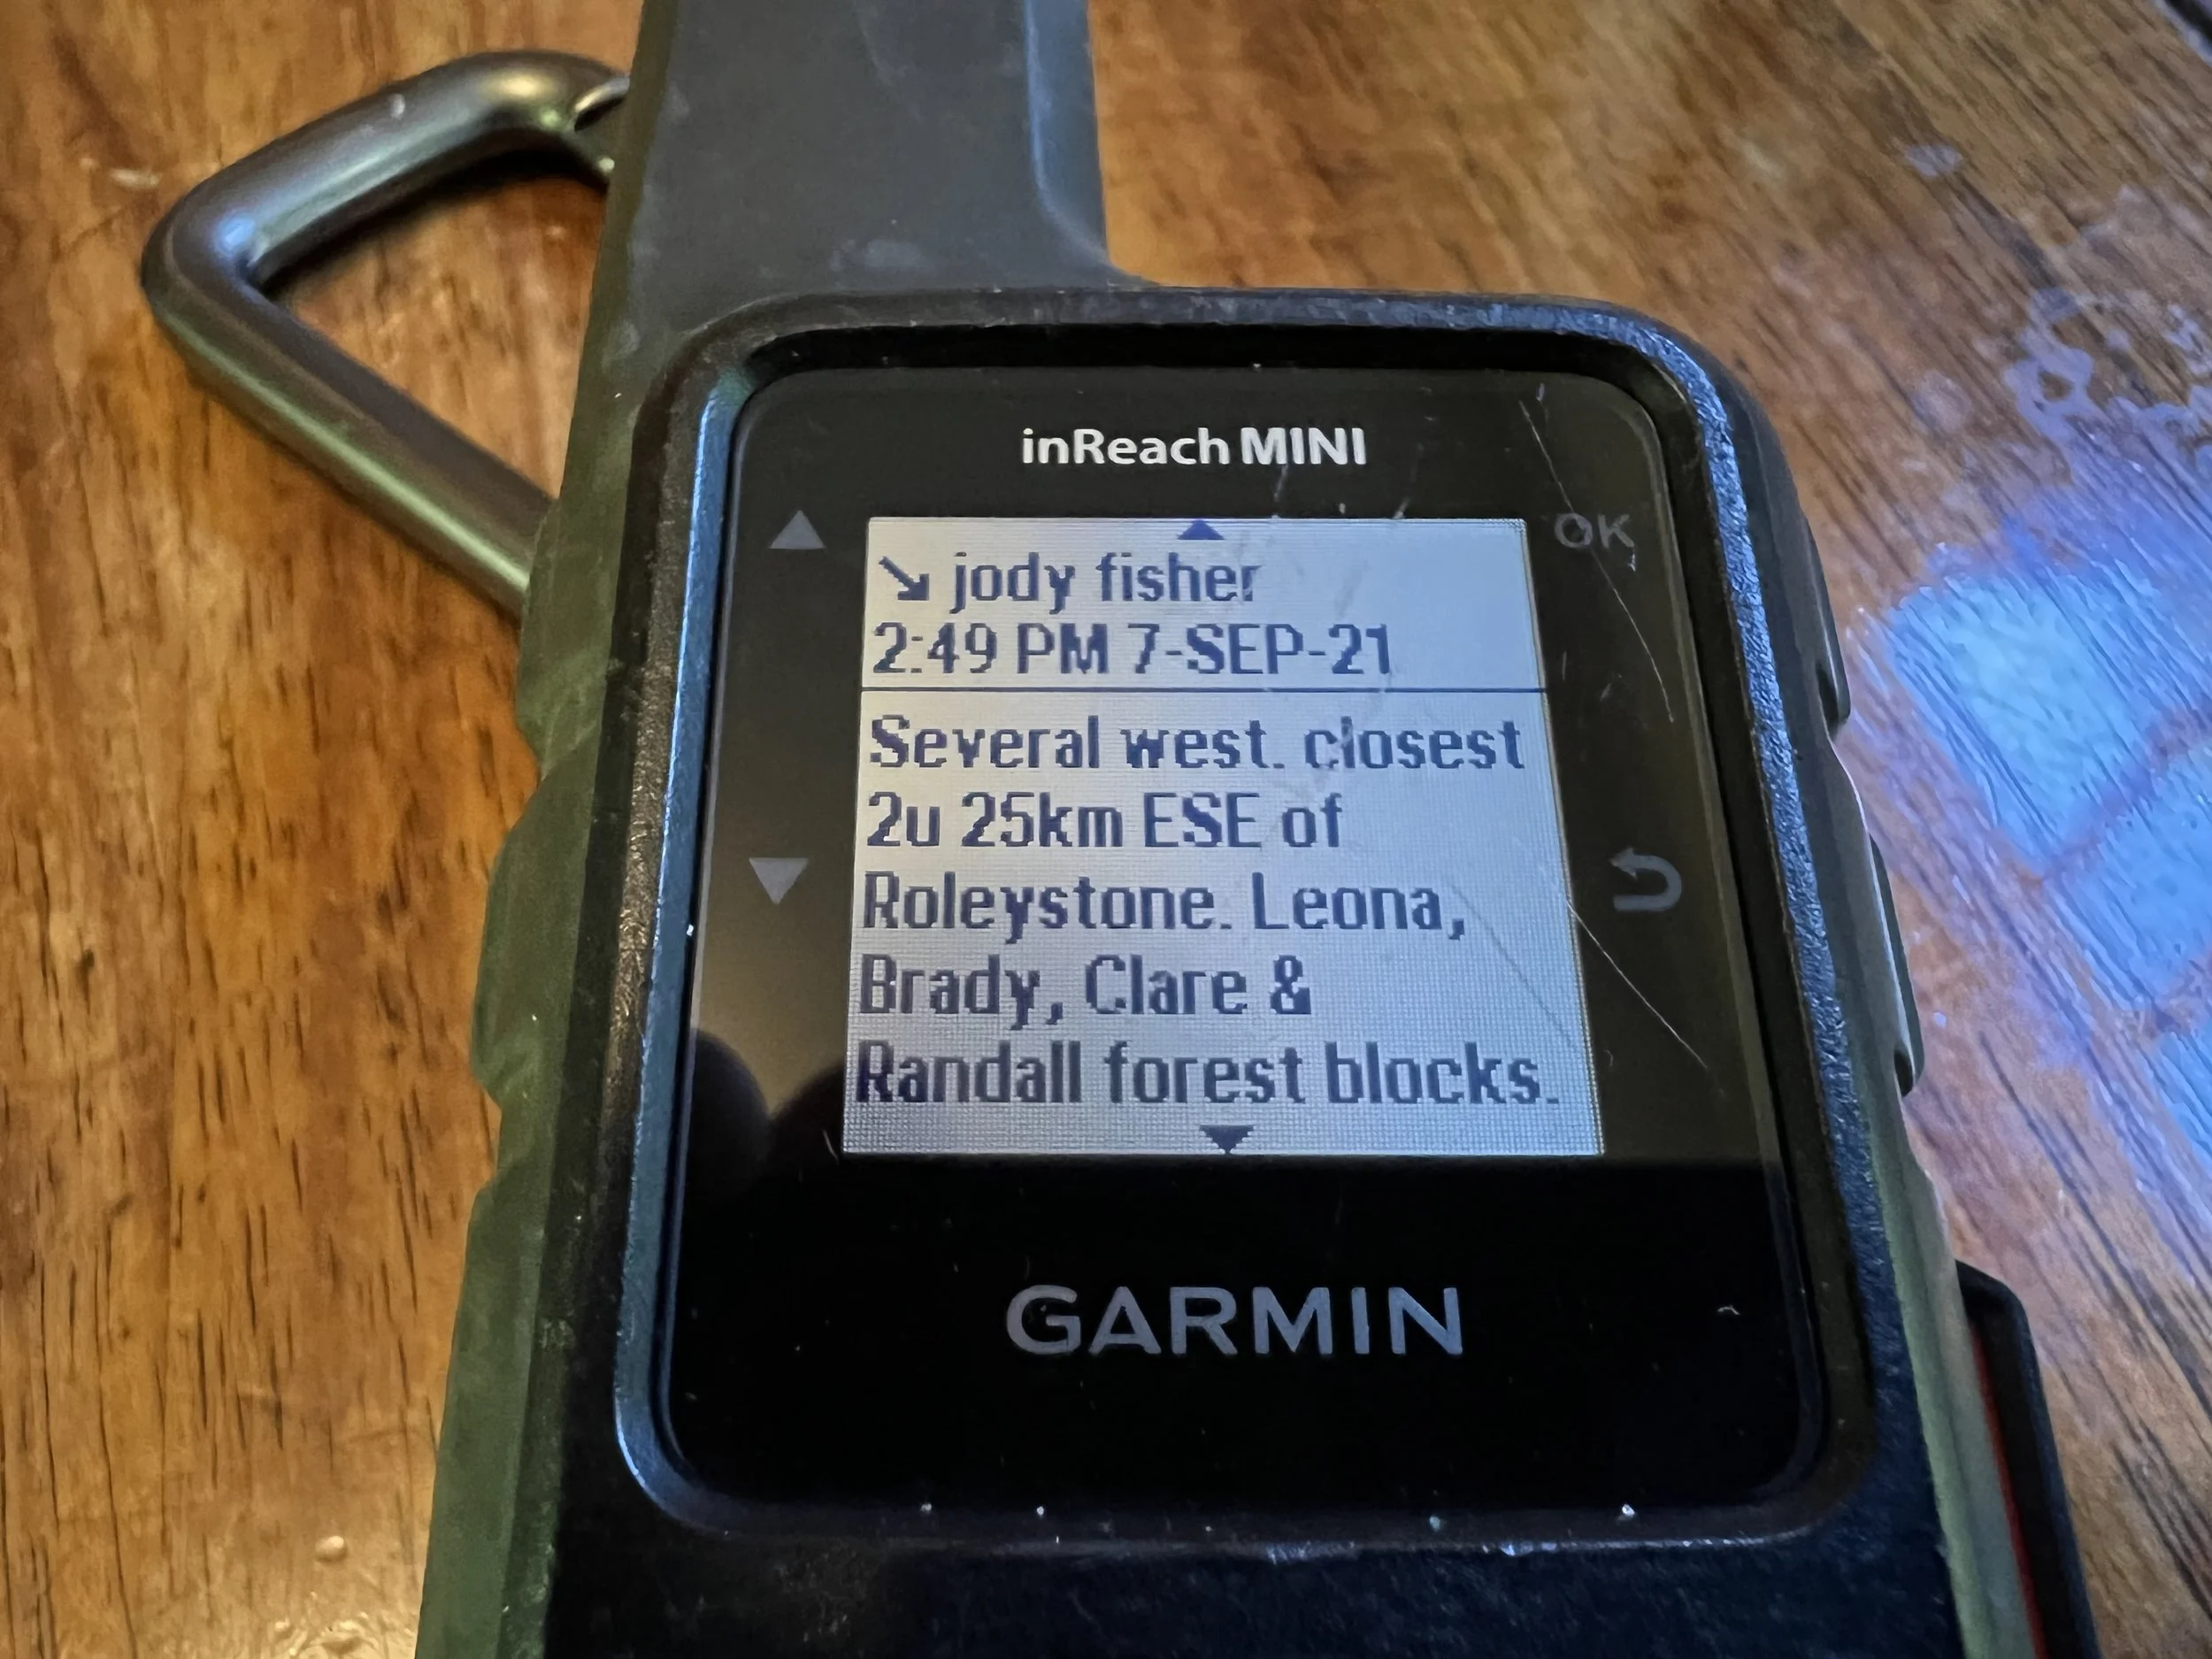
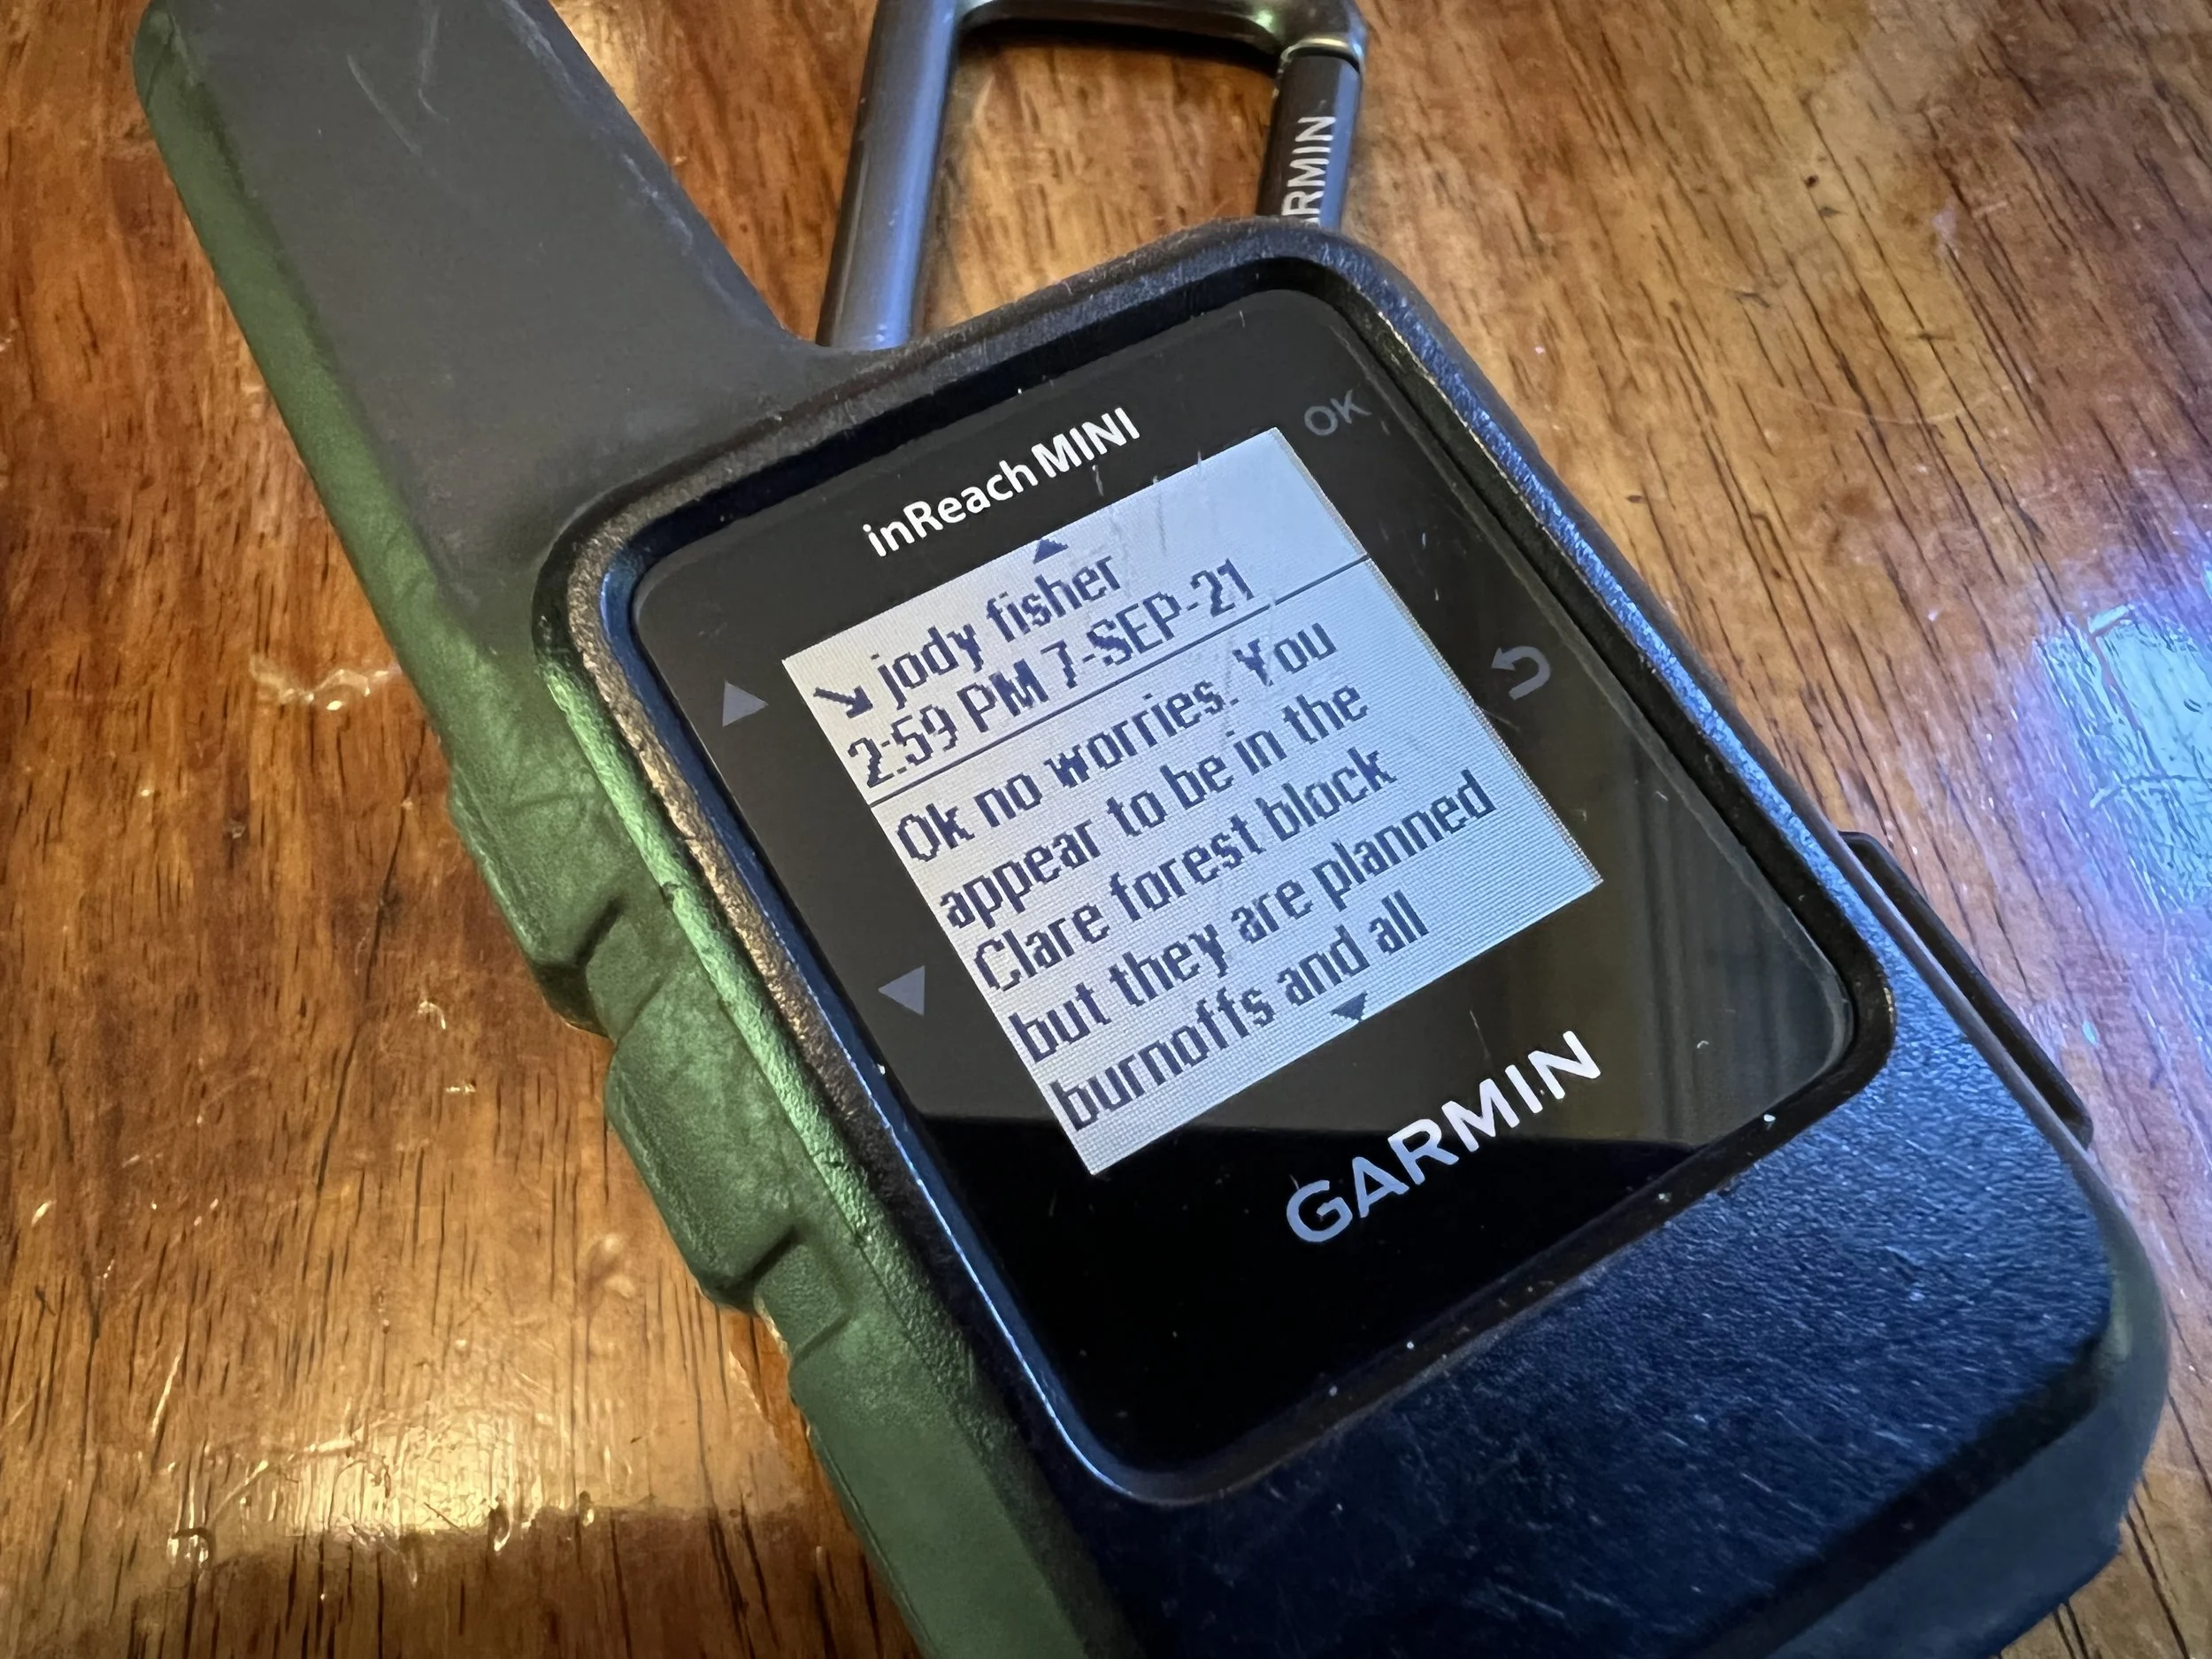
If hiking with others carrying messengers, add them to your contacts before departure to message each other should you become separated on trail; this is great for thru-hikers who hike ‘Alone-Together’, ie apart during the day and only meeting up at lunch or at camp.
Personal Locator Beacons
As the name implies, PLBs are beacons that send an SOS signal in emergencies. They are a dedicated emergency tool, rather than a versatile communication device; they don’t allow two-way communication or confirm that your message has been received unless equipped with a Return Link Service (RLS), such as many recent models made by GME and ACR. RLS is worth the peace of mind it provides:
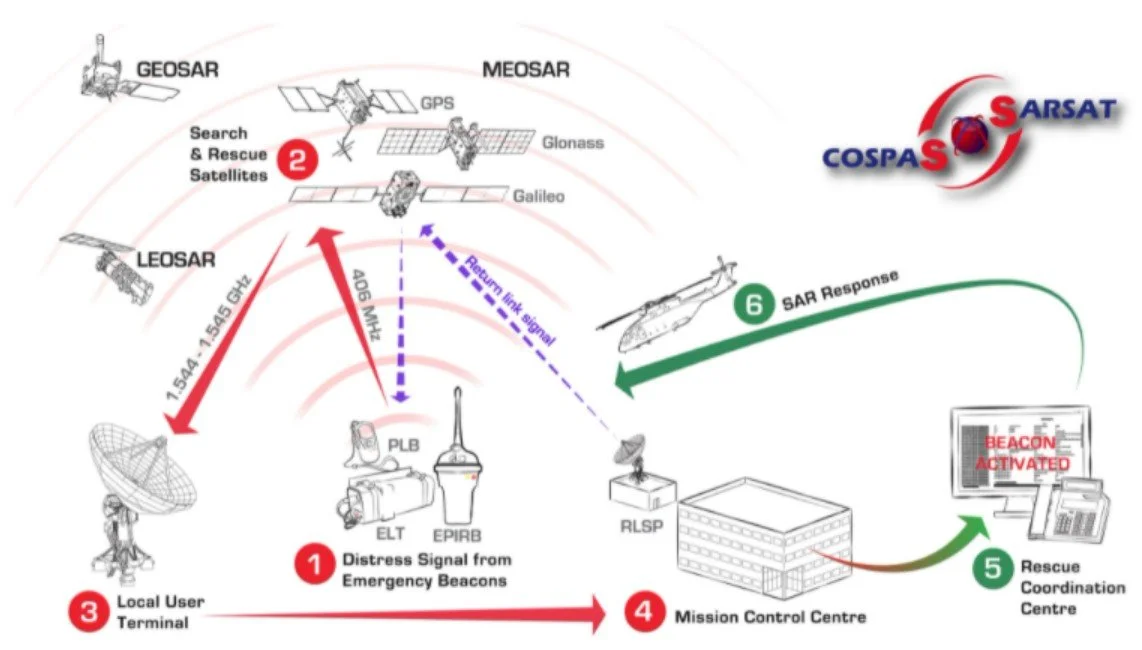
The Return Link Signal (dashed purple) is sent from the Mission Control Centre, so you know your message has been received and that help is on the way (Image Credit: Australian Maritime Safety Authority)
PLBs are reliable, relatively cheap, waterproof and impact resistant. Their signal is stronger than those sent by messengers or phones – 5 watts compared to about 1.6 watts – so are superior in unfavourable environments such as dense cloud cover or tree canopy, or in deep gorges and valleys. If you regularly hike in such environments, have potentially serious chronic health conditions, and/or undertake high-risk hiking that involves a lot of scrambling/climbing, exposure, deep river crossings, extreme cold etc, carry a PLB.
We and 45 other countries use the COSPAS SARSAT satellites. As for satellite messengers, you register your PLB upon purchase, but this time not with the company (eg Garmin). Instead in the U.S. you register with NOAA, here in Australia with the Australian Marine Safety Authority and in NZ here; you also update trip plans there. Registration is free and there is no subscription: you buy a PLB outright and they are single use, after which they need to be reset. The battery lasts 5-7 years before replacement and, after a PLB is activated, it continues to send a signal for up to 24 hours.
PLBs also include a secondary 121.5 MHz homing signal. Mobile Systems NZ explains:
“When LandSAR teams or rescue helicopters arrive in your general vicinity, they use directional finders to lock onto this low-frequency pulse. This allows rescuers to pinpoint your exact location even if you're hidden under a thick forest ceiling or tucked inside a deep ravine where GPS coordinates may fluctuate”.
SOS Function in PLBs and Satellite Messengers
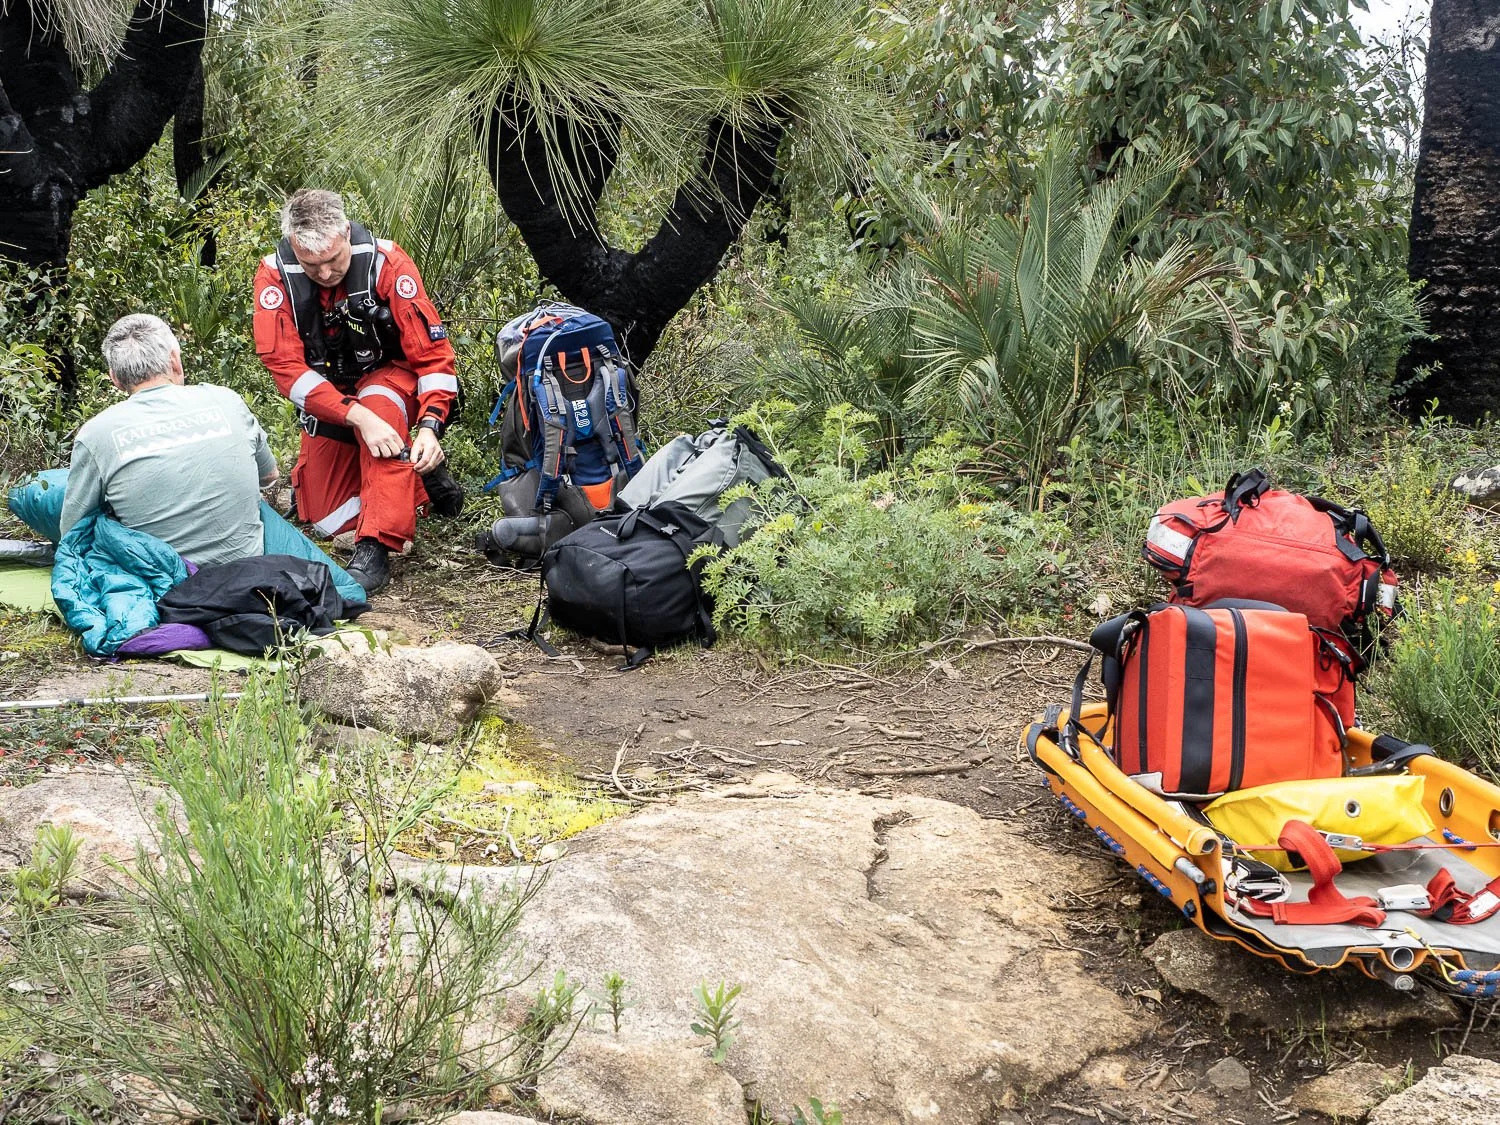
Rescue on the Bibbulmun Track.
In remote regions, the most important feature of a satellite messenger or PLB is its SOS function. The physical button is covered to prevent accidental deployment. Law requires that the Australian government must respond to your SOS because it signifies that you are in grave or immediate danger. This includes:
Immobilisation due to traumatic injury
Fractured limbs, especially if blood flow is compromised
Significant or worsening eye injuries
Minor injuries, such as a badly sprained ankle, that compromise safety (eg by slowing pace or agility to such an extent that you cannot reach shelter or safety without help)
Brain injuries – unusual confusion, repetitive questions, slurred speech
Unstable post hyper- or hypothermia (ie in exposed conditions)
Medical emergencies (anaphylaxis, asthma, severe chest pain etc)
Severe/extended pain, vomiting or diarrhoea
…but it is not always quite as clear cut as it sounds. A sprained ankle is not life-threatening itself, but is if it prevents you from returning to the trailhead, reaching shelter or erecting your tent. If you’re seriously lost but in no imminent danger, two-way messaging can provide information to self-rescue, or advise a location to await help.
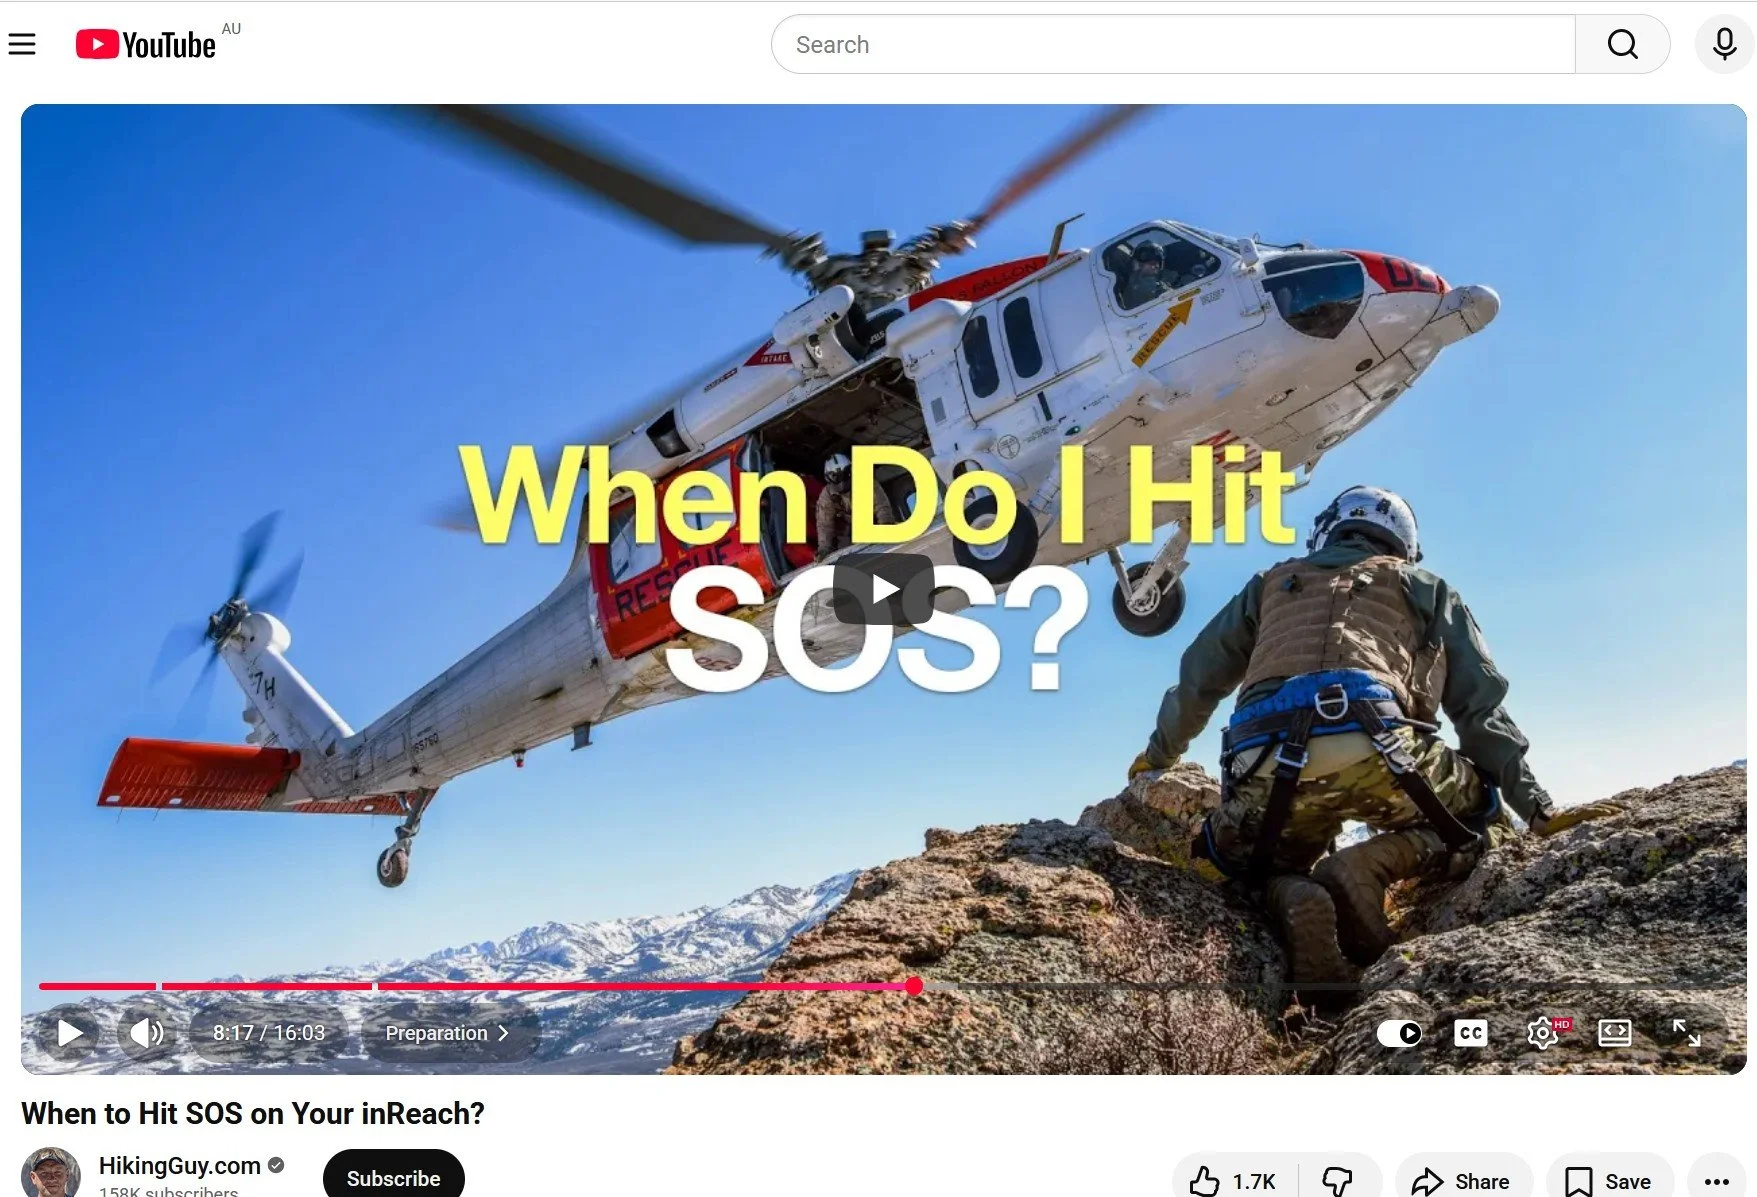
Hiking Guy’s excellent video is worth watching to clarify when you should or should not press the SOS function, as is this one .
Trail Hiking Australia’s scenarios are also exceptionally educational for decision-making – including SOS deployment – whilst on trail; if you get the answers wrong, consider doing their excellent, free Hiking Systems Safety Framework Training Modules.
The message is: if you’re unsure of a safe outcome, hit SOS. If the SOS is via a satellite messenger, professional responders can assess you further via questions before sending help. A PLB will generate a response without further discussion.
And here is some helpful reading:
In Victoria
A fall in Wyoming
A bushfire in Canada
A medical Emergency in the Sawtooth Wilderness
PLB rescues in New Zealand
What happens when you press the SOS button on a satellite messenger or PLB?
PLBs use the international 406 MHz COSPAS/SARSAT SAR satellites, technology and protocol, in Australia now also utilising MEOSAR satellites.
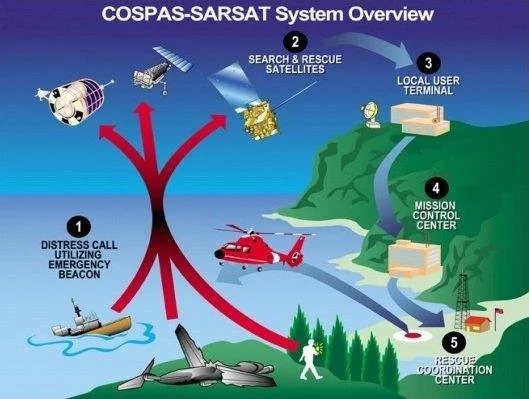
Pressing the SOS button initiates a complex rescue protocol (Image Credit: Australian Maritime Safety Authority)
In Australia, the protocol combines these dedicated satellites that detect and locate SOS beacons with ground-based local user terminals (LUTs) in WA, Queensland and New Zealand that receive satellite transmissions, and mission control centres (MCCs) that process the alert. MCCs send details to Rescue Coordination Centres (RCCs) in the country’s SAR region where the beacon is both activated and registered. The system is similar for NZ.
Satellite messengers use this system too, but there is an intermediate step where the signal is routed through a commercial satellite network such as Iridium and Garmin’s private response centre in Texas USA, before being sent to your country’s LUTs.
Because of the way PLBs and messengers work, it’s essential to follow these steps for the best results:
Register your device and include emergency contacts
If a subscription applies, ensure it’s active
Leave a Trip Intention Plan and important medical information with your Emergency Contacts because they will be contacted by SAR if you activate an SOS
Fill out a trip intentions plan with local Park Services before departure
Fill out all logbooks at the trailhead and on trail
Ensure all members of your group know who has what emergency devices
In the event of an accident or incident, stabilise the situation before sending for help (the First Aid DRSABC protocol)
If you have good mobile phone reception and battery, dial 000 (in Australia) in preference to using your PLB or Messenger because communication is smoother and faster via voice, and they can pinpoint location using your phone signal.
If possible, move to open terrain before pressing SOS on your satellite device
Stay put after sending an SOS
Expect to wait some time before help arrives: it may be hours (even when using a mobile phone!) and even longer in remote regions during stormy weather when aircraft cannot fly
Add appropriate presets to your device. Preset Messages on Satellite messengers could include:
Pressing SOS for myself. More info to come when possible
Pressing SOS for someone in my party. I am fine.
Pressing SOS for someone not in my party. I am fine.
I have [medical condition eg diabetes, asthma, cardiac, severe allergy requiring an epipen, renal conditions] and am experiencing symptoms; this information is also in your registration details, and should be with your emergency contacts.
Other Tips
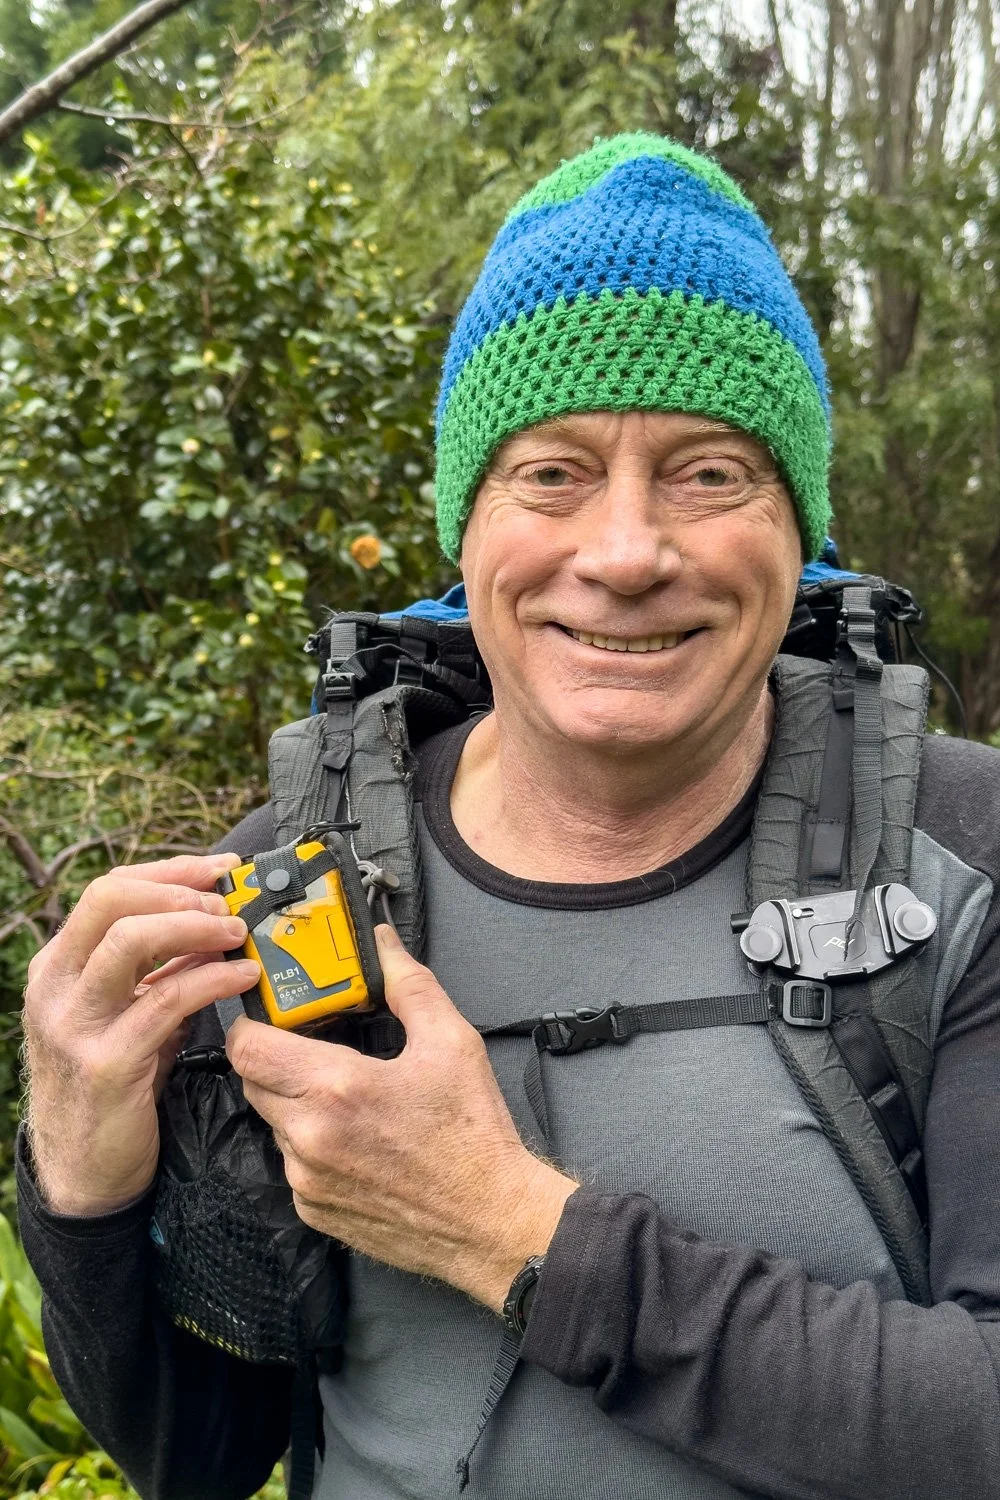
Your PLB or Messenger must be easily accessible.
An Inreach or PLB is useless if it’s inside your pack when you’re on the ground with broken bones. The device should be attached to clothing or pack in a place that you can easily reach and operate the SOS function with either hand. This is usually on the shoulder strap, high on the front of your chest.
In a remote area, if taking a spur trail – even a short one – and leaving your main pack at the junction, remove your device (and redundancies eg paper map) from your main pack and attach it to your day pack, belt or belt loop. It must still be accessible with either hand, ie not inside a pants pocket. We carry ultrasil Sea To Summit daypacks for our first aid kit, water, map and a light jacket onto spur trails.
If you’re on a trail that requires pack-hauling and the potential loss of a pack such as in the Western Arthurs, of course transfer the PLB to your person.
If your spur trail is long and poorly marked or visibility is poor, mark your main pack location as a waypoint before leaving it: one hiker required rescue when he was unable to find his pack.
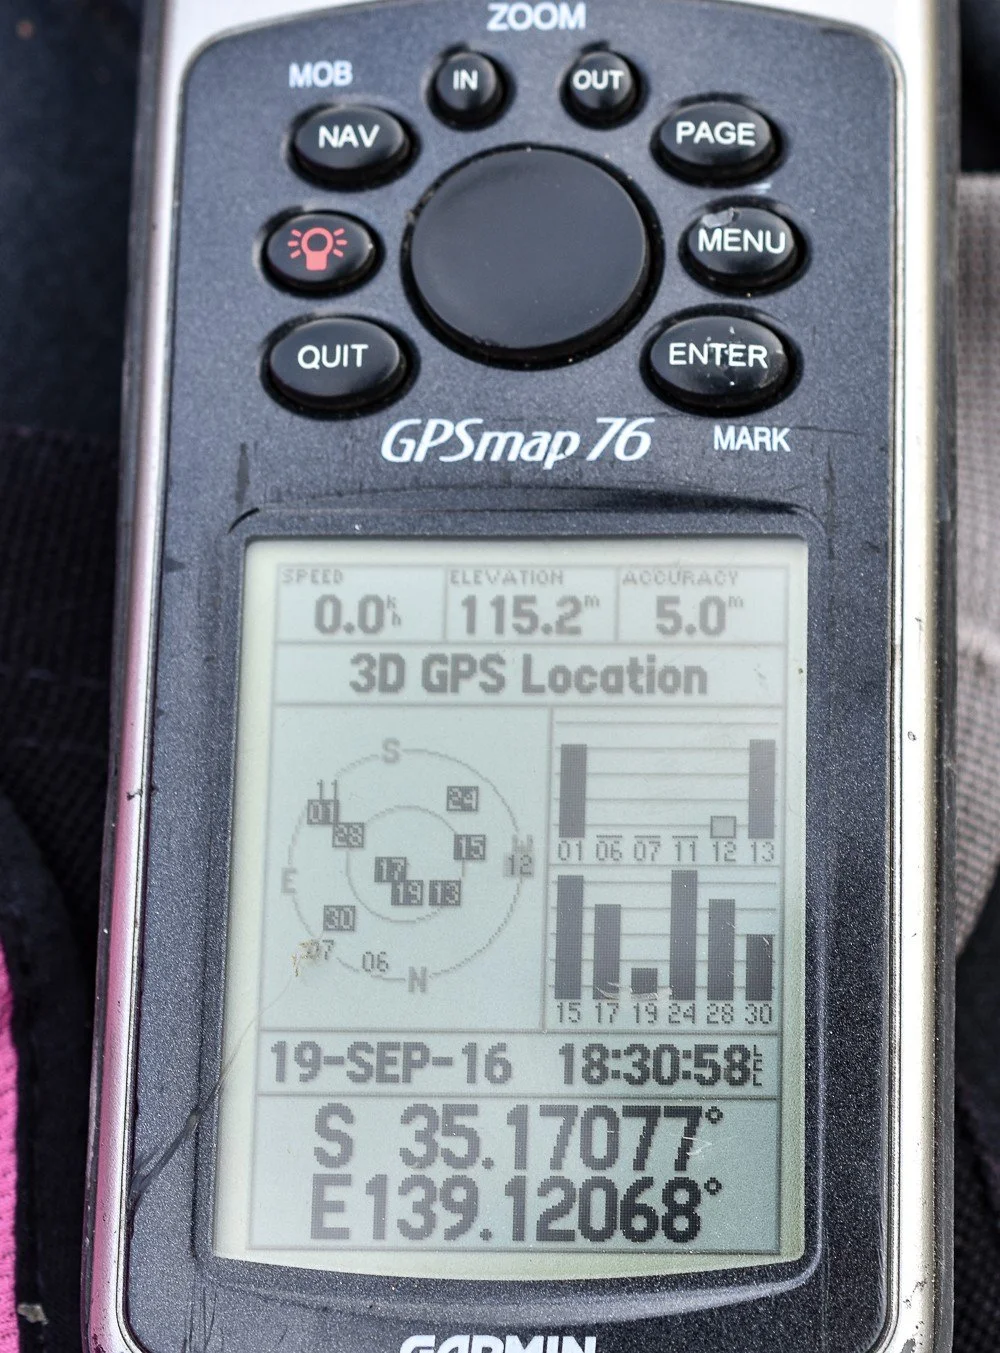
Geoff’s old Garmin GPS Map76 showing connected satellites and signal strength
When travelling interstate or overseas, it often takes time for your device to connect to satellites in the region when you first switch it on. Do so at the trailhead, to make connection faster next activation.
Remember that PLBs and satellite messengers help mitigate the consequences of an incident rather than mitigating the likelihood of an incident: if we enter terrain or conditions beyond our ability, experience or gear in remote regions, we could be dead from blood loss or hypothermia long before we are found by SAR!
A PLB or Inreach is no replacement for planning, skill and a sensible approach to safety.
Mobile Phones as Emergency SOS devices?
No. At least not for remote hikes Australia and New Zealand.
Mobile phones are stronger and more waterproof than they used to be, but relatively fragile compared to satellite messengers and PLBs. It is often impossible to operate phone touch screens in heavy precipitation: sometimes, I can’t use the camera function, let alone text! Badly damaged screens also preclude operation; I crack screen protectors on every long hike, once even a diamond glass phone camera lens! And with the requirement to directly aim at certain parts of the sky where the satellite is passing, a mobile’s satellite SOS signal is significantly inferior to that of PLBs and even satellite messengers with their larger antennae.
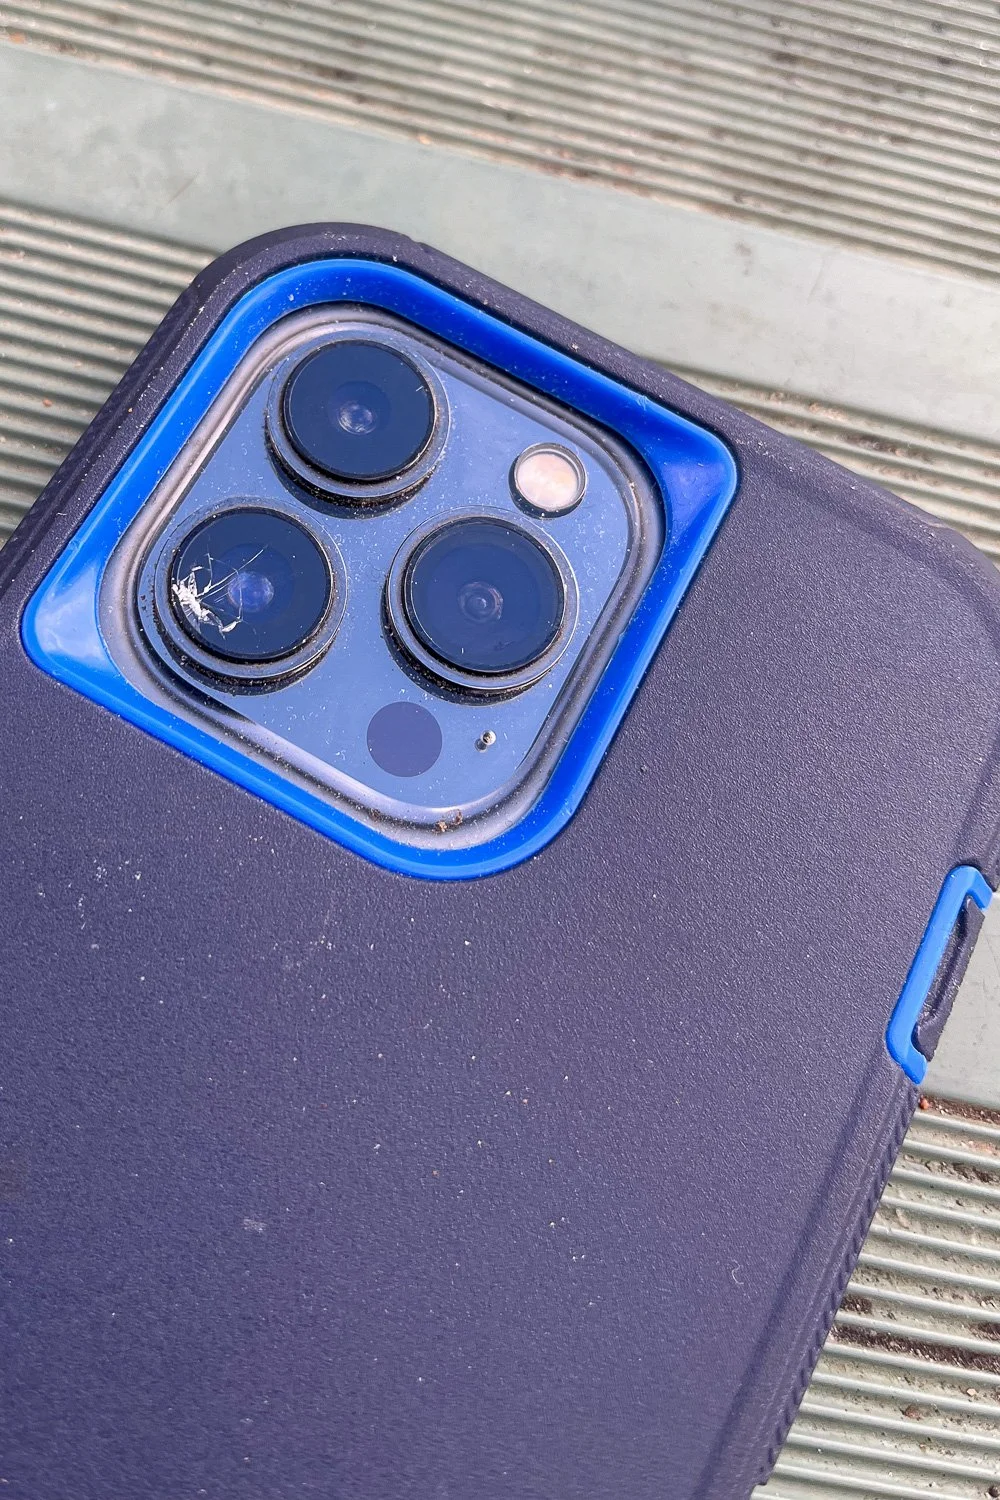
Diamond toughened lens falls victim to Larapinta’s rocks; the screen protector cracked too.
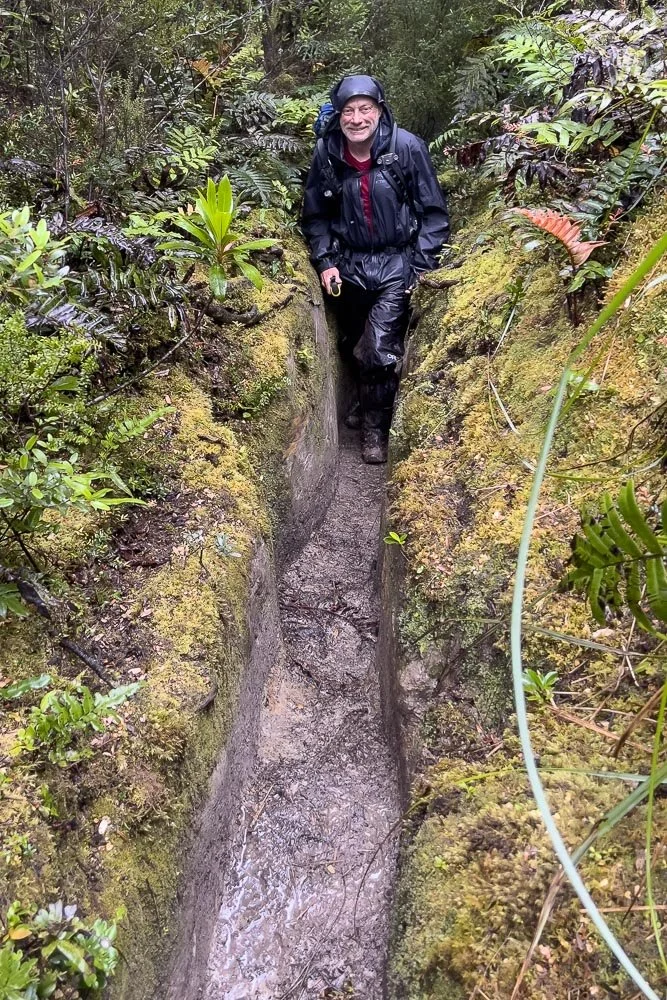
My phone camera’s shutter worked only sporadically this day. Texting would have been impossible.
But perhaps of more consequence is a mobile phone’s multi-functionality. As we saw in the introduction, the fact that we use them for photography, videoing, light, communication, navigation and entertainment means that you’re not only more likely to exhaust the battery, but also to damage them because they’re in your hand so much of the time. A mobile phone’s emergency satellite SOS capability is useless if the touch screen is inoperable or the battery is flat.
SAR’s position is that a mobile phone – even one with satellite SOS capability – is currently insufficiently robust or reliable to be the sole navigation or communication device for hikes in remote areas of Australia.
If you plan to rely on your mobile phone for emergency communication and navigation against SAR recommendations and despite the significant pitfalls we’ve outlined, we suggest that you:
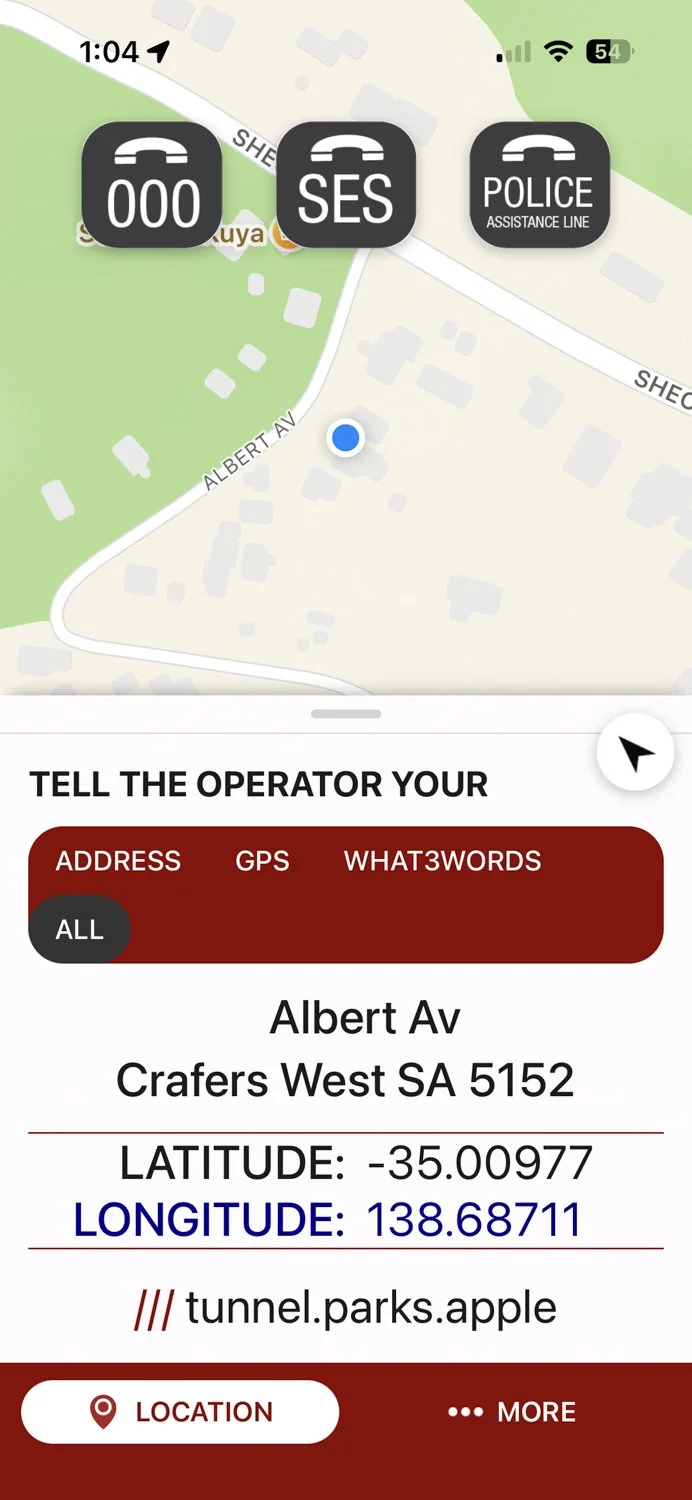
Add the Emergency Plus App in Australia or what3words App to assist first responders.
The free Emergency Plus App in Australia (what3words elsewhere) makes calls to 000, police or SES easy, with your location displayed as street address (house number deleted here), coordinates, or the what3words protocol where every 3sq metre location in the world is labelled with its own specific 3 word identifier.
Then:
Carry backup navigation (paper map)
Choose hikes carefully: avoid heavily forested terrain, deep valleys and gorges, remote terrain, precipitous or high-risk terrain
Minimise battery drain
Avoid using your phone for photography and entertainment below a certain battery percentage
Switch off background app refresh on non-relevant apps
Reduce screen brightness
Shorten Screen Timeout (Auto-Lock on iPhone)
Turn off raise to wake
Put phone in Aeroplane Mode
Switch off phone at night
Use a separate torch rather than the phone torch
Protect your Phone:
In cold regions, keep in a warm spot such as your sleeping bag overnight or a zipped pocket against your body while hiking
Use screen protectors or robust cases such as Otterbox, Urban Armor Gear and Mous
Use carry leashes
Charging:
Carry a powerbank
Bring spare cabling
Charge but don’t leave connected once full as this still drains the bank
Navigation
Navigation skills and tools must match the nature of a hike, with more of both required for more remote hikes. Bushwalking Victoria’s excellent Bushwalking Manual provides this framework:
“For an easy day walk in good weather along a well-signposted track in a National Park, a Parks supplied sketch or mud map is sufficient for navigation. A mobile phone with google maps and its GPS on can provide an exact location if required.
For longer trips, the trip leader at least should have a topographic map and the ability to navigate using map and compass.
For harder or extended trips including any off-track or winter alpine trips, several group members should be well skilled in bush navigation using a map and compass.
For challenging trips to remote areas all group members should be capable bush navigators.”
So where does that leave us with today’s electronic navigation on multiday hikes?
Electronic navigation includes GPSes with screens of various sizes and resolutions, Smartwatches (ditto), and GPSes that include Satellite Messaging capability, such as Garmin’s Inreach series. The GPS capability of every mobile phone means that we are all familiar with Google Maps, and hikers use countless other navigation apps. Download maps, points and routes onto your GPS device; on a mobile phone you download an App and its maps. Because the App’s location data utilises the GPS satellite network rather than land-based cell towers, the app works even in remote regions without tower reception, and on Aeroplane mode.
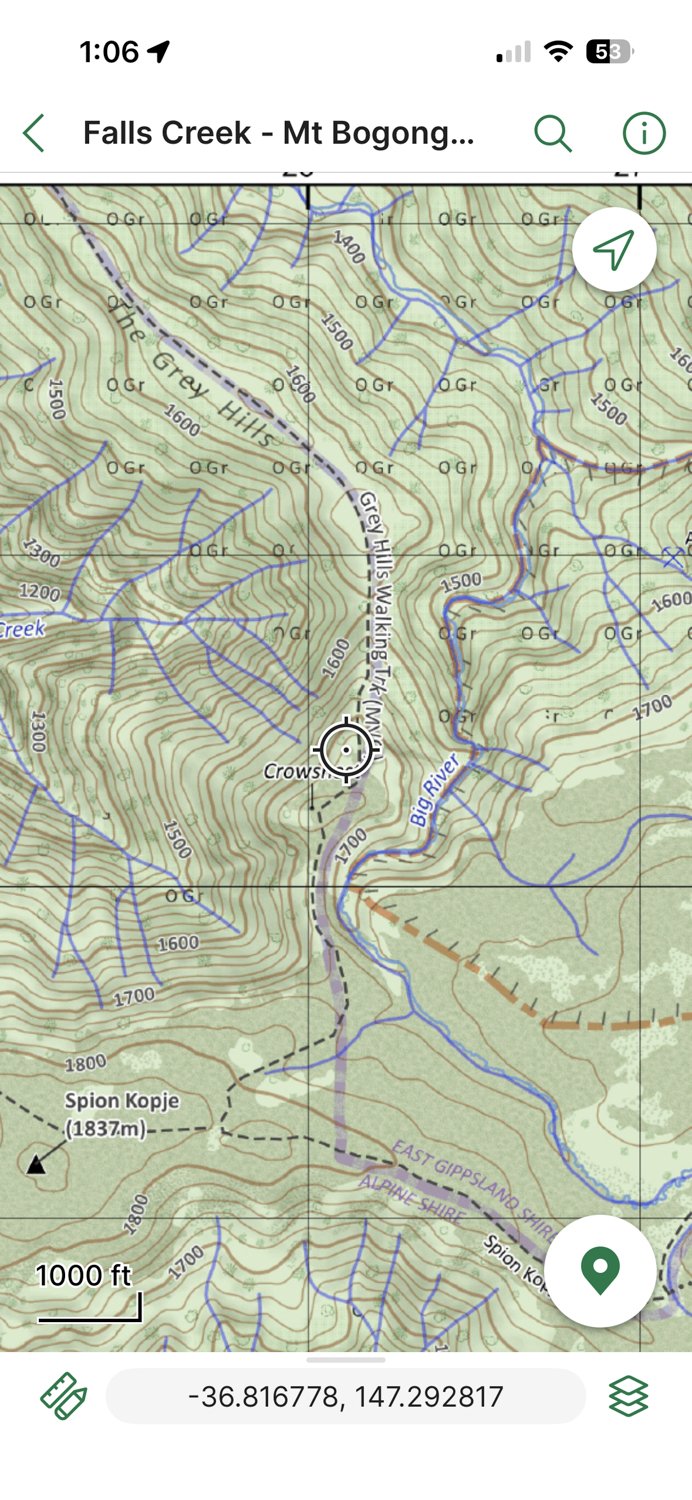
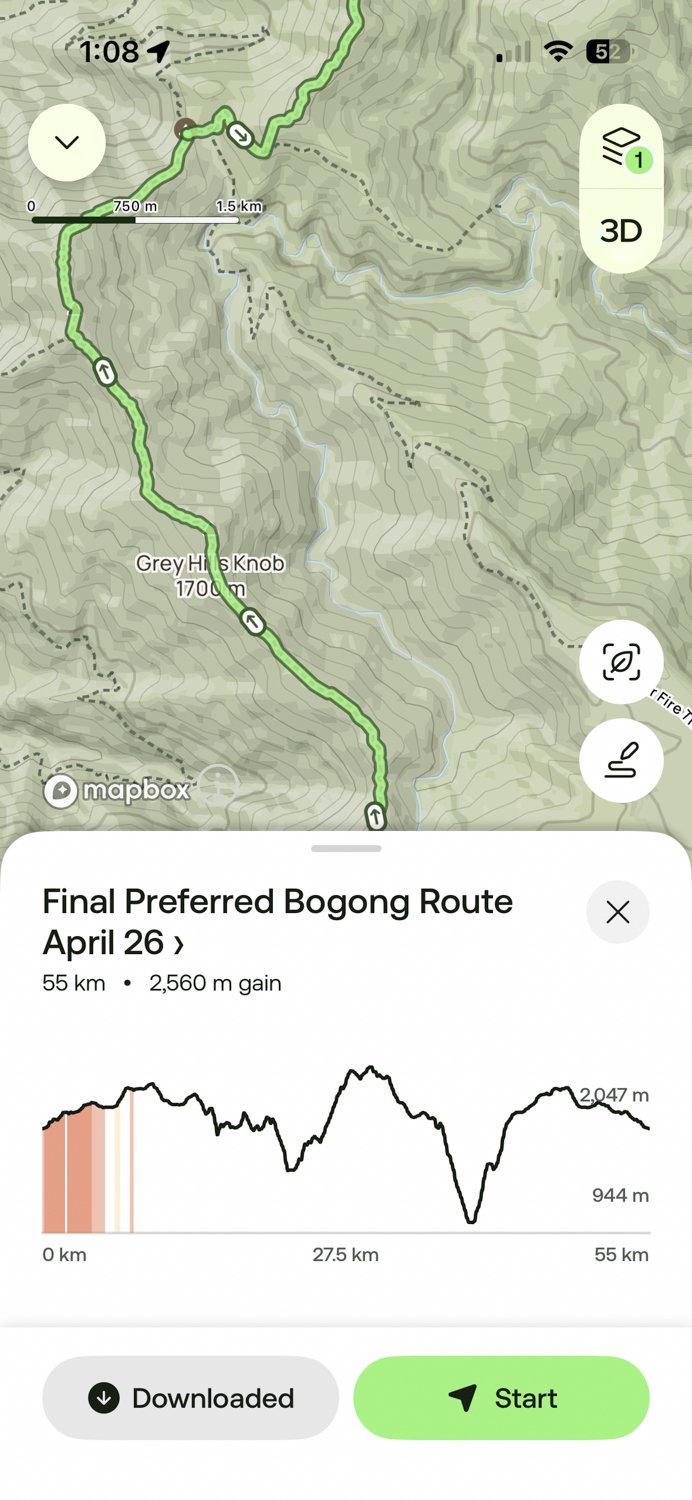
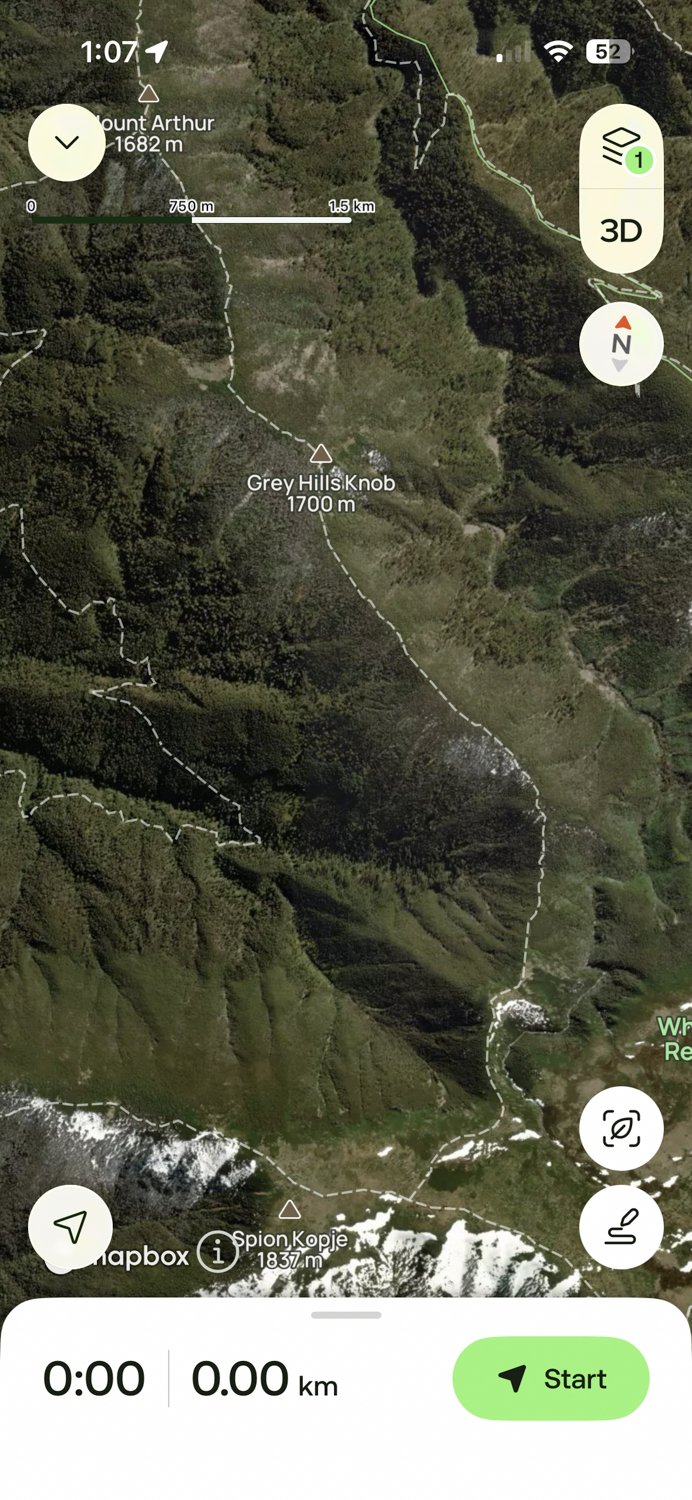
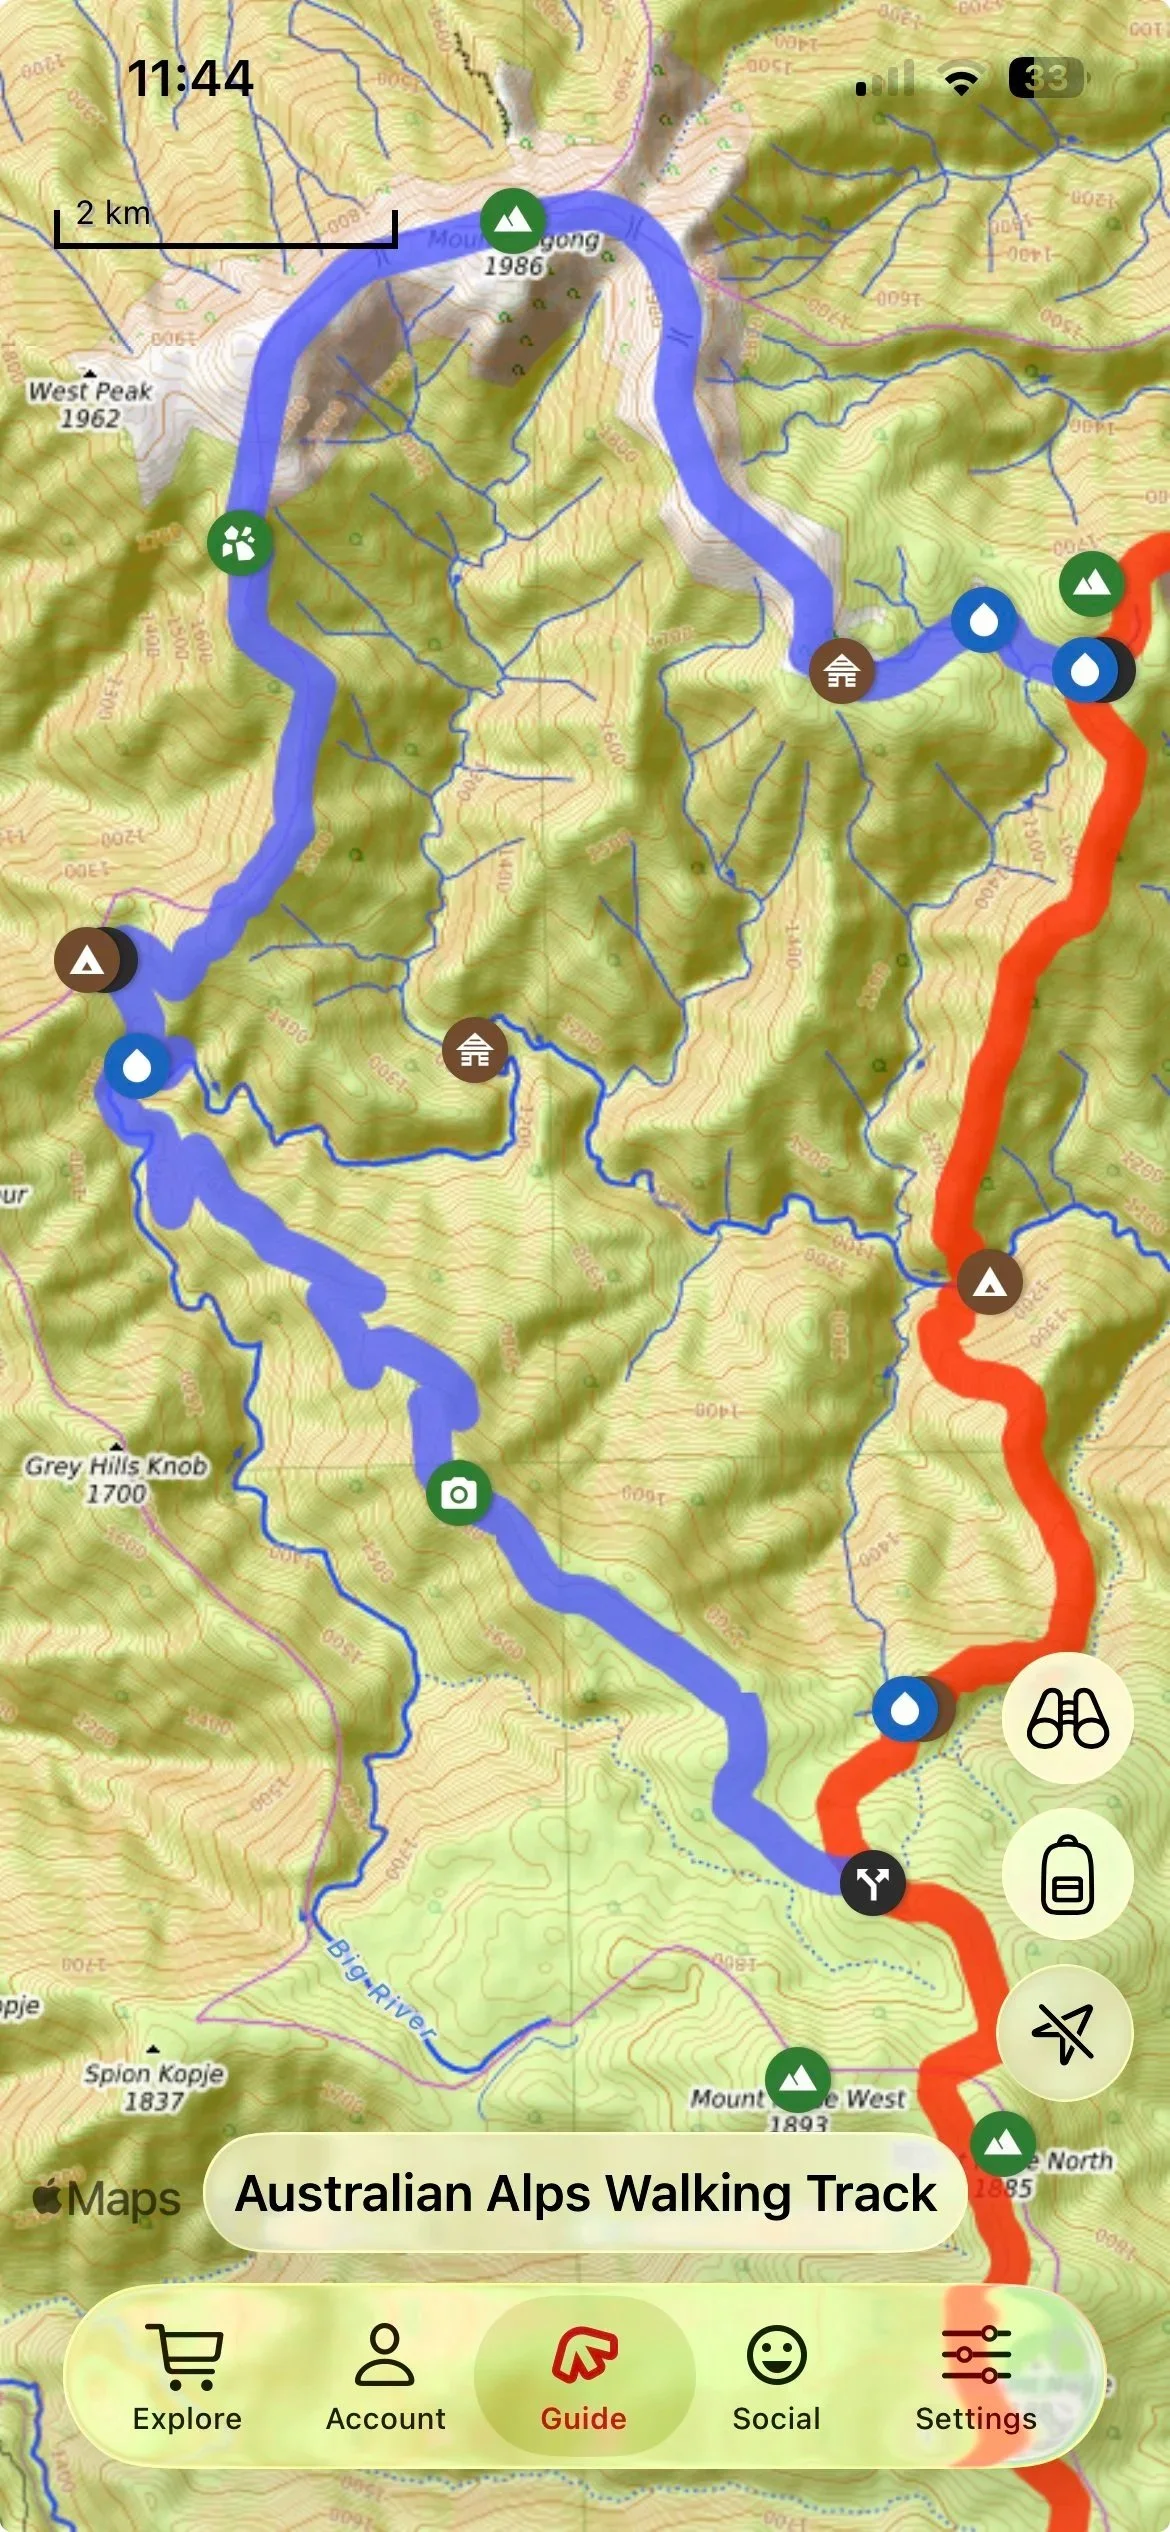
Alltrails lets you look at maps and find trails when you’re in cell range, but you need a paid subscription to download those same maps and use them in areas without reception. This is a trap for new players and it applies to most other Apps too. With a downloaded map, the App shows your location on the map in real time, offline.
Many hikers who used to carry dedicated GPS devices for this now use mobile phones. I unearthed my original Garmin GPS 12, plus our GPS 72 and 76MAP:
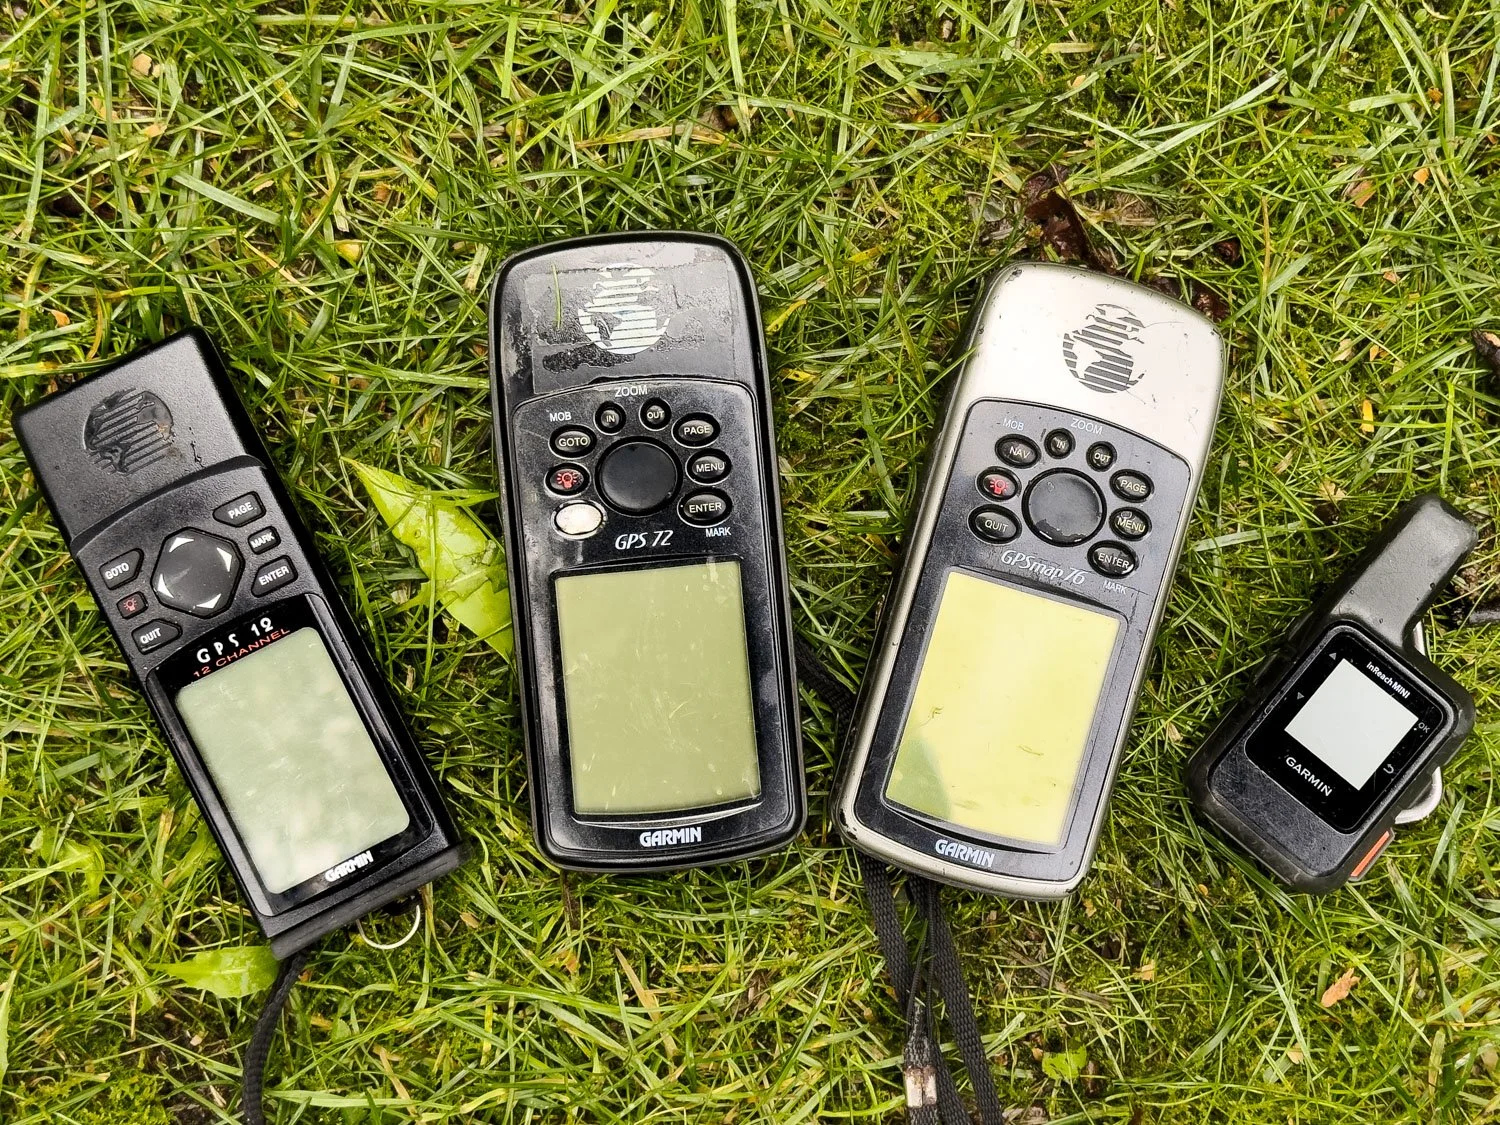
A history of much abused GPSes, the classic GPS12 far left and Inreach (GPS+messenger) far right are bomber, the central two not so much.
The GPS 12 that allowed waypoints and location data — but not a map — so you could pinpoint your location was famously bombproof, as are today’s hiking GPSes with communication built in, those well-known Inreaches. Today’s hiking GPses are designed for rough handling and abuse, with high impact and water resistance (eg MIL STD-810 for the Inreach Mini, with an IP67 rating). You’re unlikely to damage them and, because they are dedicated devices with one sole purpose, you’re unlikely to exhaust their batteries either. When needed for navigation or communication, they are reliable, provided terrain is conducive to signal.
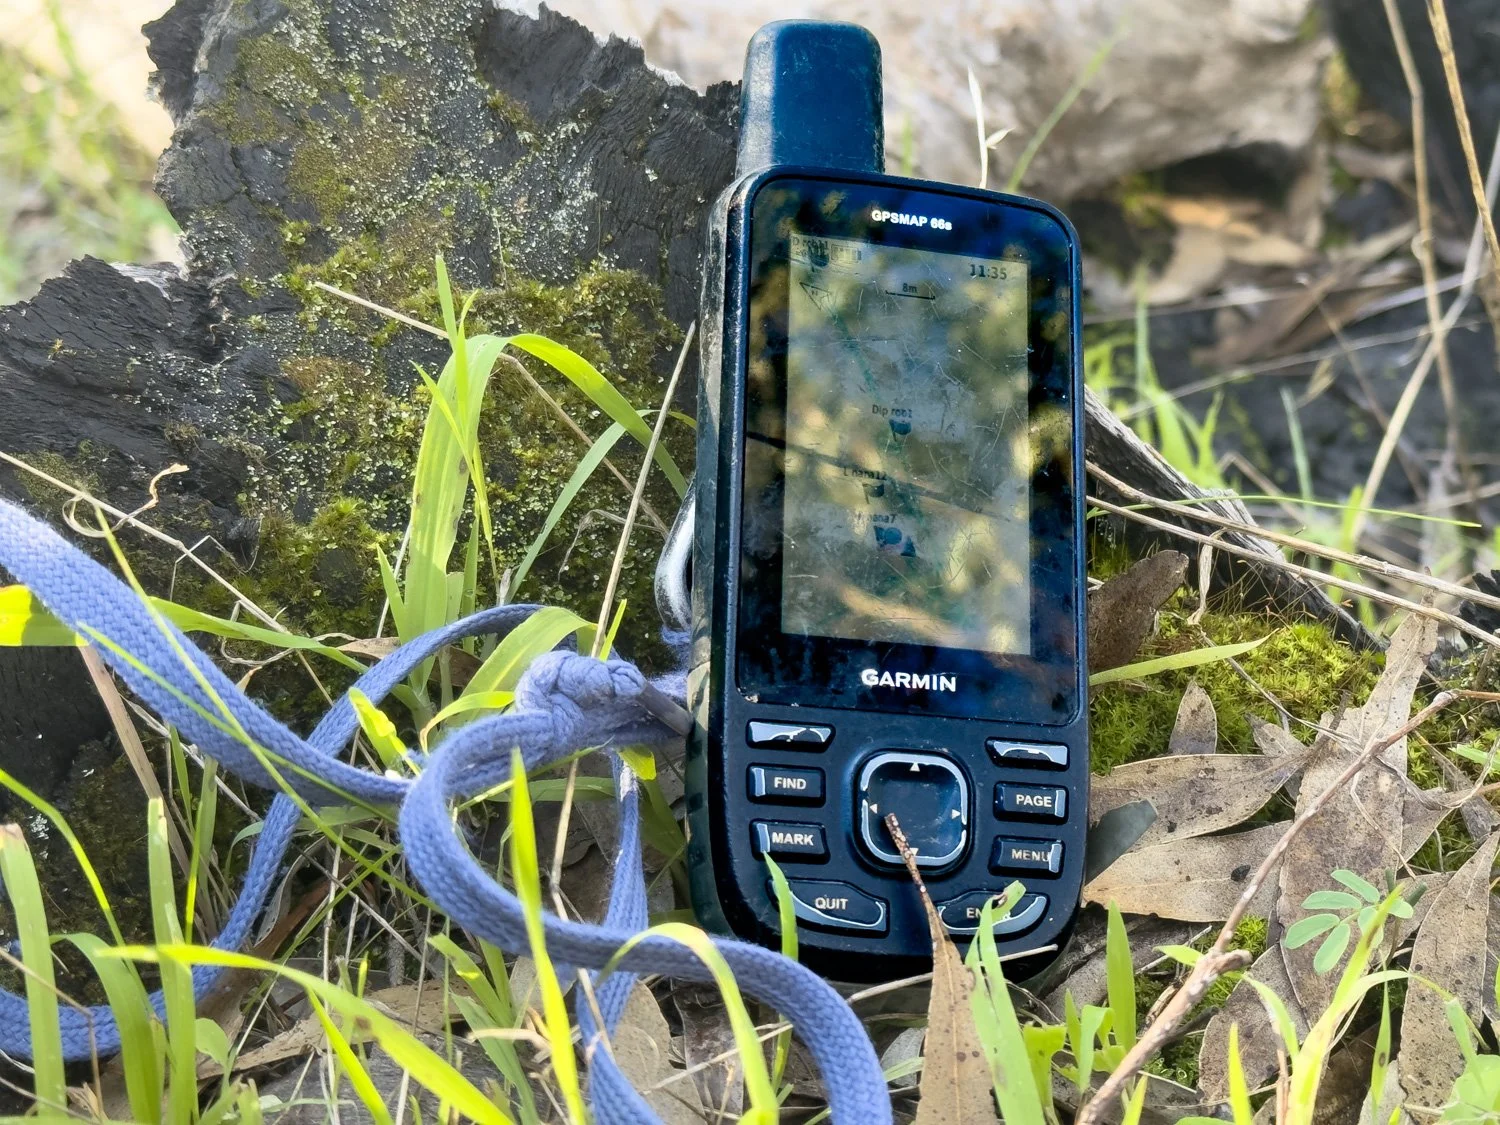
Garmin’s robust 66sMap
However, some lean more towards navigation, and others towards messaging. The highly popular Inreach Mini 3 Plus, just 125g (4.4oz), has a tiny screen so isn’t great for navigation; we sometimes enter essential waypoints (huts or campsites in remote areas) into our Inreach Mini 1. However, its messaging function is equal to that of larger Inreaches; the Inreach Mini3 Plus has more features including an inbuilt siren. It has a touchscreen for standalone operability, unlike our early model, as does the Zoleo.
One of the most useful features of a GPS/GPS+Messenger is its trackback feature. We used this to good effect when we traversed the Labyrinth in Tasmania’s Central highlands during fog and heavy rain using a paper map and waypoints on our GPS. We recorded a breadcrumb route on our GPSMap76, as well as recording the waypoint where the trail emerged from the forest onto the boulder plains.
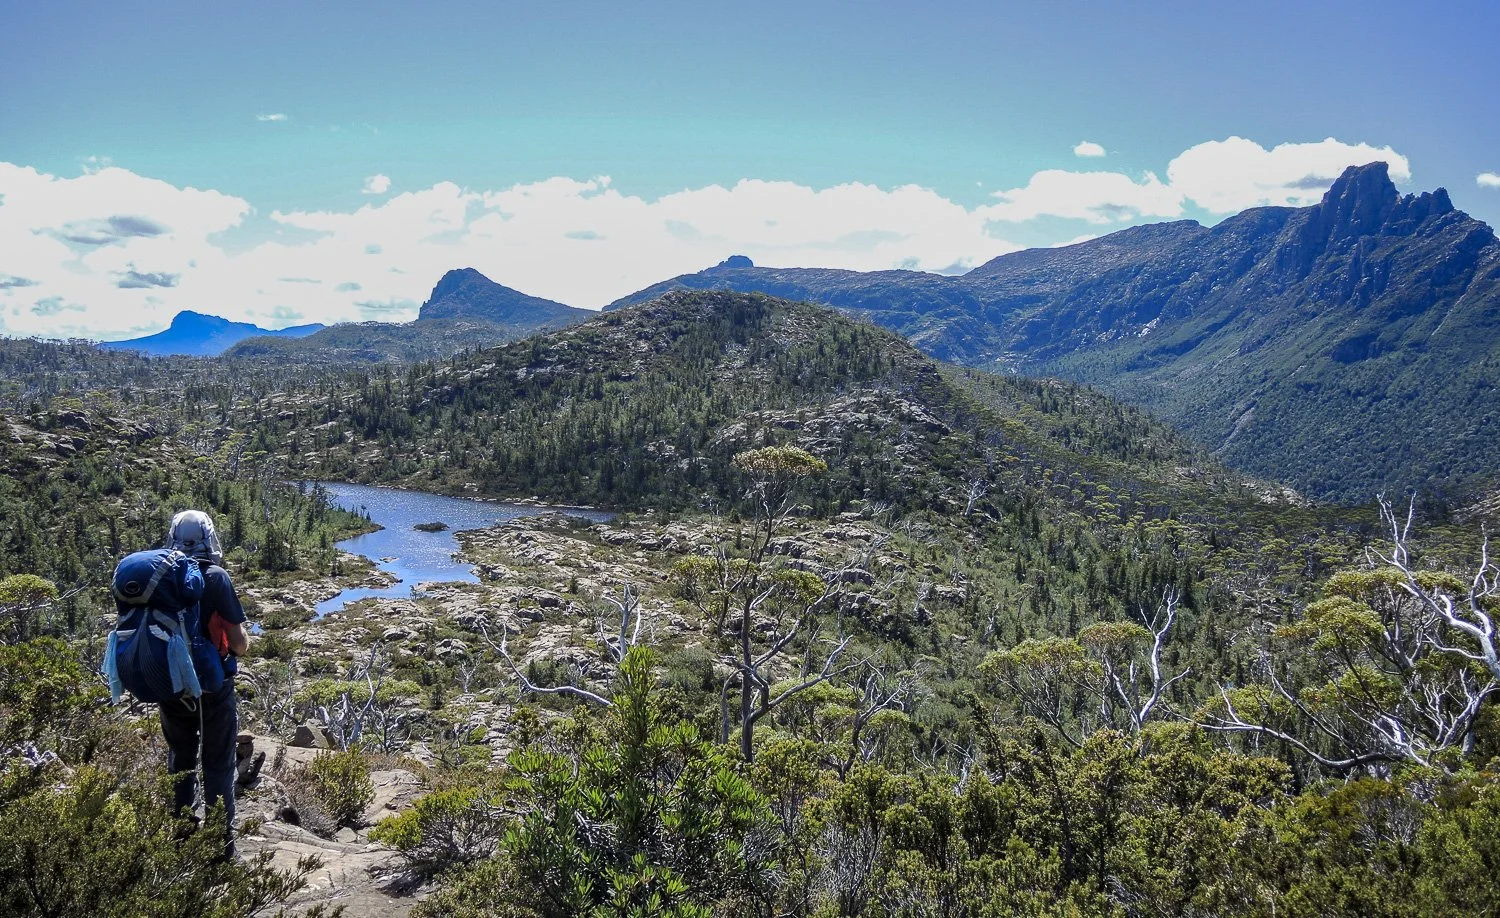
Bouldery terrain near the Labyrinth, Tasmania
In the morning, the sky cleared and we used our breadcrumb trail to retrace our steps. GPSes with larger screens, better resolution and larger scale maps are also excellent for navigating in whiteout, one of the few instances that they surpass paper maps.
The greatest shortcoming of handheld GPSes and mobile phones is their small screen. Compared to computer screens and paper maps that literally allow you to see the big picture – the trail in context of surrounding terrain, alternative routes, exit points – it is very difficult if not impossible to plan a route well on a small screen. Zooming out makes the features too small to see; zooming in makes the viewed area too small to provide meaningful context.
Some mapping Apps have more detailed, better quality and higher resolution maps that function better on small screens; US-based Gaia is popular for its large scale maps and dedicated layers for hikers, but not all states or popular hiking areas in Australia are included. New Zealand has complete coverage as does the US. If we were in these countries, it would be our preferred mapping app.
Mapping resources can be combined. When you carry a paper map, use your GPS or phone app instead of a compass to pinpoint your position on the paper; without that paper map you’ll rely on scrolling to create a wider context.
Reliability and Redundancy
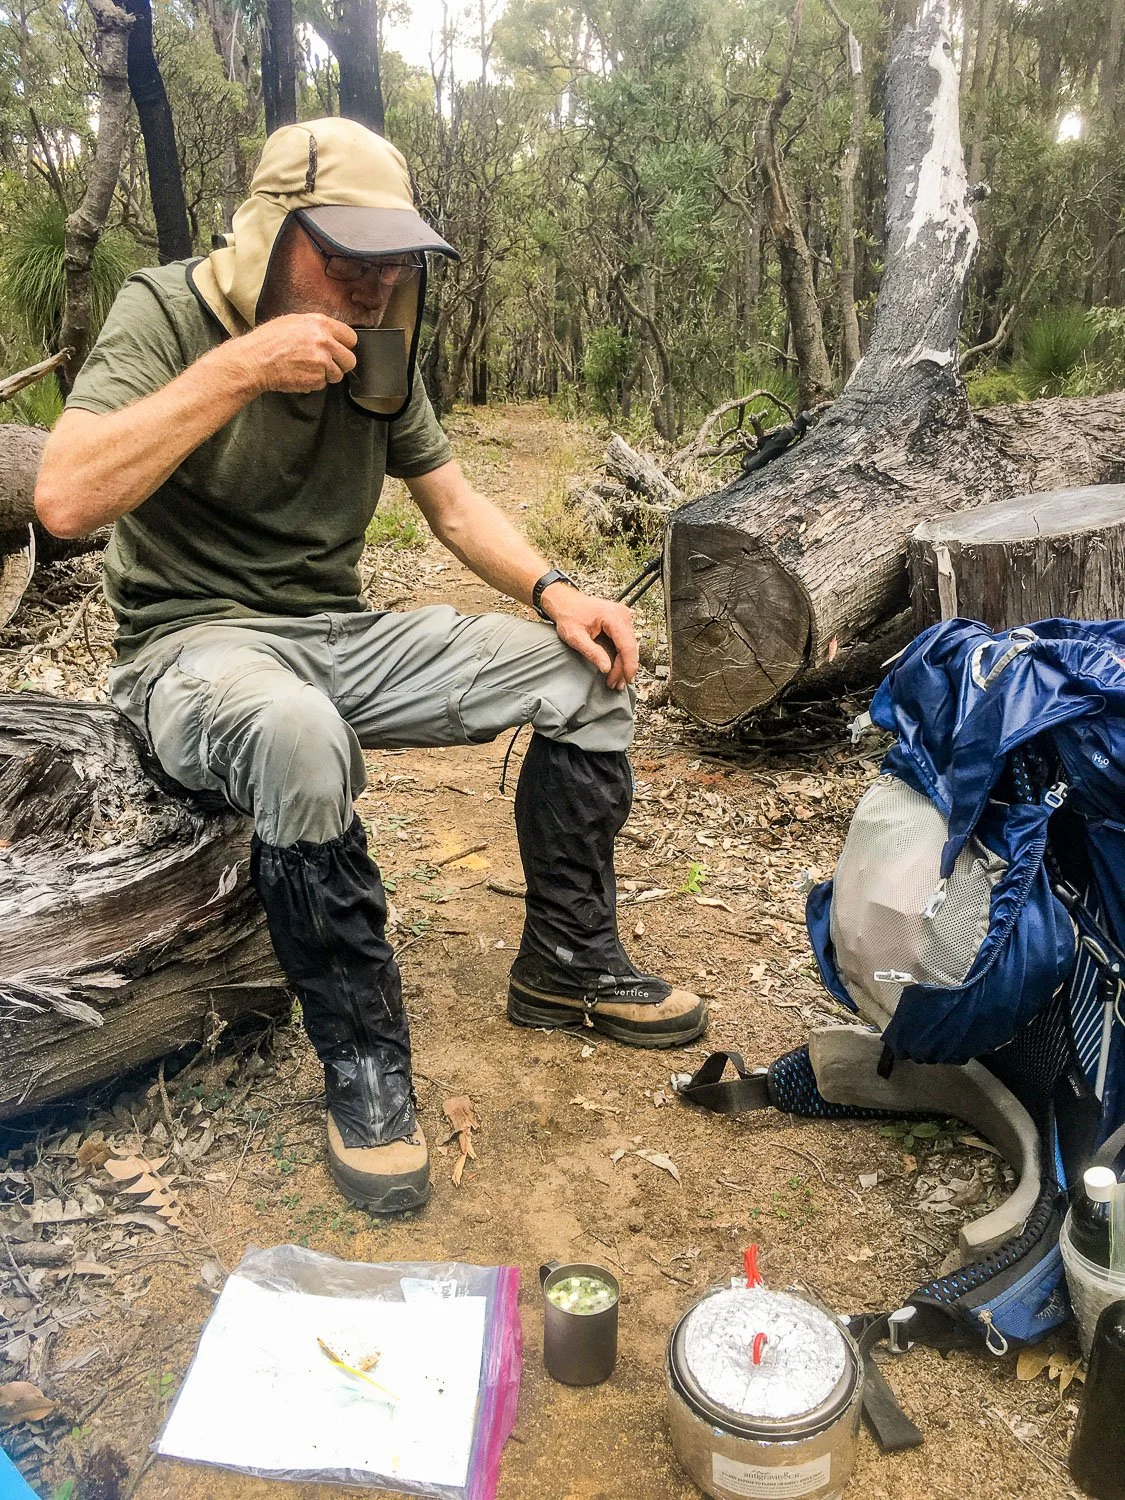
We usually browse our paper map, here in a ziploc, whilst pausing for lunch or breaks.
Although today’s electronic hiking-specific devices are relatively robust, they are still prone to failure and user error. On one trip, we left a GPS switched on and sampling too frequently, and flattened the battery in an inordinately short time. And, as we’ve seen, mobile phones are prone to many different kinds of failure. Therefore, redundancy is essential when using electronic devices on longer hikes anywhere other than on busy, non-remote trails.
Redundancy means backup: a backup for navigation, and for communication if you only have a phone. Experienced hikers also apply it to essential equipment, for example matches stored in different locations in their pack, or a fire steel.
And remember, no emergency device is of use if the only person carrying one is unconscious at the bottom of a cliff!
The longer and/or remote the hike, the more important redundancy becomes. Redundancy solutions for electronics include:
Paper maps – especially plasticized ones – and compass are the best backups to electronic ones; they are light and reliable. Ironically, we often end up using paper maps as primary with electronic for backup, but we are old school. Use your brain as backup, too, by researching the route ahead of time and before setting out each day.
When not hiking solo, ensure every member of the party downloads the route, important waypoints and/or maps into their phone and/or GPS.
Where the trail is available on different mapping apps, eg FarOut, Mapy, Wikilocs, Avenza and especially Alltrails, download or create the route onto both apps.
If hiking with a partner, consider one carrying a PLB, and the other an Inreach or equivalent (Geoff has the PLB, I have the Inreach).
Carry spare cabling and a power bank even when you don’t expect to exhaust your battery or damage your cable: on every well-populated longer hike we’ve done, we’ve encountered hikers with broken cables and flat phone batteries.
Photograph map billboards at trailheads. Take photos of your paper map: not all of it, but the most important parts of the route using your phone or, even better, your digital camera (redundancy). If using a guidebook or trail notes to plan your hike, photograph relevant pages if not carrying the book.
Redundancies for mobile phones:
phone+ paper map + compass +PLB
phone + Inreach
phone +GPS + PLB
Enjoy Your Electronics!
Today’s electronic satellite messengers, GPses and PLBs are outstanding tools that help you navigate and communicate when hiking, but they remain just that: tools. The skill of you, the user, determines how effective, safe and reliable that tool is on any given hike. No tool replaces or compensates for a lack of skill so, as you begin exploring more remote and longer hikes, ensure your navigation skills improve alongside your fitness and understanding of equipment. Take advantage of hiking clubs and websites for free training; watch videos, try rogaining, and learn to plan your own hikes rather than following someone else’s line!
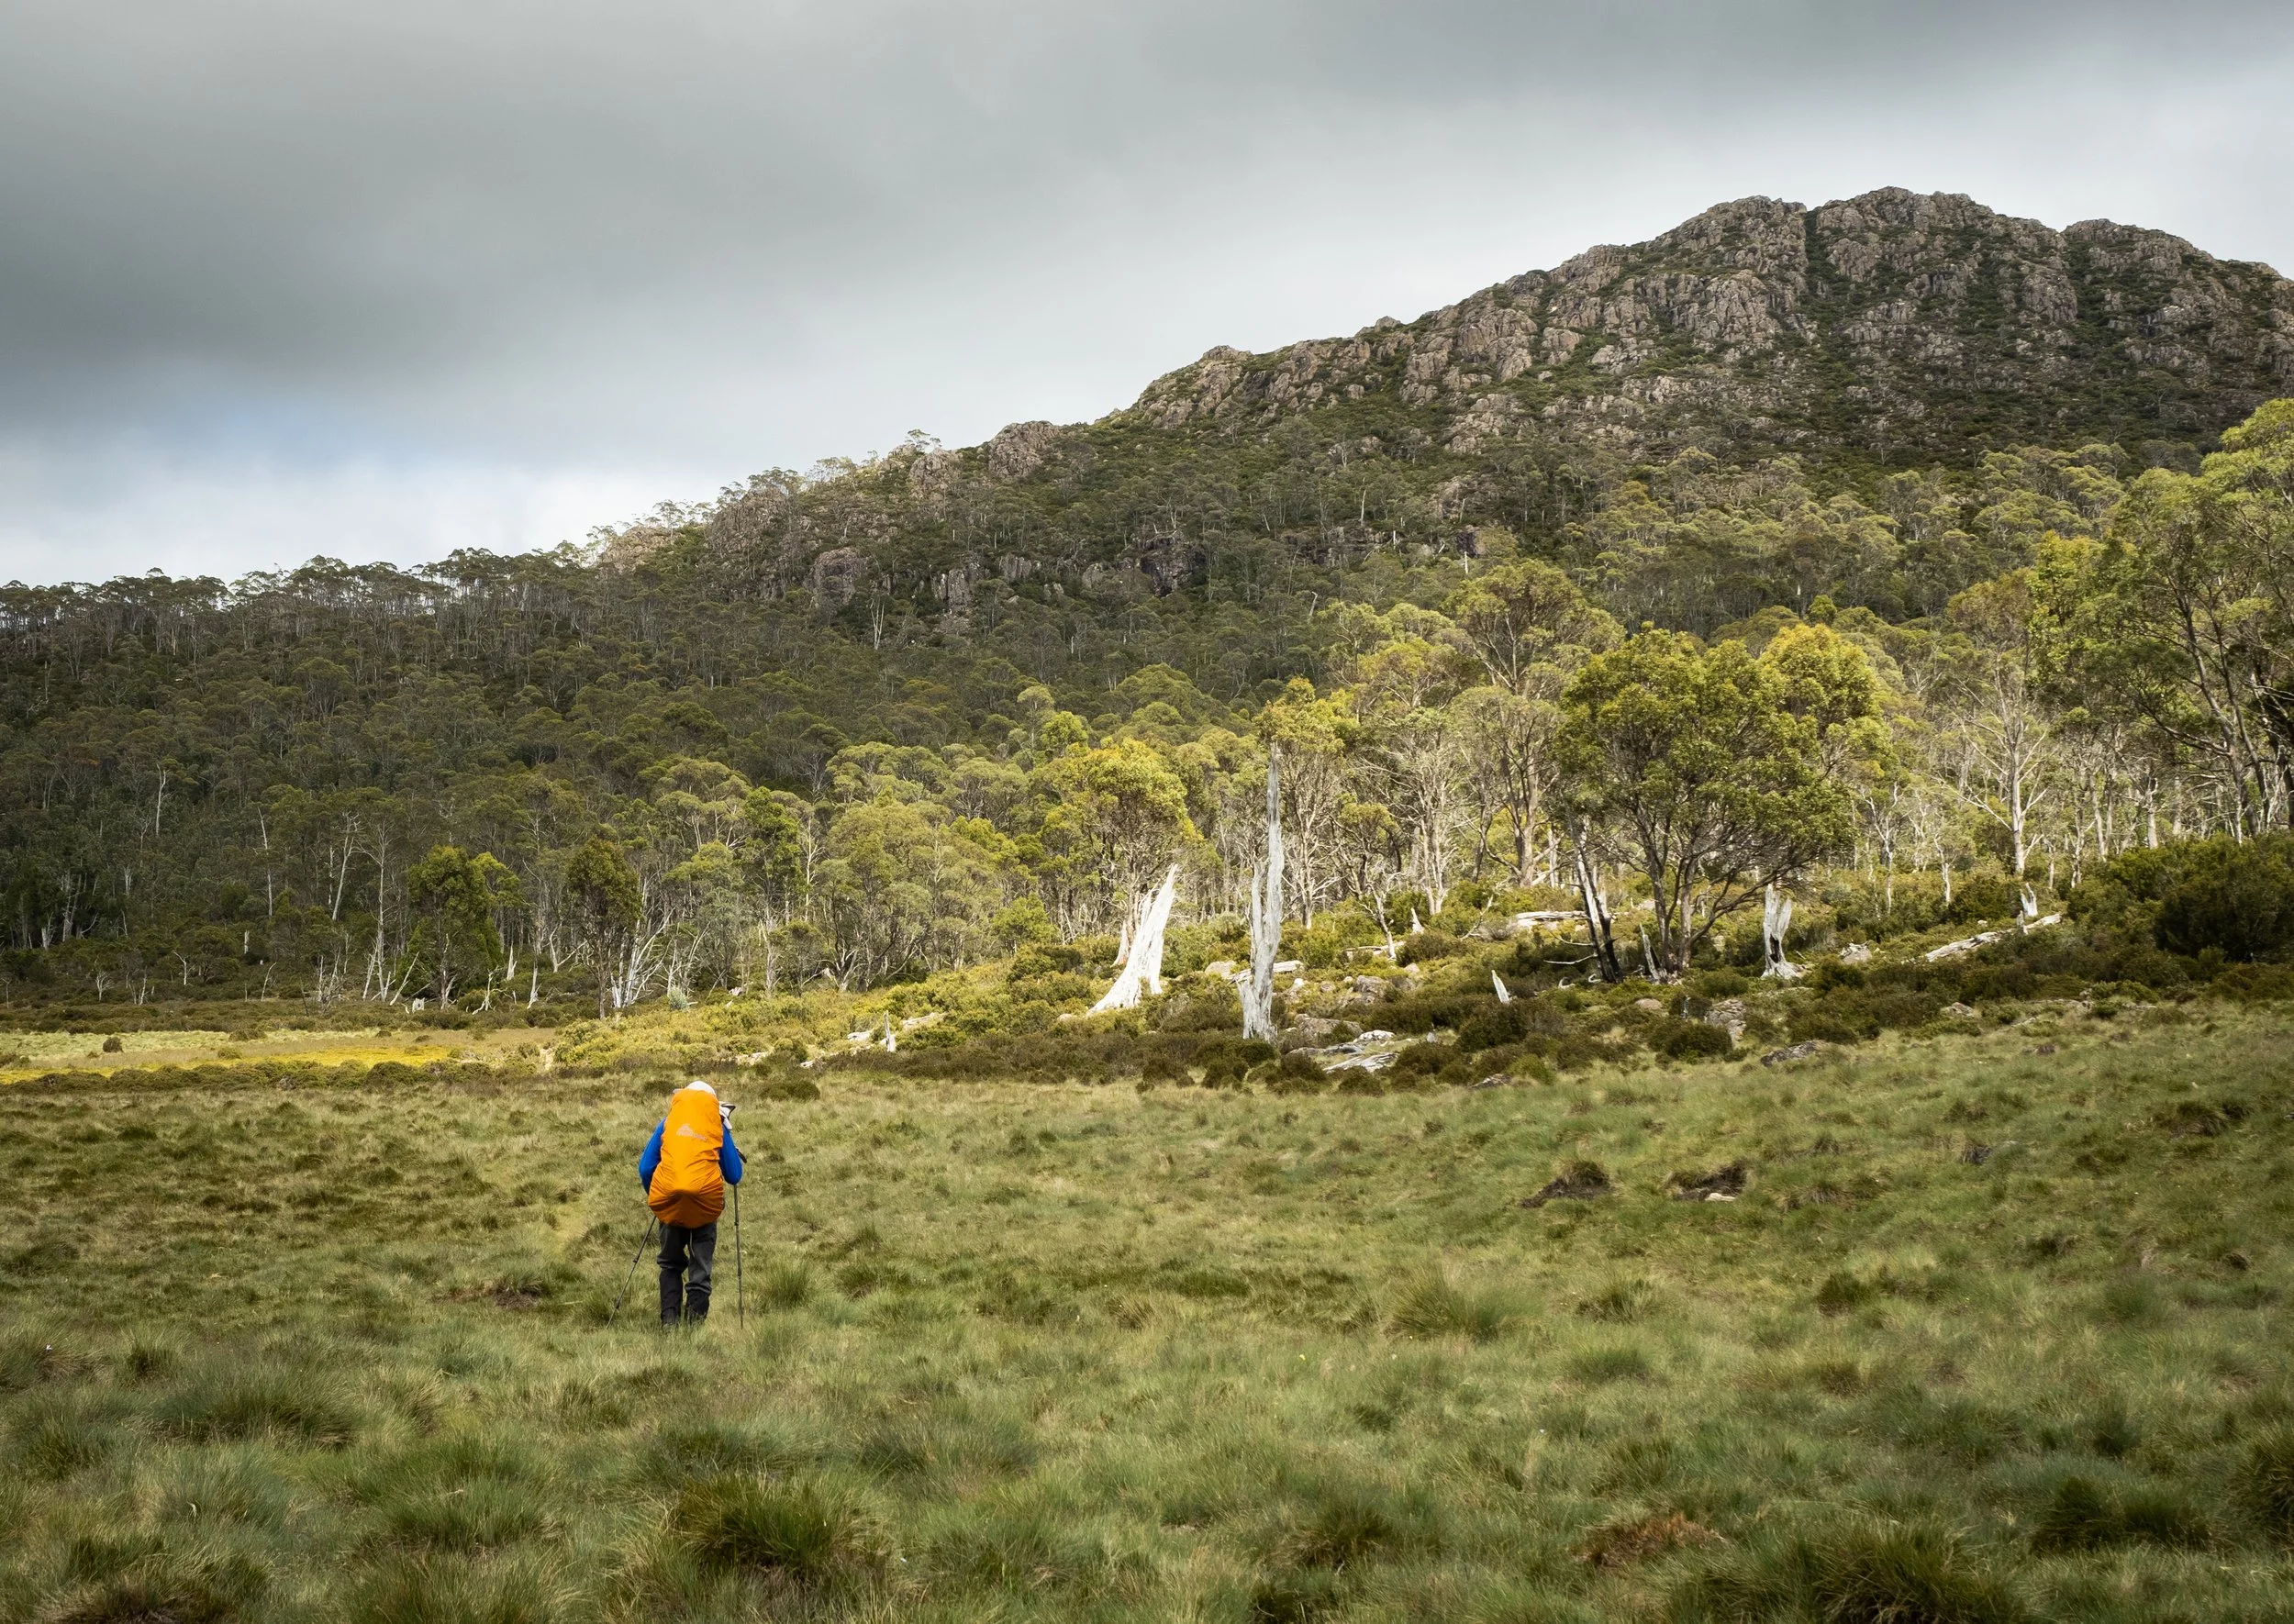
Successfully navigating a trackless route in the Walls of Jerusalem NP using paper map, handrails and electronic devices.